Lesson 5a: Creating a Test - CourseSites by Blackboard
advertisement
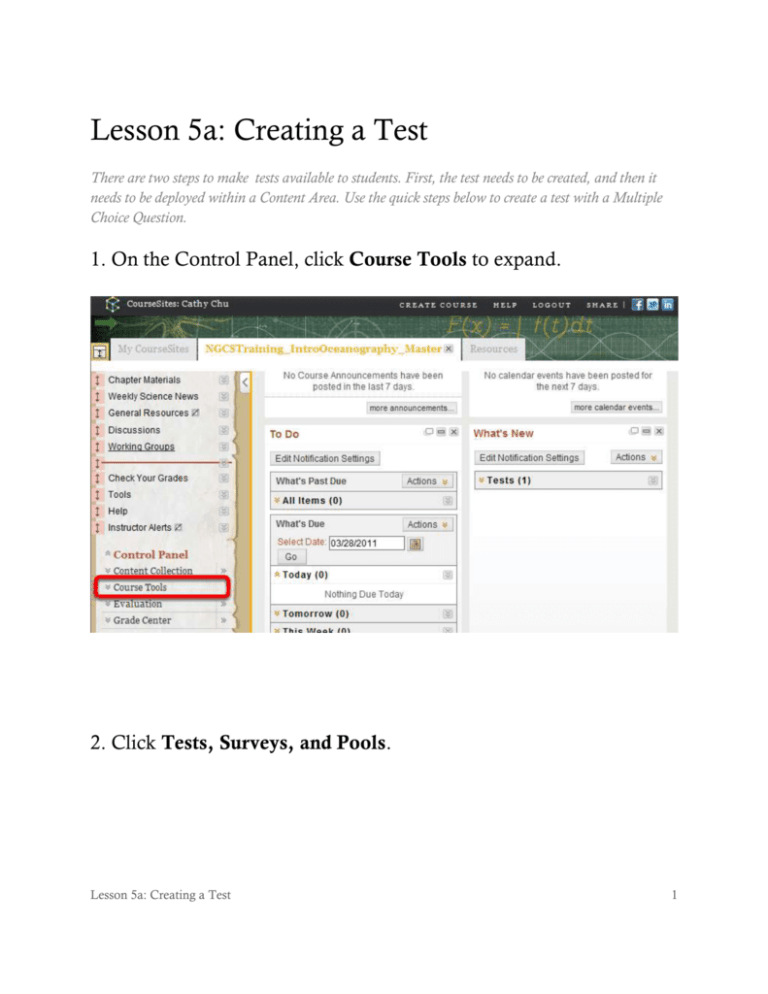
Lesson 5a: Creating a Test There are two steps to make tests available to students. First, the test needs to be created, and then it needs to be deployed within a Content Area. Use the quick steps below to create a test with a Multiple Choice Question. 1. On the Control Panel, click Course Tools to expand. 2. Click Tests, Surveys, and Pools. Lesson 5a: Creating a Test 1 3. On the Tests, Surveys, and Pools page, click Tests. Lesson 5a: Creating a Test 2 4. On the Tests page, click Build Test. 5. On the Test Information page, enter a Name, Description, and Instructions. Lesson 5a: Creating a Test 3 Note: The Description appears to students prior to beginning the assessment and the Instructions appear after they launch the assessment. 6. Click Submit. Note: The Test Canvas will appear next, where questions can be added. 7. On the Test Canvas page click the Create Question button to expand the menu and select the Multiple Choice option. Lesson 5a: Creating a Test 4 Note: Any desired question type can be added at this time or after your first question is created. Please visit http://ondemand.blackboard.com/assess.htm#TestsSurveysandPools to learn how to create other question types. 8. Enter the Question Title and Question Text. Lesson 5a: Creating a Test 5 9. Optionally, select an Answer Numbering display type, an Answer Orientation, and/or to Show Answers in Random Order. Note: While visible, Multiple Choice answers do not allow for Partial Credit. This is an option available for other question types such as Multiple Answer and Matching. 10. By default, you will have four (4) answer options. If you need more, use the Number of Answers drop down to select more. If you need less than four (4), click the Remove button next to the Answer box(es) you wish to remove. Lesson 5a: Creating a Test 6 11. Enter each of answer separately into the corresponding answer text boxes. Lesson 5a: Creating a Test 7 12. Indicate the correct answer by clicking the circular radio button next to the left of the correct answer. 13. Optionally, enter Correct Response Feedback and/or Incorrect Response Feedback. Lesson 5a: Creating a Test 8 14. Click Submit. The Test Canvas reappears displaying the newly added question. 15. To assign a point value other than the default of 10 points, click the check box to the left of the question(s) you’d like to update, enter a point value in the Points field, and then click Update. Lesson 5a: Creating a Test 9 16. Additional test questions, of any type, can be created at this point by clicking on the Create Question drop down once again. 17. Click OK when you are through adding questions. The test is added to a list of tests; however it’s not yet deployed to students. Lesson 5a: Creating a Test 10 Note: Review Step 4, Lesson 5b to learn how to deploy the newly created test. Lesson 5a: Creating a Test 11
