STEP 1
advertisement
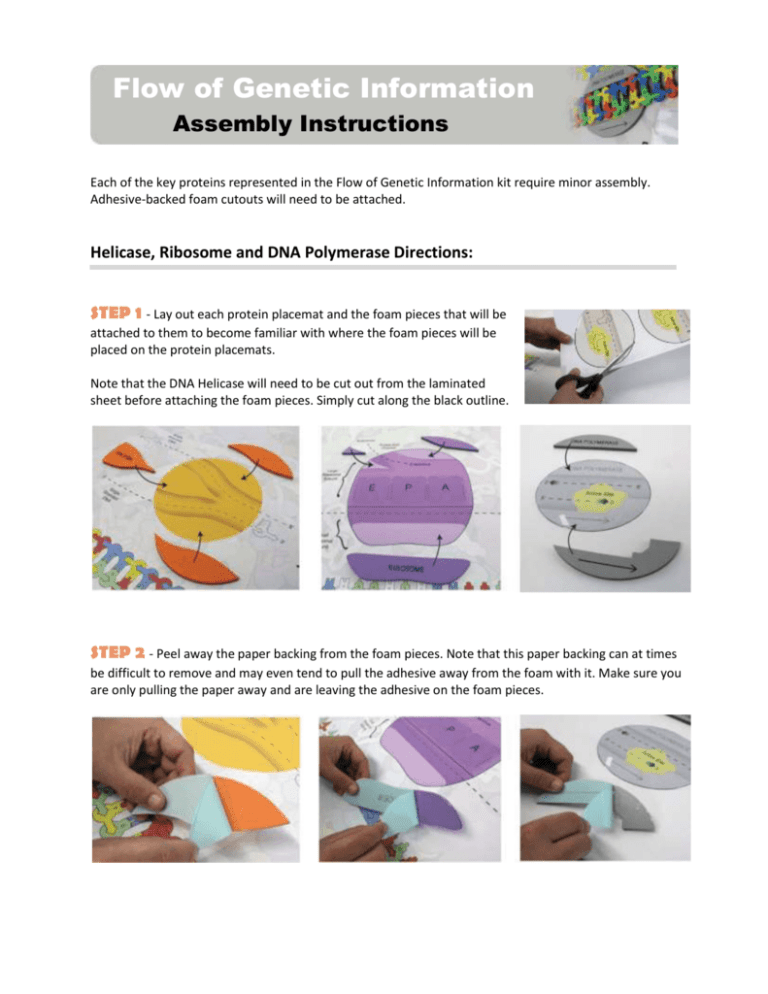
Flow of Genetic Information Assembly Instructions Each of the key proteins represented in the Flow of Genetic Information kit require minor assembly. Adhesive-backed foam cutouts will need to be attached. Helicase, Ribosome and DNA Polymerase Directions: STEP 1 - Lay out each protein placemat and the foam pieces that will be attached to them to become familiar with where the foam pieces will be placed on the protein placemats. Note that the DNA Helicase will need to be cut out from the laminated sheet before attaching the foam pieces. Simply cut along the black outline. STEP 2 - Peel away the paper backing from the foam pieces. Note that this paper backing can at times be difficult to remove and may even tend to pull the adhesive away from the foam with it. Make sure you are only pulling the paper away and are leaving the adhesive on the foam pieces. STEP 3 - Stick the foam pieces to the protein placemats. Note that the Helicase protein will have an upside-down "HELICASE" label on the foam piece. This was due to a production error but will not affect the use of the kit in any way. STEP 4 - The fully assembled protein placemats should look like the images below. RNA Polymerase Directions: The RNA Polymerase assembly is similar to the previously described protein placemats, but requires additional steps to construct the exit channel bridge. STEP 1 - Lay out the protein placemat and the three foam pieces that will be attached initially. There should be two additional foam pieces that will be used later in the assembly instructions. STEP 2 - Peel away the paper backing from the foam pieces. Note that this paper backing can at times be difficult to remove and may even tend to pull the adhesive away from the foam with it. Make sure you are only pulling the paper away and are leaving the adhesive on the foam pieces. STEP 3 - Stick the foam pieces to the protein placemats. When these three foam pieces have been attached, the protein placemat should look like the image below and to the right. STEP 4 - Cut out the exit channel bridge from the laminated sheet. Put the tabs on both ends of the exit channel bridge into the precut slits on the RNA Polymerase placemat. Note that the A and B tabs should match the A and B labels on the placemat. STEP 5 - Finally attach the remaining two foam pieces that attach to the exit channel bridge as well as the protein placemat. Placemat Insert Directions: Each of the three large protein placemats (Helicase, RNA Polymerase and Ribosome) also come with a single page instruction sheet that will be kept in an adhesive backed plastic page holder. To add this plastic page holder to the three placemats, peel away the orange adhesive covers on each plastic page holder, place the page holder over the white square on the placemat and insert the single page instruction sheet.
