week11-student-handout-google
advertisement
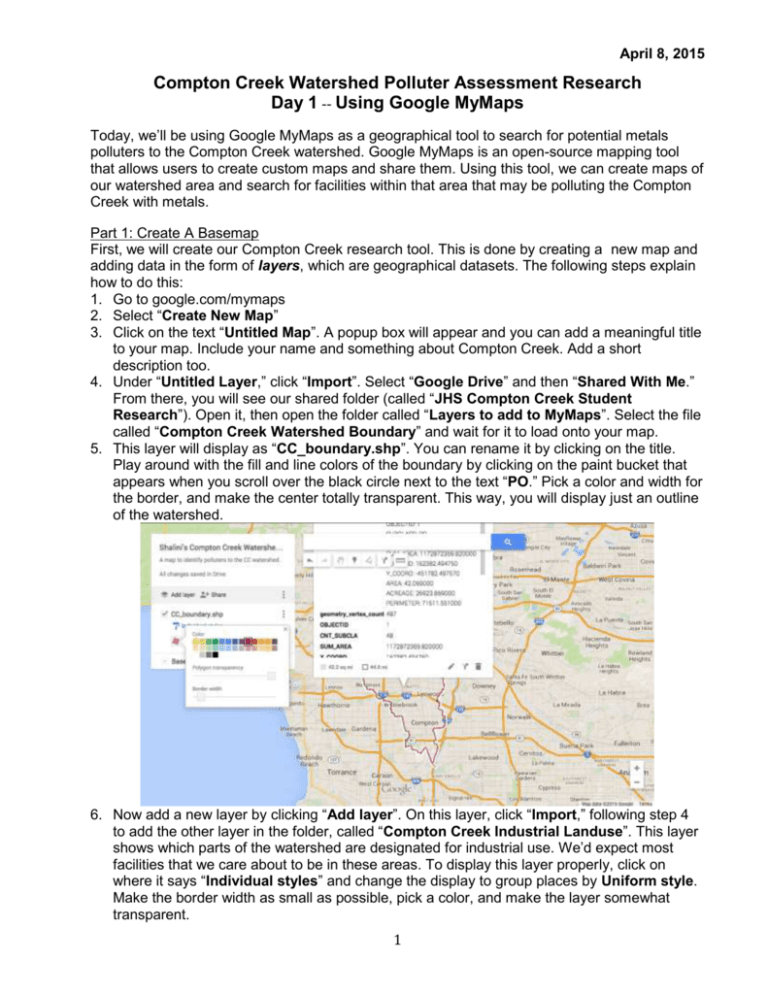
April 8, 2015 Compton Creek Watershed Polluter Assessment Research Day 1 -- Using Google MyMaps Today, we’ll be using Google MyMaps as a geographical tool to search for potential metals polluters to the Compton Creek watershed. Google MyMaps is an open-source mapping tool that allows users to create custom maps and share them. Using this tool, we can create maps of our watershed area and search for facilities within that area that may be polluting the Compton Creek with metals. Part 1: Create A Basemap First, we will create our Compton Creek research tool. This is done by creating a new map and adding data in the form of layers, which are geographical datasets. The following steps explain how to do this: 1. Go to google.com/mymaps 2. Select “Create New Map” 3. Click on the text “Untitled Map”. A popup box will appear and you can add a meaningful title to your map. Include your name and something about Compton Creek. Add a short description too. 4. Under “Untitled Layer,” click “Import”. Select “Google Drive” and then “Shared With Me.” From there, you will see our shared folder (called “JHS Compton Creek Student Research”). Open it, then open the folder called “Layers to add to MyMaps”. Select the file called “Compton Creek Watershed Boundary” and wait for it to load onto your map. 5. This layer will display as “CC_boundary.shp”. You can rename it by clicking on the title. Play around with the fill and line colors of the boundary by clicking on the paint bucket that appears when you scroll over the black circle next to the text “PO.” Pick a color and width for the border, and make the center totally transparent. This way, you will display just an outline of the watershed. 6. Now add a new layer by clicking “Add layer”. On this layer, click “Import,” following step 4 to add the other layer in the folder, called “Compton Creek Industrial Landuse”. This layer shows which parts of the watershed are designated for industrial use. We’d expect most facilities that we care about to be in these areas. To display this layer properly, click on where it says “Individual styles” and change the display to group places by Uniform style. Make the border width as small as possible, pick a color, and make the layer somewhat transparent. 1 April 8, 2015 7. Now your basemap is complete! Your map should look something like this (colors should vary) Part 2: Facility Search Now that you have your layers all set, you can use this research tool to search for facilities that might fall under the IGP and might create metals pollution. First, lets create a new layer to add these facilities to once we find them. Click “Add Layer” and name this new layer “Metals Facilities.” When you want to add facilities to this layer, click on it in the white box before adding points (more later). There are two ways we can search for facilities. By keyword and visually. Today we will search by keyword. Next week we will discuss searching visually. BRAINSTORM FOR KEYWORDS: We’ll do this as a group. Write down the word we come up with here: 2 April 8, 2015 There are certain areas we want to find industrial facilities in. There are 8 different areas we will be assigning you to (see map below). These areas are industrial areas and are probable places for industrial facilities. You will be assigned an area and will do a search to find facilities within and around that area. Write down your area number here: _________ 1 2 3 4 5 6 7 8 Search by Keyword: As a group, you brainstormed various search keywords. In this part of the facility search, you’ll use Google’s capabilities to find facilities that have these keywords in their names. Follow these instructions to do so: 1. Display the watershed boundary layer by checking its box 2. Zoom into your search area. Zoom in until you can see individual buildings. The distance from the left side of your screen to the right side of your screen should be 0.5 miles or less. You can use the ruler tool under the searchbar to calculate length. 3. Using the search bar, enter keywords (relevant to metals, that we brainstormed as a group) 3 April 8, 2015 4. Click on the “Metals Facility” layer in the white box 5. Click on the markers that fall within the watershed, then click “Add to Map” 6. Facilities will be added to the selected layer. Data sheets listing facilities within each layer can be opened by clicking on the three dots beside the layer name, and then clicking “Open Data Table” 4
