Teacher
advertisement

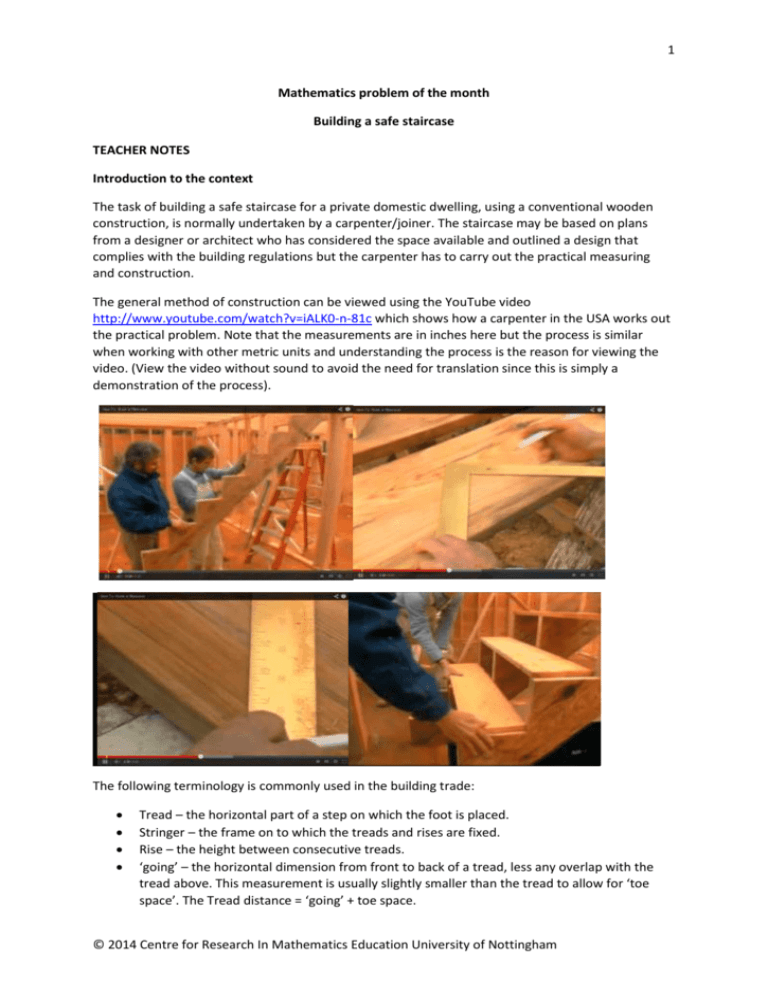
1 Mathematics problem of the month Building a safe staircase TEACHER NOTES Introduction to the context The task of building a safe staircase for a private domestic dwelling, using a conventional wooden construction, is normally undertaken by a carpenter/joiner. The staircase may be based on plans from a designer or architect who has considered the space available and outlined a design that complies with the building regulations but the carpenter has to carry out the practical measuring and construction. The general method of construction can be viewed using the YouTube video http://www.youtube.com/watch?v=iALK0-n-81c which shows how a carpenter in the USA works out the practical problem. Note that the measurements are in inches here but the process is similar when working with other metric units and understanding the process is the reason for viewing the video. (View the video without sound to avoid the need for translation since this is simply a demonstration of the process). The following terminology is commonly used in the building trade: Tread – the horizontal part of a step on which the foot is placed. Stringer – the frame on to which the treads and rises are fixed. Rise – the height between consecutive treads. ‘going’ – the horizontal dimension from front to back of a tread, less any overlap with the tread above. This measurement is usually slightly smaller than the tread to allow for ‘toe space’. The Tread distance = ‘going’ + toe space. © 2014 Centre for Research In Mathematics Education University of Nottingham 2 Some different arrangements of ‘going’ and rise, showing the allowance for ‘toe space’ are indicated in the diagrams below. Note that diagram A is an open staircase whilst B and C are more conventional solid stair constructions in which the tread overhangs the rise or the rise is cut back to allow for this extra space. The consideration of ‘toe space’ is not actually necessary for the problems to be tackled by students but explains the terminology. Source: http://www.builderbill-diy-help.com/stair-design.html A carpenter in the YouTube video http://www.youtube.com/watch?v=531UPCjZTm0 explains how he uses a ‘rule of thumb’ in his calculations. In this video the carpenter uses imperial measurements and the ‘rule of thumb’ that each rise should be about 7 inches and every tread about 10 inches. The ‘rule of thumb’ is a convenient guide to help him arrive at measurements that comply with building regulations. This video is not appropriate to show to students due to the detailed calculation in imperial measurements but may be useful background for you. Note the carpenter’s need for rounding figures, using estimation, justifying choices and how, in this particular case, he calculates using fractions but carries out the practical task of measuring using decimals. This seems to complicate the problem. Problem 1 A builder recommends a ‘rule of thumb’ for building a staircase: keep the dimensions for the ‘rise’ between 170mm and 185mm if possible and around 275mm for the ‘going’. Using this rule, design a simple staircase suitable for an exact distance of 2850mm from the ground floor to the first floor of a house with a horizontal distance available of 5m. How many ‘goings’ and rises would you use? What dimensions of ‘goings’ and rises would you use and why? What assumptions do you make? What other factors might you need to consider in a real staircase design? © 2014 Centre for Research In Mathematics Education University of Nottingham 3 Notes for problem 1: This ‘rule of thumb’ used here would be appropriate to meet the requirements of building regulations in several countries and is used for this problem although countries do have different regulations. Ask students to work in small groups to develop a design and draw a diagram. Students may work with this problem in different ways. The builder might divide the total height by different sizes of each rise, compare the results before rounding the answers and calculating the sizes of rise that would be needed to exactly fit the space (gaps are not allowed). This involves some rounding of decimals and assumptions about the level of accuracy required and what would be the better size of rise to use. Example: 2850 ÷ 170 = 16.76 but 2850 ÷ 185 = 15.4 Choosing 16 steps means a rise of 178.1mm since 2850 ÷ 16 = 178.125 Choosing 17 steps means a rise of 167.6mm since 2850 ÷ 17 = 167.64, or alternatively Choosing 15 steps means a rise of 190mm since 2850 ÷ 15 = 190 or Choosing 18 steps means a rise of 158.3mm since 2850 ÷ 18 = 158.33 Using 16 steps means the rise falls within the preferred range and appears to be the best answer but: Using 16 steps means the ‘going’ is 5000 ÷ 16 = 312.5mm Using 17 steps means the ‘going’ is 5000 ÷ 17 = 294.12mm Using 18 steps means the ‘going’ is 5000 ÷ 18 = 277.78mm If the number of ‘goings’ and rises required is considered to be the same then: Using 17 steps brings the ‘going’ close to the 275mm but takes the rise just outside the accepted range. Using 16 steps places the rise within range but the ‘going’ is farther outside the range. Using 18 steps brings the ‘going’ closer to 275mm but the rise is even farther out of the preferred range. If students decide that there should be one less ‘going’ than the number of rises than ‘going’ then various combinations could be used but none are ideal according to the ‘rule of thumb’ e.g. 17 rises and 16 ‘‘goings’’. Students will need to justify their decisions and may ask why particular measurements are recommended and whether one recommendation is more important than the other. Theoretically the measurements for ‘going’ and rise used in regulations are based on the average foot size and comfortable ‘step up’ distance for an adult, although there is some debate about this. Deviations from these sizes may cause discomfort for some people. There is opportunity for some interesting discussion here about the link to anthropometrics, the reasons for variations in building regulations between countries, what measure of ‘average’ foot size or ‘step up’ distance would be appropriate for these purposes and how it could be determined. A second reason given for regulation is that people become familiar with particular sizes of rise and ‘going’ and there is some evidence that more accidents occur when measurements deviate significantly from the ‘rule of thumb’. This may occur with steps that are too shallow or treads that are too wide as well as stairs that are too steep or treads too narrow. © 2014 Centre for Research In Mathematics Education University of Nottingham 4 (These reasons for regulations could be an alternative starting point or extension to the problem. Students might try to determine these measurements by examining data available on the Internet or by measuring foot size and step up size for a sample of people and calculating a measure of average or by measuring existing staircases to calculate the mean size of rise and ‘going’ in use for a local sample of staircases). Some groups may decide to vary the measurement of ‘going’ or rise for one or more steps in the flight of stairs. If this does not arise then it may be worth asking students why they made the assumption that the steps should all be the same size. The main reason normally given for consistency is safety and building regulations would generally recommend keeping every rise (and every ‘going’) the same size throughout a flight of stairs to avoid accidents. Students may have some comments on this or examples from experience. In answering the question “What other factors might you need to consider in a real staircase design?” students might suggest that designs depend on costs and availability of materials (some materials for the treads only come in certain widths), head clearance required (usually allow 2030mm), the additional hall/landing space needed at base and top of stairs (usually allow at least 900mm), possible space for handrails, types of balustrade, convenient positioning of the staircase within the building, etc. As a whole class, ask groups to describe their staircase designs and explain how they made their decisions. Compare the approaches used by different groups. Problem 2 When designing a staircase for a space where one continuous flight of stairs cannot be fitted you will have to consider how to place landings at the turns or design an alternative arrangement. The minimum landing space recommended is normally a square with sides equal in length to the width of the staircase. Here are some examples of designs with landings: Source: http://www.builderbill-diy-help.com/stair-design.html Design a staircase for a space that measures 2280mm by 1650mm and has a height between floors of 2760mm using the same ‘rule of thumb’ as before. Produce diagrams to show your design. Notes for problem 2: As an alternative, students could measure and consider a real physical space in which it might be desirable to fit stairs or try to design a different arrangement for an existing staircase. Again each group should produce diagrams to show their designs. © 2014 Centre for Research In Mathematics Education University of Nottingham 5 For this problem students will also have to make decisions about the width of the staircase to use. A width of 900mm is typical but they should make their own decisions. This might involve discussions about body size and whether two people need to be able to pass each other on the stairs or not. Alternatively students might decide to measure some actual staircases to determine what is normally acceptable or consult information on the Internet. (If they measure actual staircases then note that these are likely to be different in public buildings to private dwellings). Ask each group to describe their design to the class and explain their design decisions. Problem 3 (extension) An alternative way of working is to use the actual building regulations rather than the ‘rule of thumb’ derived from them. In building regulations in the UK, for example, there are three key controls stated in the guidance. 1. Any rise between 155mm and 220mm can be used with any ‘going’ 245mm to 260mm or any rise between 165mm and 200mm can be used with any ‘going’ between 223mm and 300mm. 2. The maximum pitch of the staircase must be 42o (found using vertical measurement divided by horizontal and inverse tangent). 3. 2R + G must lie between 550mm and 700mm, where R is the dimension of the rise and G of the ‘going’. Source: http://www.stairplan.com/terminology.htm Note that a pitch of 42o can be interpreted as tan 42o = rise/’going’. For the purposes of this problem the origin of the building regulations is not necessarily important – you may wish to adapt the problem for use with your own national building regulations. Start by discussing with students the meaning of the constraints and then ask them to: Work out whether their proposed staircase from the first problem complies with the regulations or not and why. Use the formula and other constraints stated to explore whether there are any other legitimate combinations that would not arise from the ‘rule of thumb’ method and whether it would be appropriate to use these. Students may decide to approach this problem in different ways such as tabulating possible options systematically or using a graphical approach. A graphical approach shows clearly how some of the information is actually superfluous, although architects do apparently use, for example, the rule about pitch as a convenient check on their calculations so this approach might be encouraged or shown later to the group. It also illustrates how the ‘rule of thumb’ fits neatly within the area where the possible measurement combinations lie on the graph. © 2014 Centre for Research In Mathematics Education University of Nottingham 6 Discuss with the class the conclusions they reached about other combinations of measurements and why or why not they might use these. Discuss the relative merits of the ‘rule of thumb’ and the more detailed regulations. © 2014 Centre for Research In Mathematics Education University of Nottingham


