remove member & delete household
advertisement

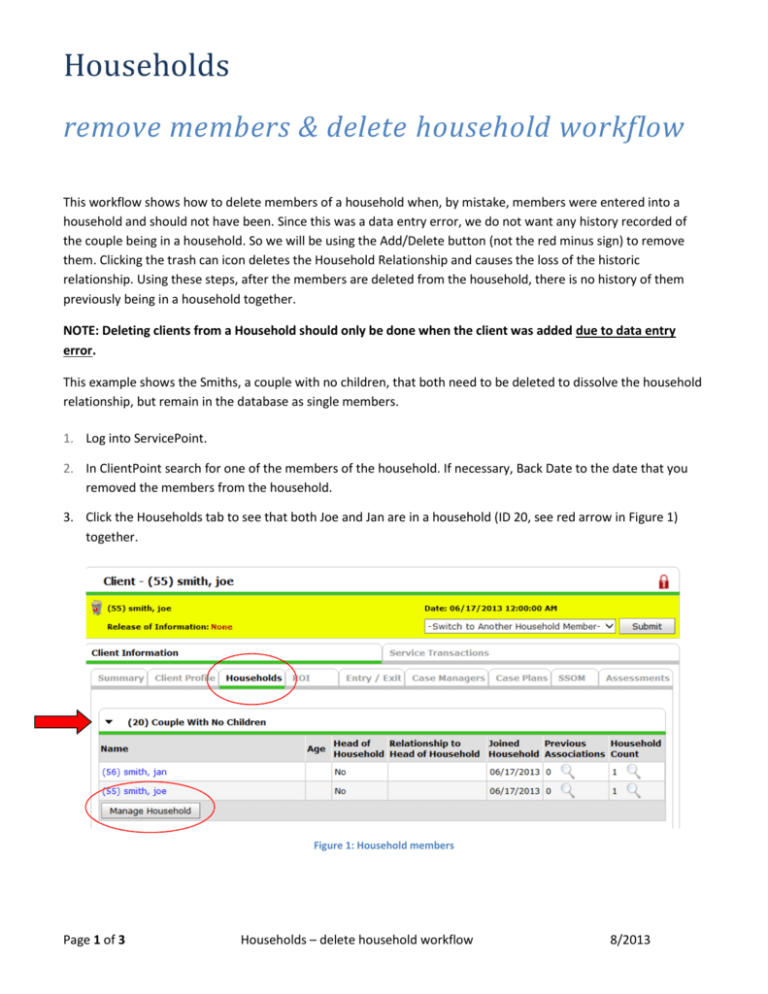
Households remove members & delete household workflow This workflow shows how to delete members of a household when, by mistake, members were entered into a household and should not have been. Since this was a data entry error, we do not want any history recorded of the couple being in a household. So we will be using the Add/Delete button (not the red minus sign) to remove them. Clicking the trash can icon deletes the Household Relationship and causes the loss of the historic relationship. Using these steps, after the members are deleted from the household, there is no history of them previously being in a household together. NOTE: Deleting clients from a Household should only be done when the client was added due to data entry error. This example shows the Smiths, a couple with no children, that both need to be deleted to dissolve the household relationship, but remain in the database as single members. 1. Log into ServicePoint. 2. In ClientPoint search for one of the members of the household. If necessary, Back Date to the date that you removed the members from the household. 3. Click the Households tab to see that both Joe and Jan are in a household (ID 20, see red arrow in Figure 1) together. Figure 1: Household members Page 1 of 3 Households – delete household workflow 8/2013 4. Click the Manage Household button. 5. Click the Add/Delete Household Members button. The Household Information screen displays. Figure 2: Add/Delete members 6. Click the trash can next to names to remove the association with the Household. Figure 3: Use trashcan to delete relationship NOTE: Deleting clients from a Household should only be done when the client was added due to data entry error. If a client did legitimately leave the Household, the 'red minus' icon should be used instead of the trash can to give a historic representation of the client leaving the Household. Clicking the trash can icon to delete a Household Relationship will cause the loss of the historic relationship that client had to the Household. Also note that deleting the client from the Household will delete that client's relationship to the Household and not actually delete the client itself. 7. The following popup displays to make sure you want to delete the association. Click the Delete button, then click the Continue button. Do this for both members. Page 2 of 3 Households – delete household workflow 8/2013 Figure 4: Delete Household Relationship verification popup 8. Click the Save & Exit button to return to the Client Profile. 9. From Joe’s Profile, click the arrow ( ) to the left of Previous Households to see that he is not considered to ever have been a member of any households. This fixes the mistake of having put Joe into a household. Figure 5: Previous household verification Even though Joe is now not a member of a household, he is still in the database as a single client with his original Client ID (#55). 10. If necessary, also make sure to exit Joe from any assessments and Programs he was entered into in error. Page 3 of 3 Households – delete household workflow 8/2013


