Free Body Diagrams PP
advertisement

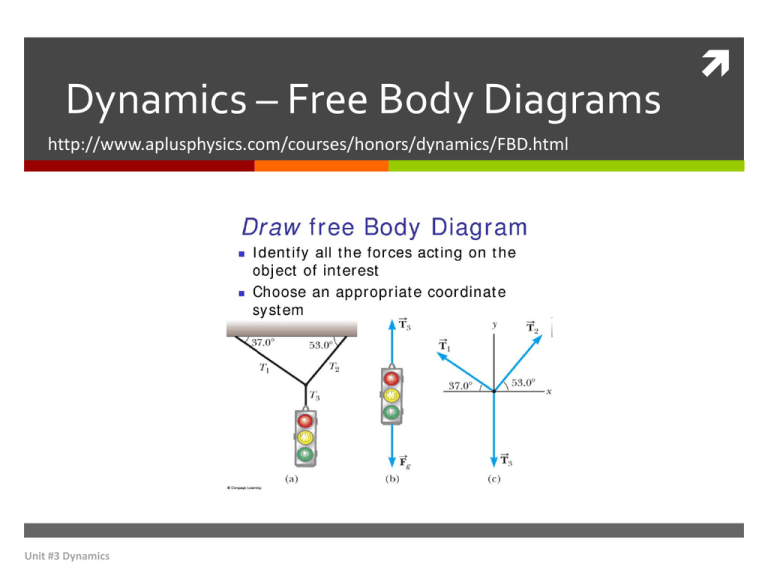
Dynamics – Free Body Diagrams http://www.aplusphysics.com/courses/honors/dynamics/FBD.html Unit #3 Dynamics Objectives and Learning Targets 1. Define a force and distinguish between contact forces and field forces. 2. Draw and label a free body diagram showing all forces acting on an object. 3. Determine the resultant of two or more vectors graphically and algebraically. 4. Draw scaled force diagram using a ruler and protractor. 5. Resolve a vector into perpendicular components: both graphically and algebraically. 6. Use vector diagrams to analyze mechanical systems (equilibrium and nonequilibrium). Unit #3 Dynamics Free Body Diagram • Fortunately, we have a terrific tool for analyzing the forces acting upon objects. This tool is known as a free body diagram. Quite simply, a free body diagram is a representation of a single object, or system, with vector arrows showing all the external forces acting on the object. These diagrams make it very easy to identify exactly what the net force is on an object, and they’re also quite simple to create: Unit #3 Dynamics Free Body Diagram 1. Isolate the object of interest. Draw the object as a point particle representing the same mass. 2. Sketch and label each of the external forces acting on the object. 3. Choose a coordinate system, with the direction of motion as one of the positive coordinate axes. 4. If all forces do not line up with your axes, resolve those forces into components using trigonometry (note that the formulas below only work if the angle is measured from the horizontal). 5. Redraw your free body diagram, replacing forces that don’t overlap the coordinates axes with their components. Unit #3 Dynamics Free Body Diagram Example As an example, picture a glass of soda sitting on the dining room table. You can represent the glass of soda in the diagram as a single dot. Then, represent each of the vector forces acting on the soda by drawing arrows and labeling them. In this case, you can start by recognizing the force of gravity on the soda, known more commonly as the soda’s weight. Although you could label this force as Fgrav, or W, get in the habit right now of writing the force of gravity on an object as mg. You can do this because the force of gravity on an object is equal to the object’s mass times the acceleration due to gravity, g. Unit #3 Dynamics Free Body Diagram Example Of course, since the soda isn’t accelerating, there must be another force acting on the soda to balance out the weight. This force, the force of the table pushing up on the soda, is known as the normal force (FN). In physics, the normal force refers to a force perpendicular to a surface (normal in this case meaning perpendicular). The force of gravity on the soda must exactly match the normal force on the soda, although they are in opposite directions, therefore there is no net force on the soda. The free body diagram for this situation could be drawn as shown at right. Unit #3 Dynamics Example Problem #1 Question: Which diagram represents a box in equilibrium? Answer: (2) all forces are balanced for a net force of zero. Unit #3 Dynamics Example Problem #2 Question: If the sum of all the forces acting on a moving object is zero, the object will 1. slow down and stop 2. change the direction of its motion 3. accelerate uniformly 4. continue moving with constant velocity Answer: (4) continue moving with constant velocity in accordance with Newton’s 1st Law of Motion. Unit #3 Dynamics Types of Force Gravity = FG, W, or mg – always straight down Normal = FN – perpendicular surface force Friction = Ff – surface force opposite velocity of object Air Resistance = FD – opposes velocity Spring = Fsp = can be push or pull Applied = FA – general push or pull on object Tension = FT = pull from a rope, cord or wire Buoyant = Fbuoy – displayed fluid (liquid or gas) force Magnetic = FB - from moving charged objects Electric = FE - from moving charged objects Unit #3 Dynamics


