Needlefelting
advertisement
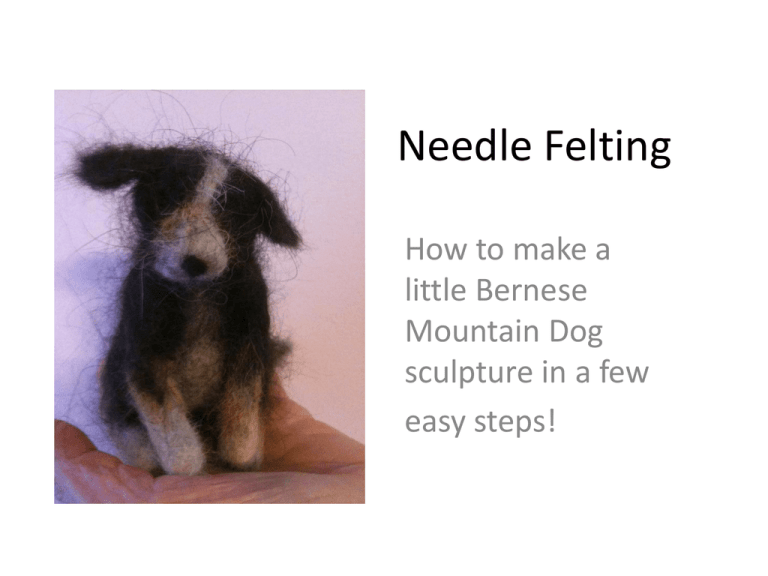
Needle Felting How to make a little Bernese Mountain Dog sculpture in a few easy steps! The History of Needle Felting Needle felting is a centuries-old craft, developed by ancient peoples to create fabric using animal fur for their dwellings clothing and footwear. Felted fabrics are created by washing wool or fur and agitating it, enabling its fibers to bond. A Yurt Ancient and present day yurts are made of felted fleece and fur. Felted fabrics are created by washing wool or fur and agitating it, enabling its fibers to bond. Needle felting, made popular in the decorative industry in the late 1800’s, uses a special barbed needle to enmesh fibers, allowing the needle felter to sculpt, interestingly, by adding to, rather than taking away mass. What is needed to needle felt Proportionate amounts of Berner fur or wool roving in colors: • black • white • and rust. Fur should come from a clean dog but should not be washed before using. Felting punch tool Punch tool has multiple needles and is used when making larger pieces Clover Needle Felting Tool Article 8900 Felting Needles Clover Fine weight felting needles - Article 8905 and Heavy weight felting needles – Article 8906 Needles have very sharp barbs that are used to enmesh fibers. A styrofoam palette and/or a foam mat to absorb the punching Baling wire (mild steel) and wire cutter for standing Berner armatures Rocaille beads or glass eyes and beads to make a collar if desired Beads can be wired or sewn into eye sockets. 4 mm glass eyes Available from GlassEyesOnline.com http://50.22.131.190/~jncshop1/index.php?main_ page=product_info&cPath=21_24_26&products_id =112&zenid=c03fb830fd5add4884518f9a3a26cd8a Sharp scissors for trimming ears and feathering edges. And a model or a photo! Sculpting the Berner • Before starting to work with the fur it is necessary to stretch it and to pull out any clumps and knots. • Begin the BMD sculpture by rolling a handful of fur in between your palms. • The agitation of the fur will cause the fur to stick together, or start to felt itself. • Keep rolling until the ball starts to stay together, then, using the felting needle begin to stick the ball on all sides. (The five needle felting punch can be used at this time) • The ball will begin to condense. • As the ball becomes solid begin to shape into the Berner sitting body. • Use the same method to roll a smaller ball that will become the head of the sitting Berner • For a standing BMD the rolled body is made in similarly, but shaped with a nice tuck-up. • Roll two tubes for the front legs and felt these tightly so the BMD will have some strength • For a standing Berner it is necessary to roll the fur over wire and felt tightly around leaving enough wire at both ends for foot platform and penetrating wire into body core. Create four legs in this fashion. • For sitting Berner roll and sculpt rear legs in a sitting position creating some bulk in the upper legs where they will be attached to body. • Leave some un-felted fur at edges of all body parts so that pieces can be attached. Assembling the BMD • Some sculptors find it simpler to add colors to the body before assembling its parts. This is a matter of choice. • In this BMD, white fur was added to the head before attaching it to the body. White fur was added to the chest after the head was attached. • When feathering is desired (on a leg or tail) it is easier to add colors and feathers before assembling. • Attach smaller parts of the body to the larger core. • Embed wires of any wired parts into body. They will stay in place. • Continue to attach body parts by felting the loose ends of fur into the body. This should be done tightly to create a firm and condensed area at attachment point. • More fur can always be added to round out attachment point. Detailing the Berner • Because felting needles are so fine, it is possible to create wonderful detailing. • Felters can make each Berner’s individual facial and coat characteristics right down to freckles, Swiss kisses and whimsical eyebrows! • Add white fur to face and then, working carefully, sculpt the nose by adding black fur. (Some crafters prefer to purchase plastic noses.) • Add rust in appropriate places on face. • To create a lip line, roll black fur into a very thin cord and felt into place. • Add eyebrows of rust fur and then create eyes with either brown rocaille beads or purchased glass eyes. • Eyes and beads may be wired, sewn or glued in. • Ears are created by felting very thin pieces and trimming them into triangular shaped ear flaps. • Create two and attach them to the head. • Complete Berner Sculpture by adding any feathering desired to body, hindquarters and legs. About the felter Lori Friedli, MSLIS, is relatively new to the world of Berners. She is an information professional by trade and an animal lover, reader and crafts person by passion! She has four resident pets, two Bernese Mountain dogs and two cats (all who have modeled and loaned their fur for felting). Lori and her husband André have created a doggie social network, Bernese Mountain Dogs of Greater New York (BMDGNY), and devote a lot of their time to Berner exercise, education and just plain fun! Website link: www.bmdgny.org. In the Berner University package you will find a disc with a Microsoft Word version of this presentation. The complete PowerPoint presentation, as you have seen in this class can be found at the BMDGNY site: http://bmdgny.org/docs/Needlefelting.pptx Kiss your Berners every day!
