Incident Management
advertisement
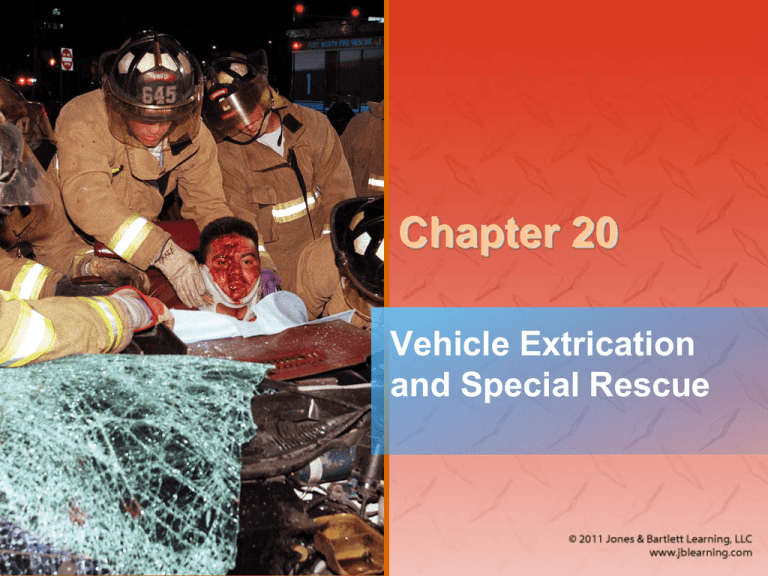
Chapter 20 Vehicle Extrication and Special Rescue National EMS Education Standard Competencies EMS Operations Knowledge of operational roles and responsibilities to ensure patient, public, and personnel safety. Vehicle Extrication • Safe vehicle extrication • Use of simple hand tools Introduction • Special rescue situations include: – Water rescue – Diving problems – Ice rescue – Confined space rescue – Farm emergencies – Bus collisions • You must maintain your personal safety. Extrication (1 of 3) • Rescuers should wear protective equipment similar to a fire fighter’s outfit: – Coat – Pants – Boots – Helmet with face shield – Gloves Extrication (2 of 3) • Basic guidelines – Know the limitations of your training, equipment, and skill. – Identify any hazards. – Control those hazards for which you are trained and equipped. – Gain access to the patients. – Provide patient care and stabilization. – Move patients only if necessary. Extrication (3 of 3) • As an EMR, you have two primary extrication goals: – To obtain safe access to the patients – To ensure patient stabilization Step One: Overview of the Scene (1 of 3) • As soon as the dispatcher tells you of the incident, begin to anticipate and plan for what you are likely to find on arrival. • The dispatch information should include: – Which types of vehicles are involved – Whether there are injured or trapped people, burning vehicles, or hazardous materials present Step One: Overview of the Scene (2 of 3) • As you approach the scene and before you exit your vehicle, get an overview of the entire incident. – Rapidly determine the extent of the accident. – Estimate the number of patients. – Locate any hazards present. – Call for any assistance needed. Step One: Overview of the Scene (3 of 3) Courtesy of District Chief Chris E. Mickal/New Orleans Fire Department, Photo Unit Step Two: Stabilization of the Scene and Any Hazards (1 of 12) • Infectious diseases – Many patients involved in motor vehicle crashes will have soft-tissue injuries and active bleeding. – If sharp glass or metal is present, wear heavyduty leather gloves over latex gloves. – If there is the danger of splattering blood, consider using face protection. Step Two: Stabilization of the Scene and Any Hazards (2 of 12) • Traffic hazards – Park your vehicle so that it protects the scene and warns oncoming traffic. – Park so you can use your vehicle’s warning lights to their best advantage. – Wear an approved safety vest and other PPE. – Ignite fusees or warning flares as soon as possible. – Survey the scene for other hazards. Step Two: Stabilization of the Scene and Any Hazards (3 of 12) • Bystanders – Keep bystanders away from the crash scene by giving them specific directions. – Use a rope or police/fire barrier tape to establish an off-limits area. • Spilled gasoline – Expect to find a fuel spill if a motor vehicle has been hit near the rear, is on its side, or is upside down. Step Two: Stabilization of the Scene and Any Hazards (4 of 12) • Spilled gasoline (cont’d) © Mark C. Ide – If a fuel spill is present, call the fire department. – If patients are in a motor vehicle with a fuel spill and the fire department has not arrived, consider covering the fuel with dirt. Step Two: Stabilization of the Scene and Any Hazards (5 of 12) • Motor vehicle batteries – Turn off the vehicle’s ignition. – Do not attempt to disconnect the battery unless you have been trained to do so. – Hybrid vehicles and electric vehicles have large quantities of batteries. Step Two: Stabilization of the Scene and Any Hazards (6 of 12) • Downed electrical wires – May be caused by high winds, ice buildup, or a vehicle hitting a utility pole – Locate the wires but avoid contact with them. – If a vehicle has a downed wire across it and passengers are trapped inside, instruct them to stay inside the car and call the utility company and fire department for assistance. Step Two: Stabilization of the Scene and Any Hazards (7 of 12) • Unstable vehicles – Assume that every vehicle involved in a crash is unstable, unless you have stabilized it. – Vehicles on their wheels • Ensure stability by chocking the front or back of each wheel. • If you can gain access to the inside of the vehicle, place the transmission in park and set the brake. • Deflate the tires by cutting or pulling the valve stems. Step Two: Stabilization of the Scene and Any Hazards (8 of 12) Step Two: Stabilization of the Scene and Any Hazards (9 of 12) • Vehicles on their sides or upside down – Do not climb on the vehicle. – Break the rear window glass and enter through the back of the vehicle. Courtesy of Mark Woolcock – The primary hazard of an upside-down vehicle is spilled gasoline. Step Two: Stabilization of the Scene and Any Hazards (10 of 12) • Vehicle fires – Impact fires occur when the gas tank ruptures during the crash. – Postimpact fires are often caused by electrical short circuits and can be prevented by turning off the ignition. Step Two: Stabilization of the Scene and Any Hazards (11 of 12) • Emergency actions for motor vehicle fires – Use a dry chemical fire extinguisher. – Use the extinguisher to keep flames out of the passenger compartment. Step Two: Stabilization of the Scene and Any Hazards (12 of 12) • Emergency actions for motor vehicle fires (cont’d) – Do not be overly worried about discharging the extinguisher onto the passengers. – Immediately have someone else gather fire extinguishers from other vehicles. – Remove patients as quickly as possible. – Move everyone at least 50′ away from any vehicle that is on fire. Step Three: Access to Patients (1 of 4) • Access through doors – Try all doors first. – Ensure that the locking mechanism is released. – Try the outside and inside handles at the same time. Step Three: Access to Patients (2 of 4) • Access through windows – Do not try to break and enter through the windshield because it is made of plastic-laminated glass. – The side and rear windows are made of tempered glass and will break easily. Step Three: Access to Patients (3 of 4) • Access through windows (cont’d) – Carry a spring-loaded center punch in your EMR life support kit. – If you must break a window, try to break one that is the farthest from the patient. – Follow the steps in Skill Drill 20-1. Step Three: Access to Patients (4 of 4) • Access through windows (cont’d) – When you gain access to a crash vehicle, be alert for undeployed air bags. – If you cannot gain access to the vehicle: • Stabilize the vehicle. • Protect the scene until the proper equipment arrives. Step Four: Initial Emergency Care (1 of 2) • Conduct a patient assessment. – Monitor the ABCs. – Control bleeding. – Treat the patient for shock. – Stabilize the cervical spine. – Provide psychological reassurance. – Maintain the body’s temperature with a blanket. Step Four: Initial Emergency Care (2 of 2) • Leave patients in the vehicle unless: – The vehicle is on fire. – The patients are otherwise in immediate danger. • Skill Drill 20-2 shows how to perform initial airway management when the patient is in a vehicle. Step Five: Patient Disentanglement (1 of 2) • Usually requires tools and specialized equipment • In some serious extrication situations, disentanglement can take up to 30 minutes and requires advanced training. © Glen E. Ellman Step Five: Patient Disentanglement (2 of 2) • Golden Period – The less time you spend at the scene with a seriously injured patient, the better. – The patient’s chance for survival increases if rescuers can get the patient to a trauma center as soon as possible. Step Six: Preparation for Patient Removal • As disentanglement proceeds, dressings, bandages, and splints are applied and the patient’s head and spine are immobilized. • The access route used to care for the patient may not be adequate as an extrication route. – The extrication route must be large enough to permit the safe removal of the packaged patient. Step Seven: Patient Removal • Once the patient is packaged, he or she is removed from the vehicle and placed onto a stretcher. • Although EMRs are directly involved in only the first four steps, you should be aware of the entire operation. Review of the Extrication Process (1 of 2) • Call for extrication help. • Specify the types of vehicles involved. • Do not stand idly by while waiting for help. – Identify and contain hazards. – Park your vehicle appropriately. – Clear a working area around the crash site. – Use your head! Review of the Extrication Process (2 of 2) • Do not stand idly by while waiting for help. (cont’d) – Try opening the doors first, rather than breaking windows. – Once you gain access to the patients, assess and monitor their conditions. – Above all, remain calm. Water Rescue (1 of 4) • Reach – Use any readily available object. – If the person is close to shore, a branch, pole, oar, or paddle may be long enough. • Throw – At a swimming pool, dock, or supervised beach, a flotation device may be available. – Throw a life buoy if one is available. Water Rescue (2 of 4) • Throw (cont’d) – Some public safety departments carry a rescue throw bag that contains a rope. – If these devices are not available, improvise. • Row – Row out to the drowning person if a small boat or canoe is available. – Wear an approved personal flotation device. Water Rescue (3 of 4) • Go – As a last resort, you may have to go into the water to save the person. – Enter the water only if you are a capable swimmer trained in lifesaving techniques. – Remove encumbering clothing before entering the water. – Take a flotation device with you. Water Rescue (4 of 4) Initial Treatment of a Person in the Water (1 of 5) • If you are involved in a water rescue, your primary concerns must be to: – Open the airway. – Establish breathing and circulation. – Stabilize spinal cord injuries. • Skill Drill 20-3 describes how to turn patients who are face down in the water face up. Initial Treatment of a Person in the Water (2 of 5) • Use the jaw-thrust maneuver. • Look, listen, and feel for signs of breathing. • If the patient is not breathing, start rescue breathing in the water. Initial Treatment of a Person in the Water (3 of 5) • If the patient has experienced cardiac arrest: – Quickly stabilize the patient’s head and neck. – Remove the patient from the water. – Place the patient on a hard surface. – Begin CPR. • Treat a patient who is unconscious in the water as if a spinal cord injury is present. Initial Treatment of a Person in the Water (4 of 5) • Assume the presence of a spinal cord injury if a conscious patient in the water: – Reports numbness or tingling in the arms or legs – Is unable to move the extremities – Reports neck pain Initial Treatment of a Person in the Water (5 of 5) • Strap the patient to a backboard, stabilize the head and neck, and remove the patient from the water. Diving Injuries (1 of 3) • Most recreational divers use self-contained underwater breathing apparatus (scuba). • Scuba consists of: – An air tank – A regulator – A mouthpiece – A face mask Diving Injuries (2 of 3) • Diving accidents can cause trauma, near drowning, or specialized injuries. • Specialized injuries associated with diving include air embolism and decompression sickness (bends). – Both are caused by air bubbles released in the body as a result of pressure changes while diving. Diving Injuries (3 of 3) • Treatment – Maintain the patient’s ABCs and normal body temperature. – Administer oxygen. – Some physicians recommend placing the patient on his or her left side with the head slightly lowered. – Patients may need to be transported to a hospital with a hyperbaric chamber. Ice Rescue (1 of 4) • No ice is truly safe. • Visually mark the location where the person was last seen. • The basic rules of ice rescue are the same as water rescue: reach–throw–row–go. – Reach for the victim using anything that will extend your natural stretch. – Throw a flotation device, throw rope, etc. Ice Rescue (2 of 4) • Reach–throw–row– go (cont’d) – Row or propel a small boat to the victim, or use a toboggan to get across the ice. © Chris Rush, Bartlesville Examiner-Enterprise/AP Photos – If you must go, secure yourself to shore with a rope around your waist, lie on your stomach, and proceed across the ice. Ice Rescue (3 of 4) • A motor vehicle on the ice presents a risky situation. – Instruct the occupants to avoid unnecessary movement. – If the vehicle has not gone through the ice, instruct the occupants to open the doors. – If the doors cannot open, instruct the occupants to roll down the windows. Ice Rescue (4 of 4) • Both the persons on the ice or in the water and the rescuers are at risk for hypothermia. – Keep all rescuers as warm as possible. – Rescue persons should be stripped of wet clothing, dried, and warmed. – If the patient has no pulse, start CPR and continue until the patient has been transported to a hospital and warmed. Confined Space Rescue (1 of 4) • Confined spaces are structures designed to keep something in or out. • Below-ground confined spaces – Manholes – Below-ground utility vaults or storage tanks – Old mines – Cisterns – Wells Confined Space Rescue (2 of 4) • Ground-level confined spaces – Industrial tanks – Farm storage silos • Elevated confined spaces – Water towers – Storage tanks Confined Space Rescue (3 of 4) • Rescue situations involving confined spaces have two deadly hazards. – The confined space may have insufficient oxygen to support life or a poisonous gas may be present. – There is also the danger of collapse. • Call for additional assistance and do not enter the space until help arrives. Confined Space Rescue (4 of 4) © Harris Shiffman/ShutterStock, Inc. © Joe Gough/ShutterStock, Inc. Farm Rescue (1 of 4) • Farm accidents pose many challenges. – Reporting of an emergency may be delayed if the farmer works alone. – There may be a lengthy response. – It may be hard to pinpoint the exact location of the emergency. – Poor roads, nonexistent roads, and muddy soil may require you to leave your vehicle behind. Farm Rescue (2 of 4) • Farm hazards – Animals – Hazardous chemicals including pesticides, herbicides, and fertilizers – Electrically powered machinery – Tall barns and silos © Nancy Hixson/ShutterStock, Inc. Farm Rescue (3 of 4) • Farm hazards (cont’d) – Below-grade manure storage pits – Accidents with farm machinery Courtesy of Lynn Betts/NRCS USDA • Rollovers of farm tractors • Entrapment in machinery • Severing of body tissue by sharp objects Farm Rescue (4 of 4) • Your role in farm rescues – Stabilize the scene and provide initial medical care for the patient. – Follow the seven steps of extrication. Bus Rescue (1 of 2) • Crashes involving buses are considered multiple-casualty events. • Your role in bus rescues – Perform a scene size-up. – Call for adequate police, fire, and EMS resources. – Establish an incident command system if multiple casualties are present. Bus Rescue (2 of 2) • Your role in bus rescues (cont’d) – Set up a one-way traffic pattern for responding vehicles. © Dena Libner, The Conway Daily Sun/AP Photos – With a large number of patients, triage the patients using the START triage system. Summary (1 of 3) • You should be able to perform the first four steps in the extrication process and assist other rescuers with the remaining steps. • Ice rescue, water rescue, underwater diving accidents, confined space rescue, farm rescue, and bus crashes are situations that require extensive skills and special training. Summary (2 of 3) • In water and ice rescue situations, you can take some simple steps to help the person without endangering yourself, including reaching out to the person with an object, throwing a flotation device to the person, or rowing to the person in a boat. Summary (3 of 3) • In confined space rescue, your primary goals are to call for additional assistance and prevent other people, including yourself, from becoming victims. • Farm emergencies and bus crashes are complex rescue situations. Review 1. Which of the following would NOT be considered a special rescue situation? A. a school bus collision B. a hiker who has fallen through thin ice C. a diver who is discovered unconscious on the surface D. an elderly man with chest pain at the park Review Answer: D. an elderly man with chest pain at the park Review 2. As an EMR, your primary goal in extrication is to: A. use specialized equipment to access patients. B. access patients safely and stabilize them. C. reach patients as quickly as possible to administer pain medications. D. dismantle the vehicle or machinery. Review Answer: B. access patients safely and stabilize them. Review 3. Once you have access to the patient, you should: A. perform an assessment. B. rapidly extricate the patient. C. administer oxygen. D. immediately begin treating injuries you see. Review Answer: A. perform an assessment. Credits • Opener: © Glen E. Ellman • Background slide image (ambulance): © Comstock Images/Alamy Images • Background slide images (non-ambulance): © Jones & Bartlett Learning. Courtesy of MIEMSS.

