Chapter 35 PPT - Wilco Area Career Center
advertisement
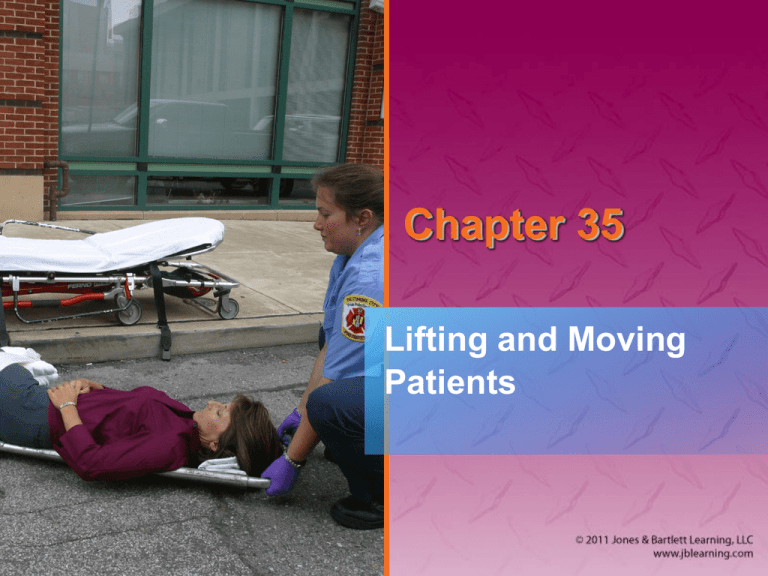
Chapter 35 Lifting and Moving Patients National EMS Education Standard Competencies EMS Operations Knowledge of operational roles and responsibilities to ensure patient, public, and personnel safety. Introduction • In the course of a call, EMTs move patients. • To move patients without injury, you need to learn proper techniques. • Correct body mechanics, grips, and devices are important. Moving and Positioning the Patient (1 of 3) • When you move a patient, take care that injury does not occur: – To you – To your team – To the patient • Many EMTs are injured lifting and moving patients. Moving and Positioning the Patient (2 of 3) • Training and practice are required. • Special lifting and moving techniques are necessary for: – Patients with head injury, shock, spinal injury – Pregnant patients – Obese patients Moving and Positioning the Patient (3 of 3) Body Mechanics (1 of 12) • In lifting: – Shoulder girdle should be aligned over pelvis. – Hands should be held close to legs. – Force then goes essentially straight down spinal column. – Very little strain occurs. Body Mechanics (2 of 12) Body Mechanics (3 of 12) • This is the correct way to lift. Body Mechanics (4 of 12) • You may injure your back: – If you lift with your back curved – If you lift with your back straight but bent significantly forward at the hips Body Mechanics (5 of 12) • This is an incorrect method of lifting. Body Mechanics (6 of 12) • Power lift – Legs should be spread about 15″ apart (shoulder width). – Place feet so center of gravity is balanced. – With your back held upright, bring your upper body down by bending the legs. – Grasp the patient/stretcher. Body Mechanics (7 of 12) • Power lift (cont’d) – Lift patient by raising your upper body and arms and straightening your legs until standing. – Keep the weight close to your body. – See Skill Drill 35-1. Body Mechanics (8 of 12) Body Mechanics (9 of 12) • Power grip gets maximum force from hands. – Palms up – Hands about 10″ apart – All fingers at same angle – Fully support handle on curved palm Body Mechanics (10 of 12) Body Mechanics (11 of 12) • To lift a patient by a sheet or blanket: – Center the patient. – Tightly roll up excess fabric on the sides. – Use the cylindrical handle to grasp fabric and lift patient. Body Mechanics (12 of 12) Weight and Distribution (1 of 9) • Whenever possible, use a device that can be rolled. • When a wheeled device is not available, a backboard must be used. Weight and Distribution (2 of 9) • More of the patient’s weight rests on the head half of the device than on the foot half. • Diamond carry and the one-handed carry use one EMT at head and foot, and one on each side of patient’s torso. – See Skill Drill 35-2 and Skill Drill 35-3. Weight and Distribution (3 of 9) Weight and Distribution (4 of 9) • Always secure patient to backboard or stretcher. – So patient cannot slide significantly when stretcher is at an angle Weight and Distribution (5 of 9) • Wheeled ambulance stretcher weighs 40–145 lb. – Generally too heavy for use on stairs Weight and Distribution (6 of 9) • If you must use a backboard or wheeled stretcher on stairs, see Skill Drill 35-4. Weight and Distribution (7 of 9) • A stair chair can be used to bring a conscious patient down to stretcher (see Skill Drill 35-5). Weight and Distribution (8 of 9) Weight and Distribution (9 of 9) • Backboard should be used instead for patient: – In cardiac arrest – Who must be moved in supine position – Who must be immobilized Directions and Commands (1 of 3) • Team actions must be coordinated. • Team leader – Indicates where each team member should be – Rapidly describes sequence of steps to perform before lifting Directions and Commands (2 of 3) • Preparatory commands are used. • Example: – Team leader says, “All ready to stop,” to get team’s attention. – Then team leader says, “Stop!” in louder voice. • Countdowns are also used. Directions and Commands (3 of 3) • Estimate patient’s weight before lifting – Adults often weigh 120–220 lb. – Two EMTs should be able to safely lift this weight. • If patient weighs over 250 lb, use four rescuers. – Place strongest EMT at head end. Principles of Safe Reaching and Pulling (1 of 4) • Body drag – When you use a body drag, same principles apply as when lifting and carrying. – Keep back locked and straight. – Kneel. – Extend arms no more than 15–20″ in front of you. Principles of Safe Reaching and Pulling (2 of 4) • Log rolling • Log roll the patient onto his or her side to place a patient on a backboard. Principles of Safe Reaching and Pulling (3 of 4) • Log rolling (cont’d) – Kneel as close to the patient’s side as possible. – Keep your back straight. – Roll the patient without stopping. Principles of Safe Reaching and Pulling (4 of 4) • Rolling the stretcher – Stretcher should be fully elevated. – Push the stretcher from the head end. – Never push with arms fully extended. General Considerations • Move a patient in orderly, planned, unhurried manner. • Carefully plan ahead. • Select methods that will involve least amount of lifting and carrying. Emergency Moves (1 of 5) • Use when there is potential for danger before assessment and management. – Examples: fire, explosives, hazardous materials • Use when you cannot properly assess patient or provide immediate care because of patient’s location or position. Emergency Moves (2 of 5) • If you are alone, use a drag to pull patient along long axis of body. • Use techniques to help prevent aggravation of patient spinal injury. – Clothes drag – Blanket drag – Arm drag – Arm-to-arm drag Emergency Moves (3 of 5) Emergency Moves (4 of 5) • To remove unconscious patient from vehicle alone: – First move legs clear of pedals. – Rotate patient so back is toward open car door. – Place arms through armpits and support head against your body. – Drag patient from seat to a safe location. Emergency Moves (5 of 5) Urgent Moves (1 of 2) • Necessary to move patient with: – Altered level of consciousness – Inadequate ventilation – Shock • Rapid extrication technique requires team of knowledgeable EMTs. – See Skill Drill 35-6. Urgent Moves (2 of 2) • Rapid extrication technique is an urgent move and should only be used if urgency exists. • Patient can be moved within 1 minute. • Technique increases damage if patient has spinal injury. • Look at all options before using technique. Nonurgent Moves (1 of 5) • Used when both scene and patient are stable • Carefully plan how to move the patient. • Team leader should plan the move. – Personnel – Obstacles identified – Equipment – Path Nonurgent Moves (2 of 5) • Choose between: – Direct ground lift (Skill Drill 35-7) • For those with no suspected spinal injury who are supine. • Patient will need to be carried distance. • EMTs stand side by side to lift/carry. Nonurgent Moves (3 of 5) • Choose between (cont’d): – Extremity lift (Skill Drill 35-8) • For those with no suspected spinal injury who are supine or sitting • Helpful when patient is in small space • One EMT at patient’s head and the other at patient’s feet • Coordinate moves verbally. Nonurgent Moves (4 of 5) • To transfer a patient from bed to stretcher, use: – Direct carry (see Skill Drill 35-9) • Move supine patient from the bed to stretcher using a direct carry method. – Draw sheet method • Move patient from bed to stretcher using a sheet or blanket. – Scoop stretcher (see Skill Drill 35-10) Nonurgent Moves (5 of 5) Geriatrics (1 of 2) • Most patients transported by EMS are geriatric patients. • Skeletal changes cause brittle bones, and spinal curvatures present special challenges. • Allay patient’s fears with sympathetic and compassionate approach. Source: © Dr. P. Marazzi/Photo Researchers, Inc. Geriatrics (2 of 2) Kyphosis Spondylosis Bariatrics (1 of 2) • Refers to management of obese people • 100 million adults in the US are overweight or obese. – Approximately 20% to 25% of children are overweight or obese. • Back injuries account for the largest number of missed days of work. Bariatrics (2 of 2) • Stretchers and equipment are being produced with higher capacities. – Does not address danger to EMTs of carrying ever-heavier weights – Mechanical ambulance lifts are uncommon in United States. Patient-Moving Equipment (1 of 3) • Stretcher is available in many models with various features. • General features – Head and foot end – Strong metal frame (to push, pull, lift) – Hinges at center allow for elevation of head/back. – Guardrail prevents patient from rolling out. Patient-Moving Equipment (2 of 3) • General features (cont’d) – Undercarriage frame allows adjustment to any height. – Stretcher has locking mechanism when controls are not activated. – Controls are located at the foot end and at one or both sides of most stretchers. Patient-Moving Equipment (3 of 3) Types of Stretchers (1 of 19) • Wheeled ambulance stretcher – Also called a stretcher or gurney – Most commonly used device Types of Stretchers (2 of 19) • Wheeled ambulance stretcher (cont’d) – Patient may be secured directly to stretcher – Or, patient may be secured to backboard first if: • Suspected spinal injury or multisystem trauma • Patient is in need of CPR Types of Stretchers (3 of 19) • Bariatric stretcher – Specialized for overweight or obese patients – Wider wheel base for increased stability Source: Courtesy of Stryker Medical Types of Stretchers (4 of 19) • Bariatric stretcher (cont’d) – Some have tow package with winch. – Rated to hold 850–900 lb • Regular stretcher rated for 650 lb max. Types of Stretchers (5 of 19) • Pneumatic and electronic-powered wheeled stretcher – Battery operated electronic controls to raise/lower undercarriage • This increases the weight of stretcher. Source: Courtesy of Stryker Medical • Hazardous for uneven terrain or stairs Types of Stretchers (6 of 19) • Loading a wheeled stretcher into an ambulance – Ensure the frame is held firmly between two hands so it does not tip. Types of Stretchers (7 of 19) • Loading a wheeled stretcher into an ambulance (cont’d) – Newer models are self-loading, allowing you to push the stretcher into ambulance. – Other models need to be lowered and lifted to the height of the floor of ambulance. – Clamps in ambulance hold stretcher in place. – See Skill Drill 35-11. Types of Stretchers (8 of 19) • Portable/folding stretcher – Strong, rectangular tubular metal frame with fabric stretched across it Types of Stretchers (9 of 19) • Portable/folding stretcher (cont’d) – Some models have two wheels. – Some can be folded in half. – Used in areas difficult to reach – Weigh less then wheeled stretchers Types of Stretchers (10 of 19) • Flexible stretcher – Can be rolled into a tubular package – Excellent for storage and carrying – Conform around a patient’s sides – Useful for confined spaces – Uncomfortable, but provides support and immobilization Types of Stretchers (11 of 19) • Backboard – Long, flat, and made of rigid rectangular material (mostly plastic) – Used to carry and immobilize patients with suspected spinal injury or other trauma Types of Stretchers (12 of 19) • Backboard (cont’d) – Commonly used for patients found lying down – 6′ to 7′ long – Holes serve as handles and a place to secure straps. Types of Stretchers (13 of 19) • Backboard (cont’d) – Short backboards or half-boards are used to immobilize seated patients • Example: the KED vest-type device Types of Stretchers (14 of 19) • Basket stretcher – Rigid stretcher also called a Stokes litter – Used for remote locations inaccessible by a vehicle, including water rescues and technical rope rescues Types of Stretchers (15 of 19) • Basket stretcher (cont’d) – If spinal injury, secure patient to backboard and place inside basket stretcher to carry patient out of location. – When you return to ambulance, lift the backboard out of basket stretcher and place on wheeled stretcher. Types of Stretchers (16 of 19) • Scoop stretcher – Also called orthopaedic stretcher Types of Stretchers (17 of 19) • Scoop stretcher (cont’d) – Splits into two or four pieces • Pieces fit around patient who is lying on flat surface and reconnect – Both sides of patient must be accessible. – Patient must be stabilized and secured on scoop stretcher. Types of Stretchers (18 of 19) • Stair chair – Folding aluminum frame chairs with fabric stretched across to form a seat and back – Most have rubber wheels in the back Types of Stretchers (19 of 19) • Neonatal isolette – Also called an incubator – Neonates cannot be transported on a wheeled stretcher. – Isolette keeps neonate warm, protects from noise, draft, infection, excess handling. – Isolette may be secured to wheeled ambulance stretcher or freestanding. Decontamination • Decontaminate equipment after use. – For your safety – For the safety of the crew – For the safety of the patient – To prevent the spread of disease Medical Restraints (1 of 2) • Evaluate for correctible causes of combativeness. – Head injury, hypoxia, hypoglycemia • Follow local protocols. • Restraint requires five personnel. • Restrain patient supine. – Positional asphyxia may develop in prone position. Medical Restraints (2 of 2) • Apply restraint to each extremity. • Assess circulation after restraints are applied. • Document all information. Personnel Considerations (1 of 2) • Questions to ask before moving patient: – Am I physically strong enough to lift/move this patient? – Is there adequate room to get the proper stance to lift the patient? – Do I need additional personnel for lifting assistance? Personnel Considerations (2 of 2) • Remember, an injured rescuer cannot help anyone. Summary (1 of 13) • The first key rule of lifting is to always keep your back in an upright position and lift without twisting. • The power lift is the safest and most powerful way to lift. Summary (2 of 13) • Pushing is better than pulling. • If you do not have a proper hold, you will not be able to bear your share of the weight, or you may lose your grasp and possibly cause a lower back injury to one or more EMTs. Summary (3 of 13) • It is always best to move a patient on a device that can be rolled. • You must constantly coordinate your movements with those of the other team members and make sure that you communicate with them. Summary (4 of 13) • Ideally, members of the lifting team should also be of similar height and strength. • If you must carry a loaded backboard or stretcher up or down stairs or other inclines, be sure that the patient is tightly secured to the device to prevent sliding. Summary (5 of 13) • Carry the backboard or stretcher foot end first, so that the patient’s head is elevated higher than the feet. • Directions and commands are an important part of safe lifting and carrying. Summary (6 of 13) • You and your team must anticipate and understand every move and execute it in a coordinated manner. • The team leader is responsible for coordinating the moves. • You should try to use four rescuers whenever resources allow. Summary (7 of 13) • You should know how much you can comfortably and safely lift and not attempt to lift more than this amount. • Rapidly summon additional help to lift and carry a weight that is greater than you are able to lift. Summary (8 of 13) • The same basic body mechanics apply for safe reaching and pulling as for lifting and carrying. • Keep you back locked and straight, and avoid twisting. • Do not hyperextend your back when reaching overhead. Summary (9 of 13) • For a nonurgent move, move the patient in an orderly, planned, and unhurried manner, selecting methods that involve the least amount of lifting and carrying. • At times, you may have to use an emergency move to maneuver a patient before providing assessment and care. Summary (10 of 13) • You should perform an urgent move if a patient has an altered level of consciousness, inadequate ventilation, or shock, or in extreme weather conditions. Summary (11 of 13) • The wheeled ambulance stretcher is the most commonly used device to move and transport patients. • Other devices include portable stretchers, flexible stretchers, backboards, basket stretchers, scoop stretchers, and stair chairs. Summary (12 of 13) • Whenever you are moving a patient, you must take special care so that neither you, your team, nor the patient is injured. Summary (13 of 13) • You will learn the technical skills of patient packaging and handling through practice and training. • Training and practice are required to use all the equipment that is available to you.
