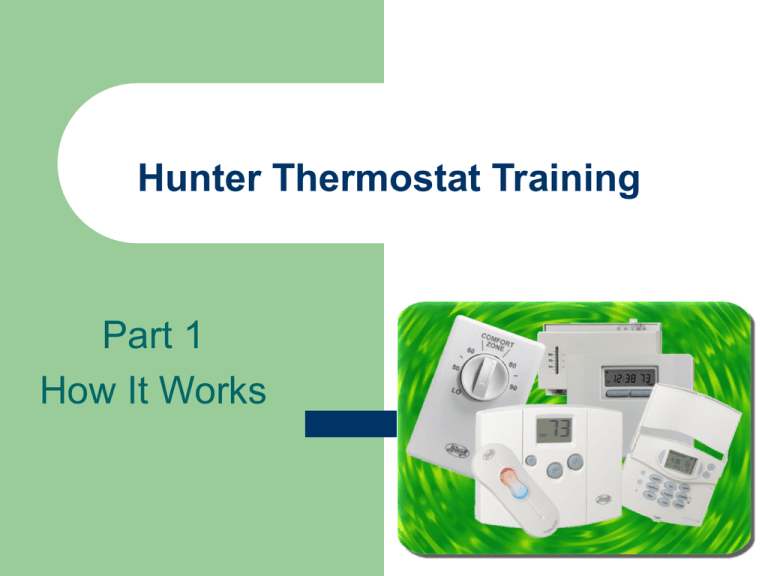
Hunter Thermostat Training
advertisement

Hunter Thermostat Training Part 1 How It Works How the Thermostat works You've probably seen or used a thermostat a thousand times. This device controls the heating and air-conditioning systems in your house. You’ve probably never seen how one works though. Within most mechanical thermostats there is a bimetallic strip. A bimetallic strip is a piece of metal made by laminating two different types of metal together. The metals that make up the strip expand and contract when they are heated or cooled. Each type of metal has its own particular rate of expansion, and the two metals that make up the strip are chosen so that the rates of expansion and contraction are different. When this coiled strip is heated, the metal on the inside of the coil expands more and the strip tends to unwind. The center of the coil is connected to the temperature-adjustment lever, and the mercury switch is mounted to the end of the coil so that when the coil winds or unwinds, it tips the mercury switch one way or the other causing the airconditioner or heater to turn on or off. How the Thermostat works Also inside a mechanical thermostat is a heat anticipator. This shuts off the heater before the air inside the thermostat actually reaches the set temperature. Often, some parts of the house will reach the set temperature before the part of the house containing the thermostat does. The anticipator shuts the heater off a little early to give the heat time to reach the thermostat. This loop of wire is actually a resistor. When the heater is running, the current that controls the heater travels from the mercury switch, through the red wire to the resistive loop. It travels around the loop until it gets to the wiper, and from there it travels through the hub of the anticipator ring and down to the circuit board on the bottom layer of the thermostat. The farther the wiper is positioned (moving clockwise) from the red wire, the more of the resistive wire the current has to pass through. Like any resistor, this one generates heat when current passes through it. The farther around the loop the wiper is placed, the more heat is generated by the resistor. This heat warms the thermometer coil, causing it to unwind and tip the mercury switch to the right so that the heater shuts off. Digital thermostats use a simple device called a thermistor to measure temperature. A thermistor is a resistor whose electrical resistance changes with temperature. The microcontroller in a digital thermostat can measure the resistance and convert that number to a temperature reading. Hunter Thermostat Training Part 2 Understanding Air-Conditioners Air-Conditioner Operation An air conditioner is basically a refrigerator without the insulated box. It uses the evaporation of a refrigerant, like Freon, to provide cooling. The mechanics of the Freon evaporation cycle are the same in a refrigerator as in an air conditioner. The compressor compresses cool Freon gas, causing it to become hot, high-pressure Freon gas (red in the diagram to the right). This hot gas runs through a set of coils so it can dissipate its heat, and it condenses into a liquid. The Freon liquid runs through an expansion valve, and in the process it evaporates to become cold, low-pressure Freon gas (light blue in the diagram to the right). This cold gas runs through a set of coils that allow the gas to absorb heat and cool down the air inside the building. Mixed in with the Freon is a small amount of a lightweight This oil lubricates the compressor. Courtesy of WWW.HOWSTUFFWORKS.COM Split Air-Conditioner Systems The cold side, consisting of the expansion valve and the cold coil, is generally placed into a furnace or some other air handler. The air handler blows air through the coil and routes the air throughout the building using a series of ducts. The hot side, known as the condensing unit, lives outside the building. In most home installations, the unit looks something like this: The unit consists of a long, spiral coil shaped like a cylinder. Inside the coil is a fan, to blow air through the coil, along with a weatherresistant compressor and some control logic. This approach has evolved over the years because it is low-cost, and also because it normally results in reduced noise inside the house (at the expense of increased noise outside the house). Besides the fact that the hot and cold sides are split apart and the capacity is higher (making the coils and compressor larger), there is no difference between a split-system and a window air conditioner. Courtesy of WWW.HOWSTUFFWORKS.COM Heat Pump Systems Imagine that you took an air conditioner and flipped it around so that the hot coils were on the inside and the cold coils were on the outside. Then you would have a heater. It turns out that this heater works extremely well. Rather than burning a fuel, what it is doing is "moving heat." A heat pump is an air conditioner that contains a valve that lets it switch between "air conditioner" and "heater." When the valve is switched one way, the heat pump acts like an air conditioner, and when it is switched the other way it reverses the flow of Freon and acts as heater. Heat pumps can be extremely efficient in their use of energy. But one problem with most heat pumps is that the coils in the outside air collect ice. The heat pump has to melt this ice periodically, so it switches itself back to air conditioner mode to heat up the coils. To avoid pumping cold air into the house in air conditioner mode, the heat pump also lights up burners or electric strip heaters to heat the cold air that the air conditioner is pumping out. Once the ice is melted, the heat pump switches back to heating mode and turns off the burners. Since this type of heating becomes far less effective as the temperature outside falls, these types of systems are generally only found in areas where heating is not a major concern, such as Florida, southern California, and Arizona or they incorporate a backup or auxiliary gas or electric heating system. Hunter Thermostat Training Part 4 Identifying The System Types of Systems 2 Wire Systems Typical 2 wire systems have just that, 2 wires. They can be of any color combination and should be small wires about 18 gauge. It is very important when assisting with the installation of a 2 wire system that you confirm the gauge or size of the wire. Line Systems will do damage to any 24v Thermostat and potentially the system. 2 Wire System examples are Heat only, electric or gas Base Board or “Under Floor” Systems Radial Heat Switch Controlled Furnace System Types of Systems 3 Wire Systems 3 Wire systems are conventionally 24v systems with no common. The third wire can act as a Conventional Heat System or damper valve on a base board system 3 Wire System examples are Conventional Heat Systems Base Board “Under Floor” Systems Types of Systems 4-5 Wire Systems 4 or 5 wire systems can either be Conventional Heat and Air-Conditioning Systems or Heat Pump. The difference between them can be identified by the “O or B” as a reversing wire and may or may not include a common wire. When identifying these terminals you should always go by the terminal lettering and “NOT” the wire colors. 4-5 Wire System examples are Conventional Heat Systems Single Stage Heat Pumps Multi-stage systems Types of Systems 6+ Wire Systems With 6 or more wires these systems will either be Multi-stage Heat Pumps or Conventional Systems with more than one stage of heat and or cool. Again, to identify the difference between the systems you should check first for a reversing wire then for multiple heat or cool wiring. 6+ Wire System examples are Multi-stage systems Multi-stage Heat Pumps Hunter Thermostat Training Part 6 Mechanical Thermostats Mechanical Thermostats This is the typical thermostat that you will see in most homes, and probably grew up with in your own. Simply rotate the dial to choose your temperature and the unit will do the rest. Later units not only had a “cool” and “heat” selector but also an auto that would change between heat and cool if a certain temperature drop or raise in temperature occurred. These types of thermostats usually had to be leveled perfectly to allow the mercury bulb in the thermostat to rock back and forth with the heating or cooling of the bimetallic coil to activate heat or cooling. Mechanical Thermostats Hunter mechanical thermostats no longer use the mercury bulb to adjust heating or cooling. Now, a simple magnetic pin is used to make contact and bridge connections. The magnet activates the switches in the thermostat to turn on heat or cool. The advantage to this is there is no longer an issue of disposing of the dangerous mercury vial and it helps give more precision in temperature. Hunter Thermostat Training Part 6 Digital Thermostats Digital Thermostats Digital thermostats do not read temperature the same as their mechanical counterparts. Digitals use a thermistor to register temperature. A thermistor is a type of resistor used to measure temperature changes, relying on the change in its resistance with changing temperature. This does lead to more accurate temperature calculations vs. it’s mercury counterpart on many mechanical thermostats but depending on the placement of the thermistor, it can cause some new problems. Many digital thermostats have an additional feature on them incase the thermistor is reading inaccurately called calibration. Calibration allows you to change the base reading by + or – degrees to more accurately reflect the room temperature. Currently no Hunter thermostat offers calibration. Digital Thermostats Another feature of many digital thermostats is the ability to program them to change temperatures ad different times during the day to accommodate the consumers life style. Each manufacturer can handle this differently as far as setting up the programs and how they operate. Keep in mind, not all digital thermostats are programmable. Hunter Thermostat Training Part 3 Wiring a Thermostat Thermostat Wiring There are 4 basic terminals on most thermostats R - This wire is normally the "Hot" terminal for the system. It is also commonly listed as RC, RH, V, VR, or 4. It may exist as a single item or there may be more than one (i.e. RH and RC). G - This wire is for control of the interior fan or air handler. It is also commonly listed as F. Y - This wire is for control of the compressor. It is also commonly listed as Y1, Y2, and M. There may also be multiple stages or compressor speeds denoted as Y Y1 or Y1 Y2. W - This terminal controls the auxilary heating system if one exists. It is also commonly listed as W1, W2. Like the compressor it may have multiple stages with W, W1, and W2 appearing in combination with one another. Thermostat Wiring Additional Terminals O - This terminal controls the reversing valve in a heat pump system. It is also commonly listed as B. In general when the wire is connected to a terminal marked O, the reversing valve is switched on in the cooling mode. In general when the wire is connected to a terminal marked B, the reversing valve is in operation in the heating mode. E - This terminal controls the emergency heat relay in heat pump systems. This relay is used to lock the compressor in the off mode when the thermostat calls for heat in the emergency mode. In some systems it also locks the system into a manual mode where the thermostat must be switched on and off to turn the heat on and off. IF this is the case and it is undesired, this can be avoided by disconnecting the wire from the E terminal and taping it off. C - This terminal is the common wire for the system. It is also commonly listed as X, X1, X2, and B. Hunter Thermostat Training Part 5 Selecting a Thermostat Selecting a Thermostat Hunter has many different types of Thermostats and many can be used for more than 1 type of system. This next chapter will help you identify the type of thermostat a Consumer would need based upon the wiring in their old Thermostat they are removing. Line Voltage Systems Line voltage systems use 110 volt house power to operate the thermostat and the systems. Hunter products only support 2 wire Line Voltage Systems. Line voltage wires will be thicker 40351 Conventional Heat and Air Consumers have various options as to which Thermostats will work with a “traditional” system. The choice will depend upon, mechanical or digital, and programming options. In addition to this, the model 42996 is the only remote based thermostat we make at this time. 40035 40050 40070 40170 42999 42995 42996 44100 44110 44150 44200 44250 44260 44300 44350 44360 44550 44660 44665 Single Stage Heat Pumps Options are decreased a bit with Single Stage Heat Pumps but still offer a wide enough selection to accommodate most individuals. Remember, the 44760 requires a common wire, even for a Single Stage Heat Pump. 40070 40170 44260 44360 44550 44660 44665 44760 Multi-Stage Systems, Heat Pumps None of Hunters Retail thermostats at this time offer connections for Multi-stage Systems. Please refer to our CTC line of products available commercially for multi-stage traditional systems. The 44760 is made specifically for Heat Pumps. 44760 Hunter Thermostat Training Part 7 CTC, our Commercial Products Climate Technology Product Line Our CTC, or Climate Technology Company, line reflects their retail counterparts. Some do add additional functionality and their warranty is 5 years compared to the 1 year our retail versions carry. Climate Technology Product Line Models 43054, 43058, and 43558 all have additional or new features. The 43054 is the same as the 42999 in our retail version with the exception of it’s ability to control a Single Stage Heat Pump and it’s use of “Indiglo” technology. The 43058 is a model 44760 with the exception of programming and Multi-stage Systems. The 43058 is a nonprogrammable model of the 44760 and will also control 2 stage heat / 2 stage cool systems. The 43558 is the same as the 44760 with the addition of 2 stage heat / 2 stage cool systems. Climate Technology Product Line All other CTC thermostats will program and react as it’s Retail thermostat. Examples of this are. 44260 44360 43154 43255 – 5-1-1 43355 44550 43503 Climate Technology Product Line The newest additions to the CTC line of thermostats is the 43057 and 43855. The 43057 controls heat pumps only and runs on 30v ac or less with no programming options and requires a common wire. The 43855 is a 7 day programmable touch screen thermostat that can be used on all systems including multi-stage systems or heat pumps. Common wire use is optional on this thermostat. Hunter Thermostat Training Part 8 Programming a Hunter Thermostat Programming a Hunter Thermostat Programming a Hunter thermostat doesn’t have to be daunting, the key is understanding your options in programming. We have 3 main programming styles within the Hunter digital thermostat family we will go over. Programming a Hunter Thermostat The first to go over is the 42995 and 42996 - remote. Even though this thermostat is not programmable there are some things you should understand about how the remote feature operates. When using the remote sensor to adjust the temperature, you can only raise or lower the temp 2 degrees plus or minus the current room temperature. So if the room temp is 70 degrees, you can only adjust the thermostat to 68 / 72. Once the room temperature changes it can be readjusted under the same conditions. It is also important to note that there are jumpers, just like our remote fans, on the transmitter and thermostat that may need to be adjusted for frequency. Other than this, it reacts just like a 42999 or 42995. Programming a Hunter Thermostat The first type to go over is used for example on the 44260. This style of programming requires you to repeatedly use the “program” button to maneuver through the programs. Program once to set the hour, again to set the minutes, yet again to set the temperature, and last to move to the next program. This same process is used to set the current time and day of the thermostat via the time/day button. Programming a Hunter Thermostat The next type to go over is used for example on the 44360. This style of programming requires you to repeatedly use the “program” button to maneuver through the programs also. Program once to set the hour, again to set the minutes, yet again to set the temperature, and last to move to the next program. The program day button is used to move between the program sets 5/2 or 7 day. Programming a Hunter Thermostat The 44660, 44665 Thermostats and sensor The 44660 and 44665 have the same programming as a 44360. The difference between the 2 is the 44665 comes with and can use up to 3 44758’s to register temperature. The 44758 is remote sensor that reports temperature to the thermostat. If for example you placed one of these in your bedroom, and the thermostat is mounting in your living rooom, you could have the 44758 report the bedroom temperature to the thermostat and run the programs according to that temperature. Like wise one can be installed outside, as the thermostat can also display temperatures from the remote sensors individually. Programming a Hunter Thermostat Last to go over is used for example on the 44550. The programming type for these thermostats is different than the previous. Program moves you through the program sets but you use the hour and minute buttons to set the activation times and the up and down arrows to set the temperature. Again, program day changes the program sets between 5/2, 7 day, and “everyday” settings. The 44760 The 44760 can be the most difficult thermostat we have to walk a customer through, but it doesn’t have to be. Remember these tips and you will come out a winner every time. The system button changes between heat, cool, and auto features Fan turns the fan on and off It programs like a 44360 would Option sets all other aspects Hunter Thermostat Training Part 9 Troubleshooting and Performing a wire test Wire testing and troubleshooting When troubleshooting a thermostat it is important to remember a few facts. Always ask how long the thermostat has been installed and running properly. The customer may reveal it has never worked in it’s current mode before. This could indicate a wiring or system problem. Many consumers will replace their previous thermostat thinking it has a problem or is defective and this is not always the case. Always ask the consumer their reasons for replacing their old thermostat, it may point to a system problem if both are having similar problems. Wire testing becomes necessary when a part of the system is not running or the customer gets no operation at all. Wire testing allows you to determine if the system or thermostat is at fault. Some customers will have concerns about handling electricity. The lines they are handling are under 30V. It might scare them if shocked, but definitely should not cause harm. Wire testing and troubleshooting Wire testing a conventional thermostat is actually very simple. You have 2 ways you can have the consumer achieve this. The first method would be to have the customer find a conductive source. This can be a paperclip, 2 nails, even small scissors. Anything that will make contact between the screws holding down the wires. Remembering your wire terminal descriptions, you will have the customer bridge power / heat, power / cool or, power / fan. Depending on where the problem lies. Also, you can remove the wires from their terminals and have the customer touch them together to achieve the same result. Either of these methods work, it is all about what you and the consumer feel comfortable with. Wire testing and troubleshooting Wire testing for a heat pump is similar in the tools and wiring you use but the additional to this is obvious, your reversing valve wire. Single stage and multi stage are going to wire test. You must remember a few things when trying to wire test with a heat pump. If the consumer has an “O” reversing wire to reverse for cool, it is impossible to get cooling to activate without using it in the wire test. Not using the reversing valve during a wire test with this terminal will always give you heat, no matter what other contactor you use with the power wire, “W” or “Y”. If the consumer has a “B” reversing valve, this reverses heat, and works the exact opposite of the above example. To perform a wire test of this nature, you would connect the power wire, fan wire, and possibly the reversing wire with the other contactor wires such as w or y to achieve a proper test. Once the wire test has been performed it should be pretty easy to determine where the problem lies. *** “O” terminals reverse cooling, “B” terminals reverse heat. It is impossible to to achieve one without the other.*** **** WARNING **** If the customer cannot identify any or all of the wires according to terminal, we cannot assist with connections. The customer must be able to tell us the terminal letters used for each wire, not color. If the consumer does not know this or only can identify by the color of the wire, they will have to gather that information and call us back or contact their local HVAC technician to assist them. **Improper wiring can cause damage to the thermostat as well As the A/C or Heat Pump Unit. Always Know what your wiring!** Helpful Hints 12/24 and C/F set different for each model, consult with your cheat sheet for programmable thermostats. The anticipator on manual models affects the length of the cycle for heat only. Check this before you replace a thermostat for not shutting down. Thermostats with auto season changeover, be sure the heat and cool cycles are set a minimum of 3 degrees apart. If the consumers says the unit won’t shut off on programmable models, make sure the fan switch is in auto and the system selector switch is correct. Low battery won’t clear on the screen? Try resetting the Thermostat. Always check 2 wire systems for line voltage wires. “O” terminals on a heat pump reverse to give cooling, “B” terminals reverse to give heat. It is impossible to get one without the other.


