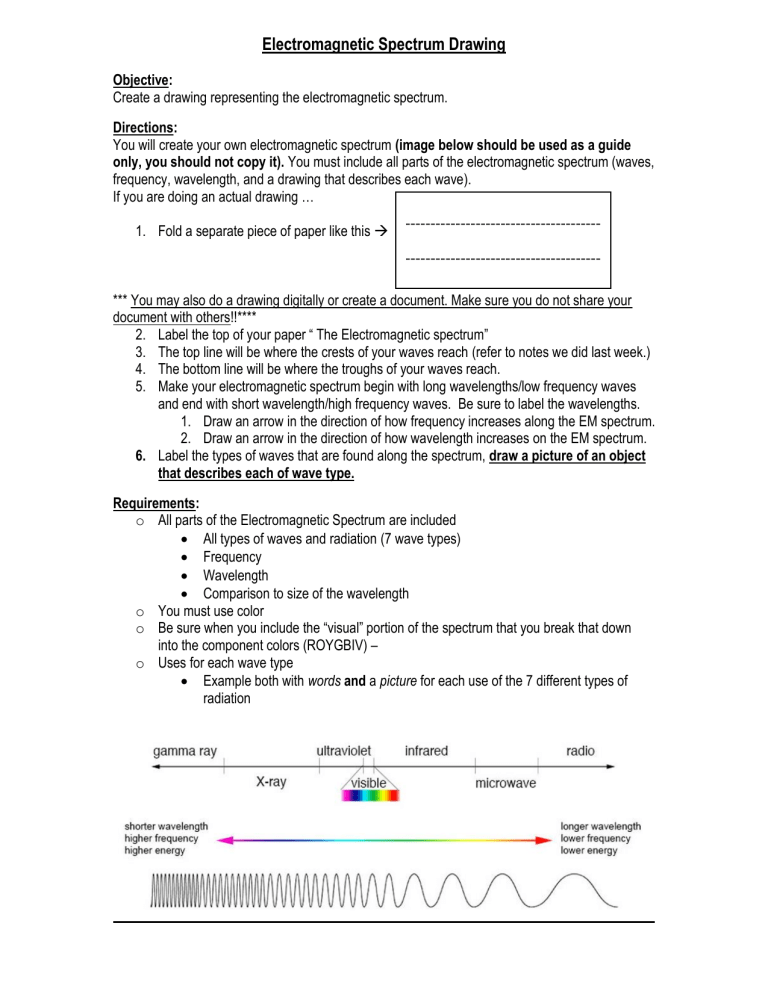
Electromagnetic Spectrum Drawing Objective: Create a drawing representing the electromagnetic spectrum. Directions: You will create your own electromagnetic spectrum (image below should be used as a guide only, you should not copy it). You must include all parts of the electromagnetic spectrum (waves, frequency, wavelength, and a drawing that describes each wave). If you are doing an actual drawing … --------------------------------------1. Fold a separate piece of paper like this --------------------------------------*** You may also do a drawing digitally or create a document. Make sure you do not share your document with others!!**** 2. Label the top of your paper “ The Electromagnetic spectrum” 3. The top line will be where the crests of your waves reach (refer to notes we did last week.) 4. The bottom line will be where the troughs of your waves reach. 5. Make your electromagnetic spectrum begin with long wavelengths/low frequency waves and end with short wavelength/high frequency waves. Be sure to label the wavelengths. 1. Draw an arrow in the direction of how frequency increases along the EM spectrum. 2. Draw an arrow in the direction of how wavelength increases on the EM spectrum. 6. Label the types of waves that are found along the spectrum, draw a picture of an object that describes each of wave type. Requirements: o All parts of the Electromagnetic Spectrum are included All types of waves and radiation (7 wave types) Frequency Wavelength Comparison to size of the wavelength o You must use color o Be sure when you include the “visual” portion of the spectrum that you break that down into the component colors (ROYGBIV) – o Uses for each wave type Example both with words and a picture for each use of the 7 different types of radiation
