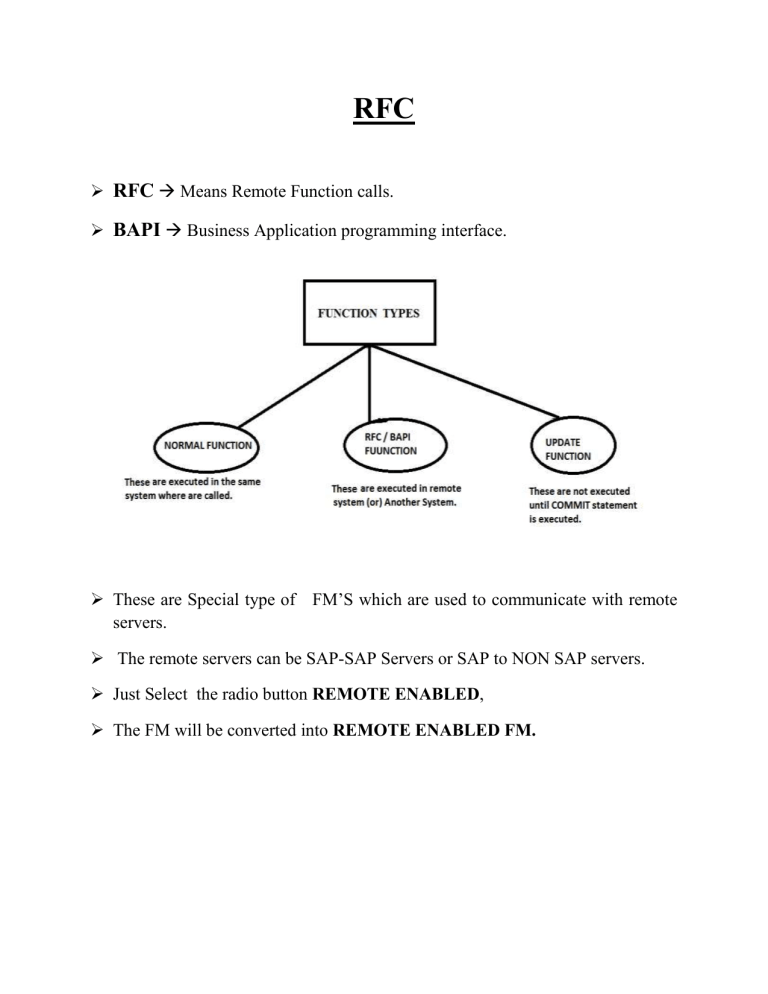
RFC RFC Means Remote Function calls. BAPI Business Application programming interface. These are Special type of FM’S which are used to communicate with remote servers. The remote servers can be SAP-SAP Servers or SAP to NON SAP servers. Just Select the radio button REMOTE ENABLED, The FM will be converted into REMOTE ENABLED FM. RFC Destination: It is a communication network or link between two remote servers. SM59 is the Tcode . In the real time, RFC Destinations are created by BASIS Consultants. Once RFC destinations are created, we can use the RFC function modules with below syntax. SYNTAX TO CALL RFC FMOD : CALL FUNCTION ‘FMOD’ DESTINATION <RFC DEST.NAME> Steps to create RFC Destination: Go to Tcode- SM59. Select ABAP Connections folder Click on Create Give the name as ECC800_TO_Z810. Give some description. How to find the Target Host and System number Double Click on Right Click on sap logon icon. ECC 6 icon, Go to Properties. Indentify the Server name and System number. Give the Target Host and System Number. Press ENTER. The IP Address Automatically comes. Click on Logon and security tab. Specify below details. Click on save. Click on to test the connection. You will enter into remote or target 810 Client. Click on back, you will come back to source client 800 Go to Tcode SE37 Create a FM by any name. Make all the parameters as PASS BY VALUE. Click on Attributes tab. Select REMOTE ENABLED option as below Click on Source Code Tab. Write The Below logic. Save and Active. Go to TCode SE38. Create a Program by any name. Click on Create. In Program Call The Function and Destination. My function name is: ZRFC_POST_DATA. My Destination: 'ECC800_TO_810'. Save and Active. Press F8. Output: Check from Remote System 810. Log on to810. Go to Tcode SE11 Enter Table Name Go to Utilities Table Contents Display Output: BAPI’S BAPI: stands for BUSINESS APPLICATION PROGRAMMING INTERFACE It is also called as B+API. Bapi’s are also Remote enable functions. We use RFC’S between SAP TO SAP Server Communication. We use Bapi’s between SAP TO NON-SAP Server Communication. RULES FOR BAPI’S: Every BAPI should start with BAPI or ZBAPI. BAPI is Also Called as Method (in oops terminology) BAPI is a parent / child of BUSINESS OBJECT(BO) All the Parameters must be pass by Value because BAPI’S doesn’t support pass by reference. Every BAPI should have a returning Parameter by Name RETURN or BAPIRET2, to display success or error messages. If BAPI is Success, we have to use another BAPI BAPI_TRANSACTION_COMMIT to Save the Data into Database Tables. If the BAPI has error, use another BAPI BAPI_TRANSACTION_ROLLBACK to revert back the changes made to the Database Tables. BAPI ARCHITEURE: WHAT IS BUSINESS OBJECT (BO): It is an object which is similar to class, which is group of attributes methods, interfaces, key fields, events for a particular Business Application or Scenario. SW01 is the TCODE for Business Object Repository Examples for Business objects are, TCODE Name BO Name MM01 ME21N BUS1001 BUS2012 VA01 “ Etc BUS2032 “ Etc BUS1001 Methods are : BAPI_Material _Get detail BAPI_Material_GETLIST BUS2012 Methods are : BAPI_PO_GETDETAIL BAPI_PO_GETITEMS Develop a Custom BAPI to display the Material details which can be used by NON-SAP. Step 1: Create structures for Importing and Exporting Parameters. Step2: Create a function module and make it as remote enabled. Step3 : Create a BO. Step4 : Embed or insert RFC into BO so that it will be converted into BAPI. STEP 1: Create a function. Go to TcodeSE37. Importing Empid, Ename, Dept and Click on pass value. Exporting the RETURN TYPE value. STEP 2: Go to Attributes. Select on Remote-Enabled Module. Go to Source code. Write as below logic. Save and Activate. STEP 3: Create a BO: Tcode SWO1. BAPIRET2 and Click on pass Give any name. Click on Create Button. Give detail as below. Press Enter. STEP 4: Add RFC Function into BO Go to Utilities. Select API Methods Under Select Add Method Give our RFC name. Click on NEXT button Click on NEXT Button. The pop-up will come. Click on YES Button. Click on SAVE. Click on BACK Button. Select MENU. Click on Object Type. Select Change release status to under Select Implemented. Select MENU. Click on Object Type. Select Change release status to under Select Released. Using BAPI IN PROGRAM:Call Function ‘ZBAPI_POST_DATA’ DESTINATION 'ECC800_TO_810' Exporting -------------------------------------------Test the Scenario same as RFC. USAGE OF BAPI’S: BAPI’S are used in 3 scenarios. 1) Report generation using BAPI’S 2) Using standard or custom BAPI to communicate between SAP & NONSAP. 3) Using BAPI’s for uploading data into SAP instead of BDC. Finding the BAPI’S: There are two ways to find the BAPI. 1) Using ‘BAPI’ TCode. 2) Using ‘SE37’ TCode. 1) Using ‘BAPI’ TCode: Tcode BAPI Select alphabetical tab. Select your scenario Example: material / customer / sales order / purchase order. BO name is displayed under the option: Object type. Expand your scenario. Method are Displayed with the Setting icon. Select any method BAPI Function is displayed. Testing the BAPI: TcodeSE37. Give the BAPI name Example: BAPI_MATERIAL_GET_DETAIL. Click on Display. Observe the import and export Mandatory Fields. Click on Execute. Provide Material as 100-100. Click on Execute. Result is displayed as Exporting Values. 2) Using ‘SE37’ Tcode: Generally ABAP teams use this option. SE37 Give the name as: BABI*SOMEDESCTION* Click on F4 the list is Displayed. Choose the BABI as per your Requirement. Choose the BAPI as per your Requirement. The BAPI with Sample Text Data. USING BAPI’S TO POST THE DATA INSTEAD OF USING BDC CALL TRANSCTION/SESSON: Call transaction/session in based on recording. This recording screen may not work when you upgrade to version because screen may change in new version of SAP. SAP recommends avoiding using call transaction/session. Instead we have to use BAPI’S. Suppose if BAPI is not available for our requirement, then we have to use call transaction/session. SEENARIO: UPLOAD MATERIAL MASTER DATA FROM FLAT FILE INTO SAP Step1: Find the BAPI name for our scenario. Step2: Create a flat file. Step3: Create a program in SE38 and write the logic. TYPES : BEGIN OF TY_FILE, MATNR TYPE MARA-MATNR, MBRSH TYPE MARA-MBRSH, MTART TYPE MARA-MTART, MAKTX TYPE MAKT-MAKTX, MEINS TYPE MARA-MEINS, MATKL TYPE MARA-MATKL, END OF TY_FILE. DATA : ITAB TYPE TABLE OF TY_FILE . DATA : WA TYPE TY_FILE . DATA I_HD TYPE TABLE OF BAPIE1MATHEADER. DATA WA_HD LIKE LINE OF I_HD. DATA I_CD TYPE TABLE OF BAPIE1MARA. DATA WA_CD LIKE LINE OF I_CD. DATA I_CDX TYPE TABLE OF BAPIE1MARAX. DATA WA_CDX LIKE LINE OF I_CDX. DATA I_DESE TYPE TABLE OF BAPIE1MAKT. DATA WA_DESE LIKE LINE OF I_DESE. DATA I_RET TYPE TABLE OF BAPIE1RET2. DATA WA_RET LIKE LINE OF I_RET. CALL FUNCTION 'GUI_UPLOAD' EXPORTING FILENAME = 'C:/FF/EXAMPLE PROGRAM.TXT' * FILETYPE = 'ASC' HAS_FIELD_SEPARATOR TABLES DATA_TAB = 'X' = ITAB. *DELETE ITAB INDEX 1. LOOP AT ITAB INTO WA. WA_HD-FUNCTION = 'INS'. WA_HD-MATERIAL = WA-MATNR. WA_HD-IND_SECTOR = WA-MBRSH. WA_HD-MATL_TYPE = WA-MTART. WA_HD-BASIC_VIEW = 'X'. APPEND WA_HD TO I_HD. WA_CD-FUNCTION = 'INS'. WA_CD-MATERIAL = WA-MATNR. WA_CD-MATL_GROUP = WA-MATKL. WA_CD-BASE_UOM = WA-MEINS. APPEND WA_CD TO I_CD. WA_CDX-FUNCTION = 'INS'. WA_CDX-MATERIAL = WA-MATNR. WA_CDX-MATL_GROUP = 'X'. WA_CDX-BASE_UOM = 'X'. APPEND WA_CDX TO I_CDX. WA_DESE-FUNCTION = 'INS'. WA_DESE-MATERIAL = WA-MATNR. WA_DESE-LANGU = SYST-LANGU. WA_DESE-MATL_DESC = WA-MAKTX. APPEND WA_DESE TO I_DESE. CALL FUNCTION 'BAPI_MATERIAL_SAVEREPLICA' DESTINATION 'ECC800_TO_810' TABLES HEADDATA = i_hd CLIENTDATA = i_cd CLIENTDATAX = i_cdx MATERIALDESCRIPTION = i_dese RETURNMESSAGES = i_ret. LOOP AT I_RET INTO WA_RET WHERE TYPE = 'S'. CALL FUNCTION 'BAPI_TRANSACTION_COMMIT' EXPORTING WAIT = 'X'. WRITE : / WA_RET-MESSAGE. ENDLOOP. Loop at i_ret into wa_ret where type = 'E'. CALL FUNCTION 'BAPI_TRANSACTION_ROLLBACK' * IMPORTING * RETURN = . WRITE : / WA_RET-MESSAGE COLOR 6. ENDLOOP. CLEAR : WA,WA_HD,WA_CD,WA_CDX,WA_DESE,WA_RET. REFRESH : I_HD,I_CD,I_CDX,I_DESE,I_RET. 1 ULINE. ENDLOOP. FLAT FILE: OUTPUT: Check 810 Client and see the Result: Report generation using BAPI’S DATA WA_CD TYPE BAPI_MARA_GA. DATA ITAB_DESC TYPE TABLE OF BAPI_MAKT_GA. DATA WA_DESC LIKE LINE OF ITAB_DESC. PARAMETERS P_MATNR TYPE BAPI_MARA_GA-MATERIAL. CALL FUNCTION 'BAPI_MATERIAL_GET_ALL' EXPORTING MATERIAL = P_MATNR IMPORTING CLIENTDATA = WA_CD TABLES MATERIALDESCRIPTION = ITAB_DESC. WRITE : / WA_CD-MATERIAL,WA_CD-IND_SECTOR,WA_CD-MATL_TYPE. ULINE. LOOP AT ITAB_DESC INTO WA_DESC. WRITE : / WA_DESC-MATL_DESC,WA_DESC-LANGU. ENDLOOP. OUTPUT: Difference between RFC & BAPI? S.no RFC BAPI 1 The RFC is a remote BAPI is a remote enable enable function. function along with API Layer to communicate between SAP to NON-SAP. 2 RFC is used between BAPI is used SAP to NONSAP TO SAP SAP. 3 RFC does not have any BAPI is a part of Business Business Objects. It is just Objects. BAPI is called as a a Function. method inside Business Objects. 4 RFC does not have any BAPI has return Messages. return Messages. 5 RFC does not use commit BAPI uses commit or or Rollback. Rollback. ALE – IDOC’S ALE : ALE is a technology which is used to communicate between the servers available at different geographical locations. To send the data and receive the data from one server to another server, we need a dedicated network which is called as ALE(Application Link Enabling). Application means customer Master Appl, Material Master Appl, Sales Order Appl. Link means a network or connection. o Enabling means enable the link. Types of data transfers Basically we have two types of data transfers 1.Outbound data transfer. 2.Inbound data transfer. Outbound data transfer: Whenever we send the data from a system to another system,It is called as outbound data transfer i.e, data moving out of SAP is called as outbound data transfer. Inbound data transfer: Whenever we receive the data from a system is called Inbound data transfer i.e, data coming into SAP server is called Inbound data transfer. Communication between SAP to SAP: ALE is a technology which is used to communicate between SAP to SAP server. The data transfer is always in the form of a document called as “IDOC”(Intermediate Document). Communication between SAP to Non-SAP: EDI (Electronic Data Interchange) is the technology which is used to communicate between SAP server to Non-SAP server. Since IDOC is an SAP tool . The Non-SAP system cannot understand the format of IDOC’s. So ,we use the Middleware technologies like TIBCO (or) XI to communicate between SAP to Non-SAP. The data transfer is always through a type of a document called as IDOC.(Post Cover) Since IDOC is an SAP tool , only SAP system can understand IDOC’s. Non-SAP system cannot understand the IDOC’s . So we use the middleware technologies like TIBCO or XI to communicate between SAP to Non-SAP. The IDOC is converted into XML and it is given to TIBCO or XI. The middleware technologies will again convert the data into a format which can be understood by the receiver system. IDOC’S IDOC: - It is an intermediate document which contains the data. Technically IDOC is a group of segments. Each segment is group of fields. Segments are like structures. All the standard SAP segments will start with letter E1. All the custom segments must start with the letter Z1. EX: - 1. DEBMAS: 01, 02, 03,04,05 is an ex for custom IDOC. 2. CREMAS: 01, 02, 03…is an example for vendor IDOC. 3. MATMAS: 01, 02, 03…… is an example for material IDOC. Where (05 is the latest version) Example for segment:DEBMAS is an IDOC E1KNA1(Cust.Master Seg) kunnr, name1, land1 are fields. E1KNB1(Cust.Companycode)kunnr, bukrs are the fields. E1KNBK(customer bank details)kunnr, Banks are the fields. Tcodes for Idoc: WE31 is the transaction code for segment definition. WE30 is the transaction code for IDOC type. IDOC ARCHITECTURE/RUNTIME COMPONENTS OF IDOC:- IDOC ARCHITECTURE Whenever an IDOC is transmitted at runtime, there are 3 components which are added automatically to the IDOC. 1) Control record. 2) Data record. 3) Status record as per above diagram. CONFIGURATION SETTINGS FOR ALV : 1.Define Logical system: In this step we define a logical name for the sending & receiving SAP server systems. The Tcode is “SALE”. 2.Assign client to the Logical system: Here we maintain a client for the sending & receiving system to transfer the particular client data. The Transaction code is “SALE”. 3.Maintain RFC Destination: In this step we maintain a connection between sender system and receiver system which is called as RFC Destination. The Tcode is “SM59”. 4.Define Port : Port specifies the medium of transferring the data from one system to another system WE21 is the Tcode for defining a Port. 5.Maintain Outbound Partner Profile: Here we need to maintain the details of the receiver's system. The details are 1.whom to send (Receiver's name) 2.what to send (IDOC name) 3.when to send(Immediately or collect) 4.How to send(Name of the port) 6.Maintain Distribution Model: It contains the list of receivers who receives the data. MASTER IDOC: It is an internal table which consists of data to be sent from SX system to RX system. Suppose we are sending 100 materials from SX to RX , then MASTER IDOC will be generated for each material . i.e. for 100 materials we get 100 MASTER IDOC’s. COMMUNICATION IDOC: These are the IDOC’s which are derived from MASTER IDOC. A COMMUNICATION IDOC is an IDOC which is generated for each receiver. OUTBOUND PROGRAM: A program which is used to start the process of data transfer from SX to RX. With the help of selection screen , MASTER IDOC will be generated and then COMMINICATION IDOC’s will be generated and will be sent to Receiver system. PROCESS CODE (OPEN SQL): Process code is a function module . It is available at receiver side. Processing code is responsible for receiving the data from IDOC and updating the data into data base tables. WHAT IS MESSAGE TYPE: It specify the type of the application from which IDOC’s are being used .The application may be material master or customer master and vendor master etc. WE81 is Tcode for defining a message type. Always IDOC type and Message type should be linked with each other. WE82 is Tcode used to create a link between message type and IDOC STEPS FOR IDOC AND MESSAGE TYPES Define segment ------------------- Define IDOC Type ------------------- Define message type ------------------- Link Message type and IDOC type ----------- MASTER IDOC: It is an internal table which consists of data to system to RX system. WE31 WE30 WE81 WE82 be sent from SX Suppose we are sending 100 materials from SX to RX , then MASTER IDOC will be generated for each material . i.e. for 100 materials we get 100 MASTER IDOC’s. Sending material master from source system to (800) to receiver (810) Sender System Step 1: Define Logical system (SALE) Step 2: Assign client to Logical System Step 3: Maintain RFC destinations (SM59) Step 4: Maintain PORT (WE21) Step 5: Maintain outbound partner profile (WE20) Step 6: Maintain Distribution model (BD64) Step 7: Run the Outbound Program Receiver System Step 1: Define Logical system (SALE) Step 2: Assign client to Logical System Step 3: Optional Step 4: Optional Step 5: Maintain inbound partner profile (WE20) Step 6: Not Required Step 7: Not Required Sender System means :800 Step 1:Go to SALE transaction Expand the Basic settings, Select Logical Systems and Double Click It gives the below screen and click on Enter. icon . It gives the below screen click on new entries button as below Enter logical system names as ECC_800 and ECC_810. Click on save button. Click on back, back. Sender System Step 2: Then click on assign client to logical system, Press ENTER. Double Click Client number 800 It gives the below screen, Find the Logical System .Replace our logical system name. Enter Sender Logical System name. Click on save, Click on Back. Double Click Client number 810. It gives the below screen, Find the Logical System .Replace our logical system name. Enter Receiver Logical System name. Click on save, Click on Back. Click on Back. Sender System Step 3: Steps to create RFC Destination: Go to Tcode- SM59. Select ABAP Connections folder Click on Create button. Give the name as ECC800_TO_Z810. Give some description. How to find the Target Host and System number Double Click on Right Click on sap logon icon. ECC 6 icon, Go to Properties. Indentify the Server name and System number. Give the Target Host and System Number. Press ENTER. The IP Address Automatically comes. Click on Logon and security tab. Specify below details. Click on save. Click on to test the connection. You will enter into remote or target 810 Client. Sender System Step 4: Maintaining the PORT - Go to WE21, Select Transaction RFC. Click on Create Button. Select own port name. Give any port name. Click on ENTER. Give the description and RFC destination here ECC800_TO_810. Then click on save it shows as below. Sender System Step 5: Then maintain the distribution outbound partner profile . Go to WE20 Select the folder partner type LS folder then click on create Specify the partner no as ECC_810 (Receiver LS) click on save immediately. The outbound parameters + symbol are ENABLING. Click on + symbol e Here specify massage type as MATMAS Receiver port as ZPORT1 Basic type as MATMAS05 Click on save. Select Transfer IDOC Immediately and give port number. Then click on save. Then go to receiver 810 client -- Maintain the Inbound Partner Profile Login in to 810 client Go to WE20 Select the folder partner type LS folder then click on create Specify the partner no as ECC_800 (Sender LS) click on save immediately. The inbound parameters + symbol are ENABLING. the inbound parameters by clicking on + symbol. Here specify massage type as MATMAS Process code as MATM Click on SAVE. Then click on save. Then go to Sender 800 client. Sender System Step 6: Then maintain the distribution model in BD64 as below Go to BD64 Give the has below. - Click on change Button or CTRL+F1 - Then click on create model view button Give the short text and Technical name and click on Enter. After creating display the name and click on save. Sender System Step 7: Then run the outbound program - Go to BD10 Tcode - Specify material no , message type , logical system and select checkbox as below Then click on execute (F8) button Sender System Step 8: Checking the status - Go to WE02 Give Give the screen a below - Click on execute of F8 Then the IDOC information is displayed below Double Click on IDoc, Expand DATA RECORDS,STATUS RECORDS FOLDER TO check data Checking the Status of receiver system810 - Go to WE02 - Click on execute of F8 - Then the IDOC information is displayed below (Double click it) - Double click on error record number 51 - Then click on Application log button - The errors will be clearly defined as below - Here the error is plant does not exist. - This error is related to functional, so, functional team will take care of this error. UNIT Test Case 1 for correct data : Lets create a new material and send it. - Go to MM01 Press enter select the BASIC DATA 1 check box press enter Then click on save button. A material will be created Then go to SENDOR SYSTEM (800) Execute the BD10 TCODE Give the material number as 1417 Then go to WE02 click on execute FILTERING: Whenever we send the data from source system to receivers system, by default all the IDoc’s and segments are received. Suppose if we want to receive only few IDoc’s or segments based on a particular value which is called as a filter value then it is called as filtering. Filtering is of two types: 1)IDoc filter 2)Segment filter. IDoc filter: Filtering the unwanted IDOC’S is called IDOC filtering. We need to specify a filter value in the distribution model(BD64), now IDoc’s will be generated only for that filter type which is called as IDoc filtering. STEPS: Go to BD64 Select model view as Zdm1. Expand that model view and sender system and receiver system. Expand the MATMAS message type. Double click on NO Filter set. Select data filtering. Click on the button create filter group. Now, Expand the data filtering. Expand the filter groups. Double click on the material type. A pop up will be raised. Click on ‘+’ symbol. Give the filter value as “FERT”, so that the IDOC’S will Be generated only for this material type. Press Enter and save the distribution model. TESTING: Create 5 materials in MM01. Create 2 materials of type ‘coupons’ and 3 materials of type ‘finished products’. Run the outbound program BD10. Give the material no range . EX: 1437 to 1441. Execute the programs. Goto receivers 810 client and check the status. Only materials of type FERT will be received because of filter value “FERT” maintained at the distribution model. 2)SEGMENT FILTERING Filtering the unwanted segments in an IDoc is called segment filtering. We need to specify the list of segments as segment filters, so that IDoc will be generated from all the segments except the segment filters. STEPS: Specify the list of the segments which are to be filtered out. Ex: Let us filter the segment ‘EIMARMM’ of message type MATMAS. Go to BD56. Specify the message type as MATMAS. Press enter. clicking on new entries. Specify sender logical system, receiver logical system, segment type. CUSTOM IDOC’S: Custom IDoc’s are generally copied from the standard IDoc by adding OR removing extra segments. We have two concepts available under custom IDoc’s. Steps to create an IDOC: Step1: First create the required segment in WE31 with some fields. Step2: Create an IDOC in WE30 by inserting all the above segments. Step1: Steps to create a segment. Go to WE31. Give the segment type as Z1KNA1. Click on the button create. Give short description. Give the list of the fields as below. Click on save and back. Click on edit from menu barset release. The segment definition is completed and it is released also Released status indicates that the segment definition is completed and it can be used to transfer the data. Similarly create one more segment by the name Z1KNBK. with the list of the below fields. Field name Data element Kunnr kunnr Banks banks Bankl bankl Save it and release it. Step2: Create BASIC IDOC TYPE from T-CODE WE30. Go to WE30 Give IDOC name as YDEBMAS05 Click on the button create. Give description and press enter. Click on the button create segment A pop-up is raised. Give the segment name as Z1KNA1. Give the minimum and maximum no. as ‘1’, because customer master will have single record. Select the check box if we want to make the segment as mandatory segment. Press enter. Now, Put the cursor on Z1KNA1, click on the button create. A pop-up is raised. Select the first radio button and press enter. Give the segment type Z1KNBK. Give the minimum no. as 1, maximum no. as 99999 because each customer will have more than 1 bank account. Press enter. Finally, the hierarchy should look as below. OR Step2: Create Extended Idoc TYPE Goto WE30. Give IDoc name as ZDEBMAS05. Select Extended Idoc radiobutton. Click on create. Give linked basic type as DEMAS05. Press enter. By default all the standard segments are copied. Put the cursor on any segment. EX: EIKNAIM. Click on create button. Give the custom segment name Min No=1 Max No=1 Press enter Click on save. Reduced IDoc Type: It is an IDoc which consists of only the required segments and fields. All the unwanted segments and filters are completely removed. ‘BD53’ is the Tcode for reduced IDoc. STEPS: Goto BD53. Give the message type as ZDEBMAS05_R. Click on the Create button. Give the message type reference as DEBMAS. Press enter. Give short description. Again press enter. All the list of the segments will be displayed in different colors. Color: RED ---------- Deselected segments / fields. Color: WHITE-------- Selected segments/ fields. Color: GREEN------- mandatory segments/fields. Put the cursor on any segment Ex E1KNA11, click on button SELECT. The color will turn from RED to WHITE which indicates that it is a required segment. Now double click on the segment, select the checkboxes for the required Fields and click on the select button. The color will turn from RED to WHITE which indicates that it is a required field. Press enter and save. CHANGE POINTERS It is a technique of sending required data i.e. materials or customers or vendors which are changed during a certain period of time is called change pointers. Steps required for change pointers: Activate change pointer centrally BD61 is the TCode. Activate change pointer for message type BD50 is the TCode. Activate change pointer for particular fields BD52 is the TCode. Already the fields will be available. If you want new fields to be added, then click on New Entries button and add the fieldname. But it is optional Run the TCode BD21 or the program RBDMIDOC. NOTE: - The changes are generally stored in 2 tables : CDHDR, CDPOS.
