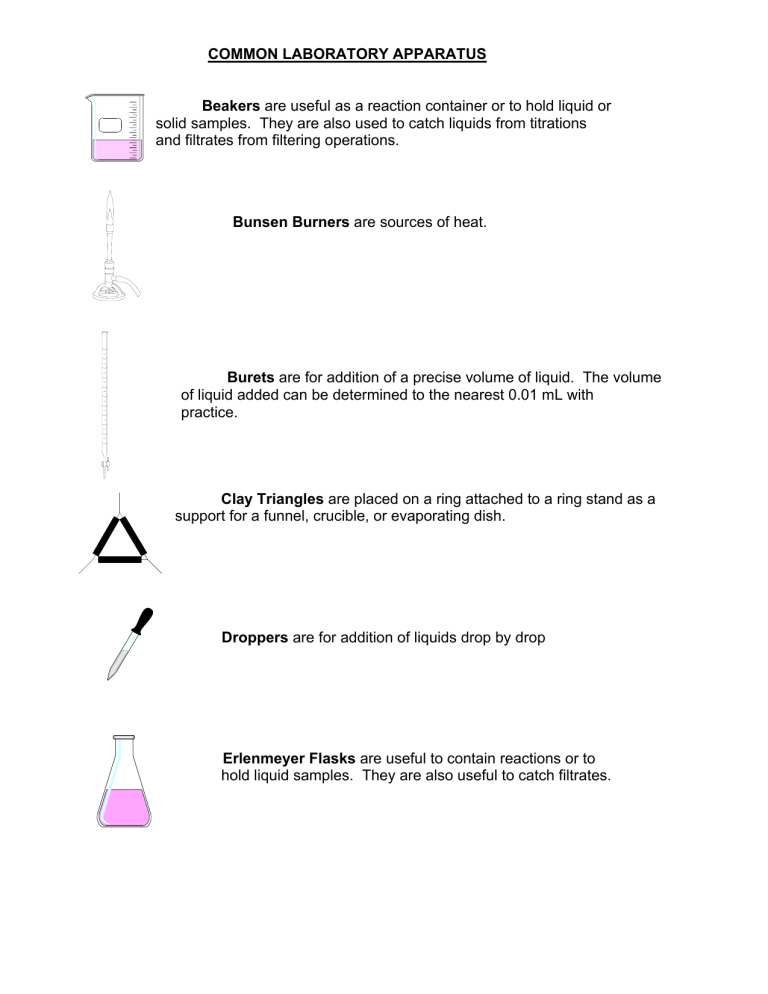
COMMON LABORATORY APPARATUS Beakers are useful as a reaction container or to hold liquid or solid samples. They are also used to catch liquids from titrations and filtrates from filtering operations. Bunsen Burners are sources of heat. Burets are for addition of a precise volume of liquid. The volume of liquid added can be determined to the nearest 0.01 mL with practice. Clay Triangles are placed on a ring attached to a ring stand as a support for a funnel, crucible, or evaporating dish. Droppers are for addition of liquids drop by drop Erlenmeyer Flasks are useful to contain reactions or to hold liquid samples. They are also useful to catch filtrates. Glass Funnels are for funneling liquids from one container to another or for filtering when equipped with filter paper. Graduated Cylinders are for measurement of an amount of liquid. The volume of liquid can be estimated to the nearest 0.1 mL with practice. Hot Plates can also be used as sources of heat when an open flame is not desirable. Pipets are used to dispense small quantities of liquids. Ring stand with Rings are for holding pieces of glassware in place. Test Tubes are for holding small samples or for containing ll - scale reactions. Test tube holders are for holding test tubes when tubes should not be touched Tongs are similar in function to forceps but are useful for larger items. Volumetric Flasks are used to measure precise volumes or to make precise dilutions. of liquid Dilution mark Wash bottles are used for dispensing small quantities of distilled water. Watch glasses are for holding small samples or for covering beakers or evaporating dishes. Wire Gauze on a ring supports beakers to be heated by Bunsen burners . LABORATORY EQUIPMENT Balances are used to determine the mass of a reagent or object. Spectrophotometers are used to measure the absorbance or transmittance of a liquid sample. Fume Hoods are used to ventilate noxious or harmful gases. COMMON LABORATORY TECHNIQUES Reading a Meniscus In all volumetric glassware (pipet, buret, volumetric flasks, graduated cylinder, etc.), it is necessary to read the level of a liquid. A liquid in a small-diameter container will form a meniscus or curve at the surface of the liquid. Usually this meniscus curves downward to a minimum at the center. To read the level of the liquid properly, the eye should be at the same level as the bottom of the meniscus. Sometimes a white card or a white card with a black mark on it will help a person to see the meniscus clearly. For volumetric flasks and transfer pipets, the volume of the glassware is exact when the bottom of the meniscus is even with the etched line. In a graduated cylinder or a buret, the volume is read from the graduations etched on the glass. To read the volume correctly, visualize the distance between the tenths of milliliter marks as divided into ten equal amounts. The volume is then found by reading the number of tenths of milliliters and estimating hundredths of milliliters. 46 46.33 47 100 Buret 91.7 90 Graduated Cylinder Care of Reagents The reagents used by all of the students can be contaminated by one careless student. Never put anything back into the reagent bottle. A certain amount of liquid can be obtained in several ways. 1) Pour from the reagent bottle into a beaker and draw up 6M NaOH the liquid into a pipet from the beaker. 2) Pour from the beaker into a graduated cylinder to within 0.1 ml of the Copper desired amount, adding the last drop with an eyedropper Sulfate filled from a beaker. Only use appropriately labeled spatulas for each reagent bottle. Pour the solid into a beaker, onto weighing paper, or into a weigh boat. Never pour excess back into the bottle. Reagents are to remain on the plastic on the center bench. This will 1)prevent spills and accidents from occurring at your work area, 2)save time for everyone because all of the chemicals will be relatively easy to find in a central location, and 3)make clean-up easier if a spill does occur. When you are finished using a chemical, replace the lid! A mix-up of lids could also contaminate an expensive chemical. Care and Use of Balances Each of the balances you will be using costs somewhere in the neighborhood of $2000 to $2500. Therefore, care must be exercised in using them. Below is a simple outline that will help you to use the balance more effectively, safely, and will assist in reducing the speed at which the Stockroom Manager’s hair is turning prematurely gray. 1. Select a suitable container (usually a weigh boat, weigh paper, or glassware) to weigh the chemical in. 2. Remove the balance cover. 3. Place the container on the balance pan and replace the balance cover. Replacing the balance cover will greatly reduce fluctuations in the balance reading! 4. Allow the balance reading to stabilize. Zero the balance by pressing the TARE button or bar which is located at the front of the balance. DO NOT hold down the tare button/bar! This will cause the balance to change units and you may end up weighing your chemical in units other then grams which will cause your data to be in error! 5. Remove the balance cover and carefully transfer the desired chemical to the container. If you use a spatula, use only a clean, dry spatula for obtaining dry chemicals. If you should spill a chemical on the balance pan, use the brush that is attached to the balance to clean the balance pan IMMEDIATELY! Chemicals left on the balance pan will corrode the pan. 6. Replace the balance cover and allow the balance reading to stabilize. In the event you weigh out too much chemical, remove the excess to a secondary container. NEVER return a chemical to its original container! There will always be some left over. Try to find someone else who needs it before disposing of it. 7. Discard chemicals as directed in each experiment (See the Safety and Disposal section for each experiment). 8. Record the balance reading in your notebook. 9. Remove the container from the balance pan and replace the balance cover. 10. Replace the appropriate lids on all reagent bottles when finished. Titration The titration procedure is accomplished by adding small amounts of one reactant to a beaker or flask containing the other until the reaction is completed. In an acid-base reaction, the reaction is complete when the amount of acid equals the amount of base. The experimenter is aware of this condition by the change in pH that occurs. The change in pH is indicated by a color change of an indicator or by a pH meter. In other types of reactions, the completion of the reaction is usually also indicated by a color change. Titrations are often accomplished using a buret. A small amount (~ 5 - 10 mL) of the solution is used to rinse a clean buret. The rinse solution is discarded. The buret is filled to just below the zero mark. The liquid level is read and recorded as the initial volume. A buret has zero at the top as shown in the figure on page 12. Small amounts of the solution are allowed to flow out of the buret into the flask by turning the stopcock. Often localized color changes will be evident for a short period of time. Mixing the solution by swirling the flask will usually cause the color to return to the original color. As the color lasts longer, the next addition of solution needs to be smaller. Close to the endpoint (reaction completion), the additions are one drop at a time. When the endpoint is reached, the liquid level is read and recorded as the final volume. The volume added is the final volume minus initial volume. Using A Bunsen Burner Lighting the Bunsen burner - Make sure the rubber tubing is connected to the Bunsen burner and the gas jet. Turn the gas valve until it is parallel to the gas jet. You should be able to hear the gas flow. Use a flint striker to cause a spark and ignite the gas. Adjusting the Bunsen burner - First, adjust the height of the flame using the gas valve at the bottom of the burner. For a clean burning flame, more air is required than is available from the gas exhaust. The air vents can be adjusted to produce an inner blue cone in the flame with no yellow tip. Too little air produces a sooty, orange-yellow tipped flame that is quite noisy. Too much air supply may cause the flame to separate from the burner and even blow itself out. The ideal working flame is bluish-green with a light blue cone and it burns quietly. High Temp. Cool Inner Region Air Vents Gas Valve To Gas Outlet
