Light flashing options - 3rd Brake Flasher Web Site
advertisement

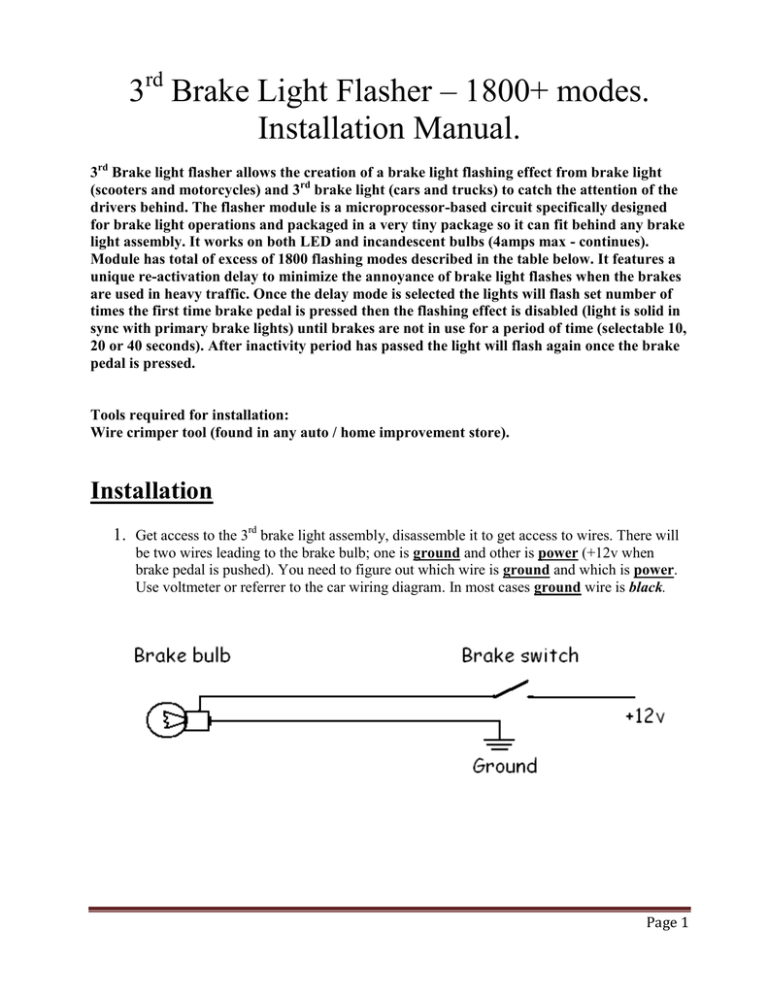
3rd Brake Light Flasher – 1800+ modes. Installation Manual. 3rd Brake light flasher allows the creation of a brake light flashing effect from brake light (scooters and motorcycles) and 3rd brake light (cars and trucks) to catch the attention of the drivers behind. The flasher module is a microprocessor-based circuit specifically designed for brake light operations and packaged in a very tiny package so it can fit behind any brake light assembly. It works on both LED and incandescent bulbs (4amps max - continues). Module has total of excess of 1800 flashing modes described in the table below. It features a unique re-activation delay to minimize the annoyance of brake light flashes when the brakes are used in heavy traffic. Once the delay mode is selected the lights will flash set number of times the first time brake pedal is pressed then the flashing effect is disabled (light is solid in sync with primary brake lights) until brakes are not in use for a period of time (selectable 10, 20 or 40 seconds). After inactivity period has passed the light will flash again once the brake pedal is pressed. Tools required for installation: Wire crimper tool (found in any auto / home improvement store). Installation 1. Get access to the 3rd brake light assembly, disassemble it to get access to wires. There will be two wires leading to the brake bulb; one is ground and other is power (+12v when brake pedal is pushed). You need to figure out which wire is ground and which is power. Use voltmeter or referrer to the car wiring diagram. In most cases ground wire is black. Page 1 2. Cut the power wire and connect flasher module RED wire to it. Make sure you use power wire end going to the car and not the bulb. 3. Now using provided quick splice connect attach flasher module BLACK wire to the ground wire. Page 2 4. Do not connect YELLOW wire yet. It is important to verify proper ground and power flasher module connections first. Push the brake pedal and watch the brake flasher internal LED to flash. If it does then power and ground connections are ok. If LED does not flash ground and power wires were not properly identified. Flasher module can be tested with smoke alarm 9V battery. Connect black and red wires to “–“ and “+” terminals of the battery. The internal LED should light up. 5. Once you verified the flasher internal LED lights up connect module YELLOW wire to the wire leading to the bulb. 6. Flasher hookup is now completed. Light flashing options: Number of times the light will flash – from one to fifteen. Light flashing frequency – fifteen different flashing frequencies. Deactivation Timeout setting – no time out, 10, 20 or 40 seconds reactivation timeout. Continues flashing – flashing pattern will repeat in 5, 10, 15 or 20 seconds. Or light will only play one flashing pattern per brake light activation. Or continues flashing. All above is user selectable. Mode changing procedure: 3rd brake flasher module has total of 1800+ different flashing modes. Use flasher white wires to switch the modes. Flasher switching procedure below listed below. You will have to configure four separate settings: 1. First setting is Deactivation Timeout which determines if the flashing pattern is disabled and for how long after the first push of the brake pedal (1 flash – no timeout, 2 flashes – 10 seconds, 3 flashes – 20 seconds and 4 flashes – 40 seconds.). In the 1 mode brake light will flash every time the brake pedal is pushed. Modes 2 through 4 will flash the brake light the Page 3 first time brake is applied. On the consecutive push of the brake pedal the light will turn ON but will not flash until you do not use brake for Timeout period of time. It prevents aggravating the drivers behind you in the heavy traffic with constant flash of the brake light. 2. Second setting is number of light flashes. You can select from 1 to 15. 3. Third setting is speed of the flashing. You can select from fast to slow with total of 15 different choices. 4. Forth setting is Continuous mode. There are 6 different modes. Mode 1 through 4 will repeat the flashing pattern with 6, 12, 18 and 24 seconds delayed between patterns. Mode 5 will disable continuous flashing and brake light will flash only once per brake pedal push. Mode 6 will flash continuously. Note that in Modes 1-4 and 6 the use of Deactivation time out is disabled because light is continuously flashing anyway. In order to switch the modes follow the steps: 1. Push the brake pedal so the brake light is illuminated (ask somebody to help you or put something heavy on the brake pedal). 2. The first time the brake pedal is pushed the brake light will play default flashing pattern. Then the brake light will stay ON and flasher internal LED will be OFF. 3. Quickly short and disconnect white wires to go into settings mode. Flasher will blink three times and switch OFF the car brake light. 4. As you read before, the first setting is Deactivation Timeout mode. As soon as you switched to the Settings mode where the flasher LED blinks three times (step #3 above) the unit will wait for as second and then blink number of times displaying current Deactivation mode value. So if the prior Deactivation mode was set to 1 then the internal LED will blink one time, if the mode was set to 2 then LED will blink twice and so on. 5. At this state you have two choices either change the setting or move on to the next one. 6. To change the setting quickly short two white wires together, next mode will be selected and flasher LED will blink according to the mode selected. 7. To confirm and save the setting short two white wires and hold it for about 2 seconds until the flasher’s internal LED will start rapid flashing. Internal LED will flash 10 times to confirm successful setting save. 8. Once the setting is saved the flasher will move on to the second parameter which is the number of flashes and the unit will blink accordingly. You can either change the setting by quickly shorting two white wires or short and hold to save the setting. 9. The next setting is flashing frequency. The unit will flash the internal LED the number of times you have selected prior and with the previously defined frequency. You have choice of 15 frequencies. Either change it or save it following the same procedure as you already did before. 10. The last setting is Continues flashing. Modes 1 through 4 will continue flashing with pause of 6, 12, 18 and 24 seconds. Mode 5 will only flash once and Mode 6 will provide continuously flashing. 11. Change or save the setting repeating procedure with shorting white wires for shorter or longer period of time. 12. Once the last setting has been set, the flasher will turn the internal LED on and then will flash selected pattern. 13. At this point configuration is completed and you can start using brake flasher. Repeat the steps above to change flasher configuration. Page 4


