TN009
PCB Design Guidelines for 3x3 LGA Accelerometers
Introduction
This technical note is intended to provide information about Kionix’s 3 x 3 mm LGA
packages and guidelines for developing PCB land pattern layouts. These guidelines are
general in nature and based on recommended industry practices. The user must apply
their actual experiences and development efforts to optimize designs and processes for
their manufacturing techniques and the needs of varying end-use applications. It should
be noted that with the proper PCB footprint and solder stencil designs, the package will
self-align during the solder reflow process.
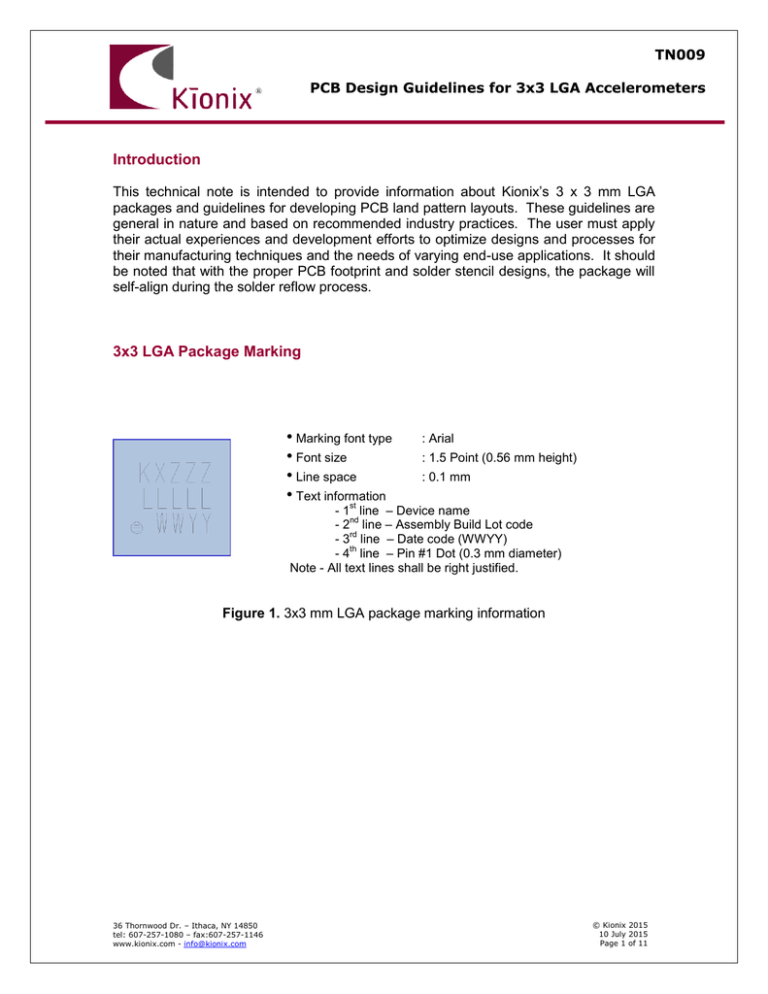
3x3 LGA Package Marking
• Marking font type
• Font size
• Line space
• Text information
st
: Arial
: 1.5 Point (0.56 mm height)
: 0.1 mm
- 1 line – Device name
nd
- 2 line – Assembly Build Lot code
rd
- 3 line – Date code (WWYY)
th
- 4 line – Pin #1 Dot (0.3 mm diameter)
Note - All text lines shall be right justified.
Figure 1. 3x3 mm LGA package marking information
36 Thornwood Dr. – Ithaca, NY 14850
tel: 607-257-1080 – fax:607-257-1146
www.kionix.com - info@kionix.com
© Kionix 2015
10 July 2015
Page 1 of 11
3x3 LGA Package Outline and Dimensions
The following diagrams show the outline of the Kionix’s LGA packages with
dimensions and tolerances. All dimensions and tolerances conform to ASME
Y14.5M-1994. All dimensions are in millimeters and angles are in degrees.
Figure 2. 10-pin 3 x 3 mm LGA package outline diagram with dimensions
© Kionix 2015
10 July 2015
Page 2 of 11
Figure 3. 16-pin 3 x 3 mm LGA package outline diagram with dimensions
Typical LGA packages expose metal traces on the package sides; so no solder material
should be allowed to contact the package sides.
There may be variation in the location and shape of the “PIN 1 ID”, for various product
packages with the same pin layout.
© Kionix 2015
10 July 2015
Page 3 of 11
Solder Pad Layer Dimensions
The solder pocket is defined by dimensions of the metal layers behind the solder
pad and the solder mask around the pad. There are two varieties of solder pad
design in the Kionix 3x3 LGA.
Table 1. For 3x3 products with 0.13mm substrates (KX023, KX23H, KXCJA)
Solder Mask (Cross Section "X-a")(µm)
Layer
Min
Nominal
Max
S/M
10
20
30
Solder Pad (Cross section "X-b")(µm)
Layer
Min
Nominal
Max
NI
3
12
Au
0.3
0.3
0.5*
* Absolute physical limit is 1.0 µm
Table 2. For 3x3 products with 0.21mm substrates (parts not in table 1)
Solder Mask (Cross Section "X-a")(µm)
Layer
Min
Nominal
Max
S/M
15
30
45
Solder Pad (Cross section "X-b")(µm)
Layer
Min
Nominal
Max
NI
3
12
Au
0.3
0.3
0.5*
* Absolute physical limit is 1.0 µm
© Kionix 2015
10 July 2015
Page 4 of 11
LGA PCB Layout Recommendations
Given the above 3 x 3 mm package dimensions, the following guidelines are
recommended:
The PCB should be designed with SMD (Solder Mask Defined) openings for the
LGA lands. These openings should be an identical mirror image of the bottom
pattern of the LGA package. The land size on the PCB should be 100% of the
device land.
The pin 1 indicator triangle that is exposed on the LGA substrate does not need
to be soldered to the PCB and should be left floating.
© Kionix 2015
10 July 2015
Page 5 of 11
LGA Solder Stencil Guidelines
A laser-cut, stainless steel stencil with electro-polished trapezoidal walls is
recommended.
Solder stencil thickness: 8-pin and 10-pin should be 0.125mm thick while the 16pin should be 0.102mm thick.
Solder stencil opening: 8-pin and 10-pin should be 0.05mm smaller per side than
corresponding pad openings while the 16-pin should be 0.25 x 0.35 mm.
If improved solder release is required, aperture walls can be trapezoidal and the
corners rounded.
1.375
0.35
0.30
1.20
0.65
Note: All units in mm
Figure 4. Example of a 10-pin 3 x 3 mm LGA solder stencil layout
Figure 5. Example of a 16-pin 3 x 3 mm LGA solder stencil layout
© Kionix 2015
10 July 2015
Page 6 of 11
PCB Via and Trace Placement
Vias are not needed for thermal dissipation, as our part doesn't generate much
heat. Therefore, only electrical vias are needed. If vias are not in the land pads,
capped, plugged, tented, un-capped or un-plugged vias can be used. To ensure
optimal performance, vias and traces should not be placed on the top layer
directly beneath the accelerometer. The following figures illustrate an example of
proper PCB via and trace placement. Obviously, each product will present its
own physical limitations for accelerometer placement and trace routing.
Therefore, these guidelines are general in nature. Engineering judgment should
be used to try to avoid placement directly beneath the accelerometer.
Figure 6. Via and Trace “Keepout” (Top Vew)
Figure 7. Via and Trace “Keepout” (Side View)
© Kionix 2015
10 July 2015
Page 7 of 11
Tape and Reel Dimensions
The following section provides information on the tape and reel used for shipping
Kionix’s 3 x 3 mm LGA accelerometers.
Package
LGA (3x3)
Tape Width Component Pitch Hole Pitch Reel Diameter
12mm
8mm
4mm
330mm
Figure 8. Dimensions of the reel
© Kionix 2015
10 July 2015
Page 8 of 11
© Kionix 2015
10 July 2015
Page 9 of 11
Direction of feed
Figure 9. Orientation of the parts in the carrier tape and direction of feed
© Kionix 2015
10 July 2015
Page 10 of 11
Revision History
Rev
2
3
4
Date
03-Jul-08
29-Sep-11
3-Jan-12
22-Mar-12
5
6
7
12-June-14
15-Oct-14
07-May-15
8
10-July-15
Description of Change
Initial release
Include 16 pin devices
Included 16 pin solder mask schematic
Added “Detail A” to illustrate metal lead dimension to
Figures 2,3,4
Added Solder Pad Layer Dimensions
Added No solder on side of package recommendation.
Updated Solder Mask Defined feature drawings, removed 8
pin
Renamed the document
"Kionix" is a registered trademark of Kionix, Inc. Products described herein are protected by patents issued or pending. No license is
granted by implication or otherwise under any patent or other rights of Kionix. The information contained herein is believed to be accurate
and reliable but is not guaranteed. Kionix does not assume responsibility for its use or distribution. Kionix also reserves the right to
change product specifications, application notes, and technical notes or discontinue any product at any time without prior notice. This
publication supersedes and replaces all information previously supplied.
© 2015 Kionix, Inc. – All rights reserved
© Kionix 2015
10 July 2015
Page 11 of 11


