2B701-813EN*G
Guidelines for cleaning,
disinfection, and sterilization
of transducers
This manual describes the cleaning, disinfection, and sterilization
procedures for the ultrasound transducer. For the operating precautions
and procedures for the transducers, refer to the operation manual for
each transducer.
Safety Precautions
1. Meaning of Signal Words
In this manual, the signal words DANGER, WARNING,
CAUTION are used regarding safety and other important
instructions. The signal words and their meanings are defined as
follows. Please understand their meanings clearly before reading this
manual.
Signal word
Meaning
!
DANGER
Indicates an imminently hazardous situation
which, if not avoided, will result in death or
serious injury.
!
WARNING
Indicates a potentially hazardous situation
which, if not avoided, could result in death or
serious injury.
! CAUTION
CAUTION
Indicates a potentially hazardous situation
which, if not avoided, may result in minor or
moderate injury.
Indicates a potentially hazardous situation which, if
not avoided, may result in property damage.
! CAUTION:
1. Precautions concerning cleaning, disinfection, and
sterilization.
1) Observe the following precautions to prevent infection.
• Wear protective gloves when performing cleaning.
• Wear sterile protective gloves when performing
disinfection or sterilization.
• Wear new protective gloves each time cleaning,
disinfection, and sterilization are performed.
• Clean the transducer before and after examination.
Disinfect or sterilize the transducer as required.
Note that local regulations may require that the
transducer be disinfected before sterilization.
• Sterilize the transducer and biopsy adaptor before and
after an ultrasound-guided biopsy procedure is
performed. Failure to do so may result in the
transducer and biopsy adaptor becoming sources of
infection.
2) After cleaning, rinse the transducer thoroughly with
purified water to remove all chemical residues. After
disinfection, rinse the transducer thoroughly with sterile
or deionized water to remove all chemical residues.
Chemical residues on the transducer may be harmful to
the human body.
3) After chemical cleaning or disinfection, dry the
transducer surfaces thoroughly.
4) After gas sterilization, degas the transducer. Gas
residues on the transducer may be harmful to the human
body.
5) The efficacy of the cleaning solutions, disinfectants, and
sterilizing gases is not guaranteed by TOSHIBA. Contact
the manufacturers for information on the activity of the
products.
Observe the following precautions to ensure the safety of patients as
well as operators when performing cleaning, disinfection, or
sterilization of the transducer.
!
WARNING:
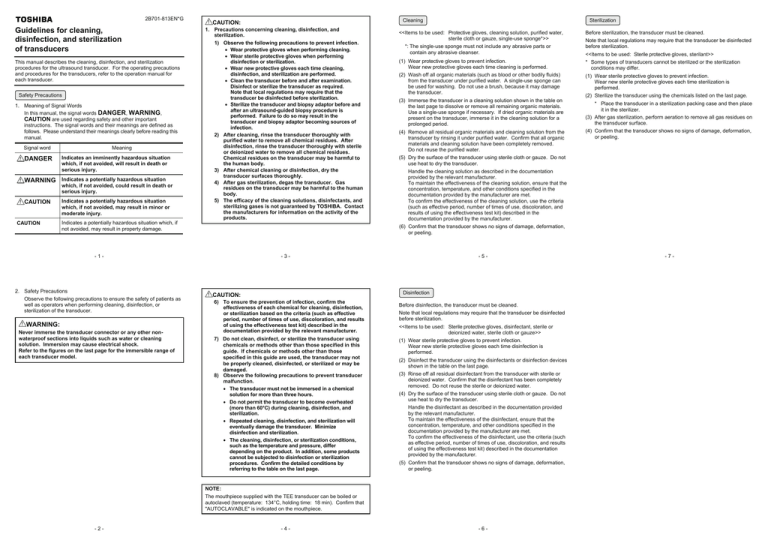
Never immerse the transducer connector or any other nonwaterproof sections into liquids such as water or cleaning
solution. Immersion may cause electrical shock.
Refer to the figures on the last page for the immersible range of
each transducer model.
<<Items to be used: Protective gloves, cleaning solution, purified water,
sterile cloth or gauze, single-use sponge*>>
*: The single-use sponge must not include any abrasive parts or
contain any abrasive cleanser.
Note that local regulations may require that the transducer be disinfected
before sterilization.
(1) Wear protective gloves to prevent infection.
Wear new protective gloves each time cleaning is performed.
* Some types of transducers cannot be sterilized or the sterilization
conditions may differ.
(2) Wash off all organic materials (such as blood or other bodily fluids)
from the transducer under purified water. A single-use sponge can
be used for washing. Do not use a brush, because it may damage
the transducer.
(3) Immerse the transducer in a cleaning solution shown in the table on
the last page to dissolve or remove all remaining organic materials.
Use a single-use sponge if necessary. If dried organic materials are
present on the transducer, immerse it in the cleaning solution for a
prolonged period.
(4) Remove all residual organic materials and cleaning solution from the
transducer by rinsing it under purified water. Confirm that all organic
materials and cleaning solution have been completely removed.
Do not reuse the purified water.
<<Items to be used: Sterile protective gloves, sterilant>>
(1) Wear sterile protective gloves to prevent infection.
Wear new sterile protective gloves each time sterilization is
performed.
(2) Sterilize the transducer using the chemicals listed on the last page.
* Place the transducer in a sterilization packing case and then place
it in the sterilizer.
(3) After gas sterilization, perform aeration to remove all gas residues on
the transducer surface.
(4) Confirm that the transducer shows no signs of damage, deformation,
or peeling.
(5) Dry the surface of the transducer using sterile cloth or gauze. Do not
use heat to dry the transducer.
Handle the cleaning solution as described in the documentation
provided by the relevant manufacturer.
To maintain the effectiveness of the cleaning solution, ensure that the
concentration, temperature, and other conditions specified in the
documentation provided by the manufacturer are met.
To confirm the effectiveness of the cleaning solution, use the criteria
(such as effective period, number of times of use, discoloration, and
results of using the effectiveness test kit) described in the
documentation provided by the manufacturer.
-3-
! CAUTION:
6) To ensure the prevention of infection, confirm the
effectiveness of each chemical for cleaning, disinfection,
or sterilization based on the criteria (such as effective
period, number of times of use, discoloration, and results
of using the effectiveness test kit) described in the
documentation provided by the relevant manufacturer.
7) Do not clean, disinfect, or sterilize the transducer using
chemicals or methods other than those specified in this
guide. If chemicals or methods other than those
specified in this guide are used, the transducer may not
be properly cleaned, disinfected, or sterilized or may be
damaged.
8) Observe the following precautions to prevent transducer
malfunction.
• The transducer must not be immersed in a chemical
solution for more than three hours.
• Do not permit the transducer to become overheated
(more than 60°C) during cleaning, disinfection, and
sterilization.
• Repeated cleaning, disinfection, and sterilization will
eventually damage the transducer. Minimize
disinfection and sterilization.
• The cleaning, disinfection, or sterilization conditions,
such as the temperature and pressure, differ
depending on the product. In addition, some products
cannot be subjected to disinfection or sterilization
procedures. Confirm the detailed conditions by
referring to the table on the last page.
-5-
Disinfection
Before disinfection, the transducer must be cleaned.
Note that local regulations may require that the transducer be disinfected
before sterilization.
<<Items to be used: Sterile protective gloves, disinfectant, sterile or
deionized water, sterile cloth or gauze>>
(1) Wear sterile protective gloves to prevent infection.
Wear new sterile protective gloves each time disinfection is
performed.
(2) Disinfect the transducer using the disinfectants or disinfection devices
shown in the table on the last page.
(3) Rinse off all residual disinfectant from the transducer with sterile or
deionized water. Confirm that the disinfectant has been completely
removed. Do not reuse the sterile or deionized water.
(4) Dry the surface of the transducer using sterile cloth or gauze. Do not
use heat to dry the transducer.
Handle the disinfectant as described in the documentation provided
by the relevant manufacturer.
To maintain the effectiveness of the disinfectant, ensure that the
concentration, temperature, and other conditions specified in the
documentation provided by the manufacturer are met.
To confirm the effectiveness of the disinfectant, use the criteria (such
as effective period, number of times of use, discoloration, and results
of using the effectiveness test kit) described in the documentation
provided by the manufacturer.
(5) Confirm that the transducer shows no signs of damage, deformation,
or peeling.
NOTE:
The mouthpiece supplied with the TEE transducer can be boiled or
autoclaved (temperature: 134°C, holding time: 18 min). Confirm that
"AUTOCLAVABLE" is indicated on the mouthpiece.
-2-
Before sterilization, the transducer must be cleaned.
(6) Confirm that the transducer shows no signs of damage, deformation,
or peeling.
-1-
2. Safety Precautions
Sterilization
Cleaning
-4-
-6-
-7-
Precautions for use
• Wear protective gloves when
performing cleaning.
• Wear sterile protective gloves
when performing disinfection or
sterilization.
• Wear new protective gloves
each time cleaning, disinfection,
or sterilization is performed.
• After chemical cleaning, rinse
the transducer thoroughly with
purified water and then dry it.
• After chemical disinfection, rinse
the transducer thoroughly with
sterile water or deionized water
and then dry it.
Efficacy and effectiveness of
the cleaning, disinfection, and
sterilizing agents
• Contact the manufacturer of the
relevant chemical for the
efficacy of each cleaning,
disinfection, or sterilizing agent.
• Determine the effectiveness of
each agent based on the
criteria described in the
documentation supplied with the
agent.
Usable chemicals
Cleaning
Chemical
name/type
Enzyme
Ethanol
Isopropyl
alcohol
Ethanol
Isopropyl
alcohol
Trade name
CIDEZYME®
Rapid
MultiEnzyme
cleaner
ANIOSYME
DD1
neodisher®
mediclean
Tristel
Pre-Clean
Wipes
Manufacturer
J&J
3M
Company
Laboratories
ANIOS
DR.
WEIGERT
GmbH &
Co. KG
Tristel
Solutions
Limited
Concentration
(Dilution ratio)
0.8%
(125)
1%
(100)
0.5%
(200)
1%
(100)
Working
solutions
80%
(original
solution)
5 min.
10 min.
Wiping
only
Time
1 min.
10 min.
High-Level Disinfection*6
Disinfection
*6
Didecyl dimethyl
Isopropanol/
ammonium chlorides/
Didecyl
Quaternary
dimethyl
ammonium
ammonium
compounds
chlorides
Glyoxal/
Glutaral/
Didecyl
dimethyl
ammonium
chlorides
Succindialdehyde
WIP'
ANIOS
Dr. Schumacher
GmbH
Laboratories
ANIOS
Lysoform
Disinfection
Ltd.
Schülke &
Mayr
GmbH
70%
(original
solution)
Working
solutions
Working
solution
2%
(50)
10%
(10)
Wiping
only
Wiping
only
Wiping
only
Wiping
only
Room
temperature
Room
temperature
Room
temperature
Room
temperature
Room
temperature
Room
temperature
Room
temperature
Room
temperature
Humidity
Normal
humidity
Normal
humidity
Normal
humidity
Normal
humidity
Normal
humidity
Normal
humidity
Normal
humidity
Normal
humidity
OrthoPeroxygen
phthalaldehyde
CIDEX
®
Lysoformin™ Gigasept ®
® PLUS
CIDEX
3000
FF
28 day
solution
CLEANISEPT®
WIPES
Temperature
Glutaraldehyde
15 min.
15 min.
Room
Room
temperature temperature
Normal
humidity
Normal
humidity
J&J
J&J
3.4%
2.4%
(working (working
solution) solution)
Room
temperature
gigasept ®
PeraSafe™ *1 FF (new)
gigasept®
PAA
concentrate
CIDEX ®
OPA
VirKon ®
J&J
DuPont
DuPont
0.55%
(working
solution)
1%
(100)
1.62%
(61.7)
12 min.
45 min. 20 min.
Hydrogen
Succinperoxide,
Peracetic acid dialdehyde
Peracetic
acid,
Hydrogen
peroxide,
Acetic
acid
10 min.
10 min.
5%
(20)
15 min.
Normal
humidity
Normal
humidity
Normal
humidity
Normal
humidity
Hydrogen
peroxide
Chlorine
dioxide
Peracetic acid
NU-CIDEX ®
Anioxyde
1000
Tristel One
Shot
Solution/
Tristel
Fusion
Tristel
Sporicidal
Wipes/Tristel
Rinse Wipes
Trophon
EPR™
J&J
Laboratories
ANIOS
Tristel
Solutions
Limited
Tristel
Solutions
Limited
Nanosonics
Limited
0.35%
(working
solution)
0.15%
(working
solution)
0.012%
(1 sachet in
5 liters of
water)
Schülke & Schülke &
Mayr
Mayr
GmbH
GmbH
2%
(a doublechambered
bottle into 5
liters of water)
5 min.
30 min.
5 min.
Room
temperature
Room
temperature
Room
temperature
Normal
humidity
Normal
humidity
Normal
humidity
5 min.
Room
Room
Room
Room
Room
temperature temperature temperature temperature temperature
Normal
humidity
Sterilization*6
Normal
humidity
Use the
disinfectant
cartridges
specifically
designed
for the
disinfection
Wiping
device.
only
There are
no
disinfectionrelated
Room
temperature parameters
(temperature,
Normal
humidity,
humidity
pressure,
or time) to
be set by
Normal
pressure the operator.
Working
solutions
Ethylene
oxide
gas*2
Hydrogen
peroxide
plasma*3
®
Ethylene STERRAD
50/100S/
oxide gas
200/NX
J&J
10%
Exposure
time:
7 hours
Aeration
time:
12 hours
50°C
50%
Operating
pressure
980 hPa
[gauge]
Use
STERRAD
system
cassettes
specifically
designed for
the sterilizer.
There are no
sterilizationrelated
parameters
(temperature,
humidity,
pressure, or
time) to be
set by the
operator.
Normal
pressure
Normal
pressure
Normal
pressure
Normal
pressure
Normal
pressure
Normal
pressure
Normal
pressure
Normal
pressure
Normal
pressure
Normal
pressure
Normal
pressure
Normal
pressure
Normal
pressure
Normal
pressure
Normal
pressure
Normal
pressure
Normal
pressure
Normal
pressure
Normal
pressure
Type D
OK
OK
OK
OK
OK
OK
OK
OK
OK
−
OK
OK
OK
OK
OK
OK
OK
OK
OK
OK
OK
OK
OK
PSM-20CT/25AT/30BT
PSM-37AT/37CT/50AT/70AT
Type D
OK
OK
OK
OK
OK
OK
OK
OK
OK
−
OK
OK
OK
OK
OK
OK
OK
OK
OK
OK
OK*8
OK
OK
PLF-308P, PLG-308P
PVM-740RT, PVL-715R/715RT
Type D
OK
OK
OK
OK
OK
OK
OK
OK
OK
−
OK
OK
OK
OK
OK
OK
OK
OK
OK
OK
−
OK
OK
PC-19M
Type A
OK
OK
OK
OK
−
OK
OK
OK
OK
−
OK
−
OK
OK
OK
OK
OK
OK
OK
OK
−
−
−
Pressure
Model name
*4
Immersible
range
PVF-738F/738H/745V
PLG-506M/805S
PVG-366M/381M/681S/720S
PVG-600S/601V/630V
PLQ-703A/805A/1203A
PVQ-375A/381A/641V/662A/674A
PLM-503AT/703AT/805AT
PLM-1202S/1204AT
PVF-381MT/620ST/575AT
PVM-375AT/381AT/620ST/621VT
PVM-651VT/656AT/662AT/672AT
PC-50V
Type A
OK
OK
OK
OK
OK
OK
OK
OK
OK
−
OK
−
OK
OK
OK
OK
OK
OK
OK
OK
−
−
−
PEM-508MA*5
Type B
OK
−
−
−
OK
−
−
−
−
−
OK
OK
−
−
−
−
−
−
−
−
−
−
−
*5
Type E
OK
−
−
−
OK
−
−
−
OK
−
OK
OK
OK
OK
−
−
OK
−
−
−
−
OK
−
PEF-510MA*5
Type C
OK
OK
−
−
OK
−
−
−
OK
−
OK
OK
OK
OK
OK
OK
OK
OK
OK
−
−
−
−
PEM-508SC
SMA-736SA
Type F
OK
OK
OK
OK
OK
OK
OK
OK
OK
−
OK
OK
OK
OK
−
−
OK
OK
OK
OK
−
−
−
PVM-375MV
Type D
OK
OK
OK
−
OK
OK
−
−
OK
OK
OK
OK
OK
OK
OK
OK
OK
OK
OK
−
OK
−
−
PEF-704LA*7
Type C
OK
−
−
−
OK
−
−
−
OK
−
OK
OK
OK
OK
−
−
OK
−
−
−
−
OK
−
Type D
OK
OK
OK
OK
OK
OK
OK
OK
OK
−
OK
OK
OK
OK
OK
OK
OK
OK
OK
OK
−
OK
OK
PVM-787LA
*7
OK : Use of the chemical is permitted.
*1:
*2:
*3:
*4:
–
: Use of the chemical is not permitted.
*5: The attached mouthpieces can be boiled or autoclaved. (Temperature: 134°C, Holding time: 18 min)
Make sure that "AUTOCLAVABLE" is indicated on the mouthpieces.
*6: Note that local regulations may require that the transducer be disinfected before sterilization.
*7: Sterilize the transducer before and after use.
*8 : For transducers with a thin cable, use a Trophon EPRTM with a serial number beginning
with 24100 or higher or a probe cable clamp "T-Clamp". Please contact your Trophon EPRTM
representative for further information.
PeraSafe™ may be classified as a sterilizing agent or as a high-level disinfectant depending on the local regulations.
After sterilization, thoroughly degas the transducer to remove all gas residues on the transducer.
Note that the label on the transducer may fade and the connector handle may become difficult to turn. These are not abnormalities.
When multiple model names are referred to, they are abbreviated. For example, "PVG-366M and PVG-381M" is abbreviated as "PVG-366M/381M".
For the transducers supported by each diagnostic ultrasound system, refer to the operation manual supplied with the diagnostic ultrasound system.
● Type A (PC-19M etc)
● Type B (PEM-508MA)
● Type C (PEF-510MA etc)
● Type D (PLM-703AT etc)
● Type E (PEM-508SC etc)
● Type F (SMA-736SA)
Ferrite core*
Immersible range
Immersible
range
Trademarks
This manual may include trademarks or registered trademarks
of companies other than Toshiba.
For Europe:
Zilverstraat 1, 2718 RP
Zoetermeer, The Netherlands
TOSHIBA MEDICAL SYSTEMS EUROPE B.V.
http://www.toshiba-europe.com
EC
REP
For other countries, please contact your local distributor.
Immersible range
Immersible range
Immersible range
* The ferrite core may not be provided
depending on the system to which the
transducer is connected.
Never immerse the non-waterproof sections of the transducer into liquids such as water or cleaning solution. Immersion may cause electrical shock.
1385, SHIMOISHIGAMI, OTAWARA-SHI, TOCHIGI-KEN 324-8550, JAPAN
Immersible range
2B701-813EN*G
© TOSHIBA MEDICAL SYSTEMS CORPORATION 2006-2013
ALL RIGHTS RESERVED

