instructions for use
advertisement
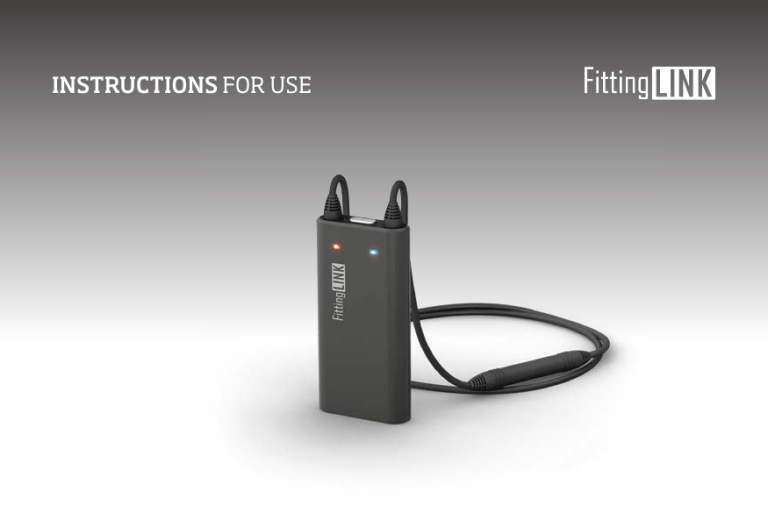
INSTRUCTIONS FOR USE Thank you Indications for Use Thank you for choosing our product as your means to fast, reliable fitting. To support your efforts, we have put great care and attention into making sure that FittingLINK is of the highest quality and is easy to use and maintain. FittingLINK is an accessory to fitting software used when programming wireless hearing instruments. FittingLINK is intended for wireless transfer of fitting data between the hearing instruments and the device running the fitting software. FittingLINK can be connected to the device running the fitting software through the provided Bluetooth adaptor or USB cable. FittingLINK ensures a fast and reliable connection directly between the PC and the client’s hearing instruments via Bluetooth technology. In the fitting software you will find instructional videos on how to use FittingLINK. We recommend that you read this manual carefully before you start to use FittingLINK, in order to achieve the maximum benefit. The manual contains important information about preparing and using FittingLINK on your PC. It describes the most frequently used functions, which must be understood before you start to use FittingLINK. The manual also contains instructions and important information about the handling of your FittingLINK and FittingLINK charger. For specific information about how to use FittingLINK with your fitting software, please refer to the documentation delivered with your fitting software (e.g. installation handbooks, help files or instructional videos). If you have any questions about the use, care, or maintenance of FittingLINK, please contact your supplier’s support function. FittingLINK is intended to be used by Hearing Care Professionals and hearing instrument users. Contents IMPORTANT NOTICE Please familiarize yourself with the entire content of this booklet before using your FittingLINK. It contains instructions and important informa­tion about the use and handling of your FittingLINK. Instrument view 7 Package content 8 Warnings10 Basic functions - first-time use 14 Turning FittingLINK ON/OFF 15 How to charge FittingLINK 16 Charging FittingLINK with the charger and charging cradle 18 Charging FittingLINK with the charging cradle and USB cable 19 Charging FittingLINK without the charging cradle 21 Battery low indicator 22 Connect to a PC 24 Connect to a PC via the Bluetooth adaptor 25 How to re-establish pairing between FittingLINK and the Bluetooth adaptor 26 Connect to a PC via the USB cable 29 FittingLINK and your fitting software 30 How to use FittingLINK 31 How to use FittingLINK on children How to use FittingLINK for coupler-based verification using hearing instrument analyzers Overview of the LED indicators Cleaning and maintenance Technical information FittingLINK Technical information Bluetooth adaptor Technical data FittingLINK 38 Instrument view ON/OFF 40 42 46 47 50 52 Front LED indicator - red Top LED indicator 6 Power supply (and USB port) ON/OFF button 7 Neck loop Front LED indicator - blue Package content FittingLINK – what is in the box? The FittingLINK box consists of the following elements: Bluetooth adaptor Clip Box 1 Box 2 Box 3 Charger* USB cable 3m Charging cradle InstructIons for use This guide (Instructions For Use) 8 * Contents may vary depending on country. 9 Warnings Warnings You should familiarize yourself with the following general warnings and the entire contents of this booklet before using your FittingLINK. Products to be connected to external equipment When using the USB cable always insert the cable into FittingLINK before connecting the cable to other equipment. The safety of recharging batteries with the USB cable is determined by the external equipment. When the USB cable is connected to mains-operated equipment, this equipment must comply with IEC 60065, IEC 60950-1, IEC 60601-1 or equivalent safety standards. For safety reasons, only recharge the battery with original FittingLINK accessories. If third party equipment is used, safety cannot be guaranteed. 10 Explosives and heat exposure There is a risk that the battery will explode and cause serious injury if FittingLINK is exposed to excessive heat. Never expose FittingLINK to extreme heat by putting it in the oven, microwave, burning it or leaving it inside a parked car in the sun. The operating temperature for FittingLINK is between 5 and 40° C. Choking hazards FittingLINK is not a toy and therefore should be kept out of the reach of children and anyone else who might swallow parts or otherwise cause injury to themselves. If a part is swallowed, see a doctor immediately. Interference and active implants FittingLINK is designed to comply with the most stringent Standards of International Electromagnetic Compatibility. However, FittingLINK might cause interference with other medical devices, such as defibrillators and pacemakers. 11 Warnings Warnings • Please contact the manufacturer of your implantable device for information about the risk of disturbance. • Immediately remove FittingLINK if interference is suspected and seek medical advice. Interference can also be caused by power line disturbances, electromagnetic fields from other devices, radio signals and electrostatic discharges. Please note that other active FittingLINK devices and wireless hearing instrument accessories in proximity may create interference and should be turned off. Use of the neck loop The neck loop is an antenna for the magnetic induction link to the hearing instruments. If the neck loop breaks, it cannot be repaired and must be replaced immediately. Consult your local supplier for replacement. Please refer to “How to use FittingLINK on children”. Battery safety and replacement Do not attempt to open FittingLINK, as it may damage the battery. Never attempt to replace the battery. If battery replacement is needed, please return your device to the supplier. The service guarantee is void if there are signs of tampering. The battery is tested and in compliance with IEC 62133. If the neck loop should accidentally get caught on something while the client is wearing it, the neck loop is constructed to release automatically. Therefore, never try to shorten or modify the neck loop in an unauthorized way. Always use the provided clip to shorten the length of the neck loop. 12 13 Basic functions - first-time use Turning FittingLINK ON/OFF Insert the USB cable in the bottom of the charging cradle and the charger is ready for use. Power on Press the ON/OFF button on top of FittingLINK for approx. 2 seconds until you see a green steady light from the top LED and a short red and blue flash from the front LED indicators. The LED lights indicate that FittingLINK is powered on and you can release the ON/OFF button. If FittingLINK cannot power on, make sure it is charged. If the top LED shows a red light instead of the green light the battery is running low (steady red light) or very low (flashing red light) and FittingLINK should be charged. Please refer to “See how to charge FittingLINK”. Power off Press and hold the ON/OFF button on top of FittingLINK for approx. 2 seconds until the top LED indicator turns off. POWER 14 15 How to charge FittingLINK FittingLINK charging indicator FittingLINK uses an internal rechargeable battery. FittingLINK can be charged either by using the provided charger and charging cradle or by using the USB cable provided. Charging Top LED indicator Device on and fully charged When charging FittingLINK for the first time, it should be left to charge for at least two hours even if the top LED indicator on the device shows that the battery is fully charged. We recommend that you turn off and store FittingLINK in the charging cradle whenever it is not in use, to ensure the best possible performance. It is safe to leave FittingLINK in the charging cradle overnight – the battery cannot be overcharged. 16 Description Device on and charging Device off and charging Once fully charged, the LED will be off Steady Flash 17 Charging FittingLINK with the charger and charging cradle Charging FittingLINK with the charging cradle and USB cable Simply place FittingLINK in the charging cradle when you want to charge FittingLINK with the provided charger and charging cradle. Remember to connect the charger to a power outlet. As soon as the power is switched on, FittingLINK will start charging. When charging FittingLINK with the provided charging cradle and the USB cable, place FittingLINK in the charging cradle and connect the USB cable to a USB port on your PC. 18 19 Please note that if you charge via a USB hub, some hubs do not deliver enough power to actually charge FittingLINK. In this case we recommend use of the provided charger instead. Only recharge FittingLINK using the provided charger or a stabilized USB hub/charger that provides 5VDC and ≥500 mA. Charging FittingLINK without the charging cradle If you prefer not to use the charging cradle when charging FittingLINK, you have the option to insert the USB cable directly into FittingLINK instead of the charging cradle. IMPORTANT INFORMATION When using the USB cable, always insert the USB cable into FittingLINK before connecting the cable to other equipment. 20 21 Battery low indicator FittingLINK will indicate low battery (approx. 20 minutes programming capacity left) with a steady red light, and very low battery (approx. 5 minutes programming capacity left) with a flashing red light. The battery should not be drained completely. Keeping the battery fully charged will prolong the capacity of the battery. The battery cannot be replaced by the user. The battery capacity is up to 8 hours of typical daily use. Battery charge time is 2 hours for complete charge, using the provided power supply. Battery low indicator Top LED indicator Description Low battery – approx. 20 minutes capacity left Very low battery – approx. 5 minutes capacity left Steady Flash To ensure the best possible performance, we recommend that you turn off and store FittingLINK in the charging cradle whenever it is not in use. 22 23 Connect to a PC Connect to a PC via the Bluetooth adaptor You can connect FittingLINK to your PC either by using the provided Bluetooth adaptor or the USB cable. Make sure that FittingLINK is turned OFF. The Bluetooth adaptor enables you to connect FittingLINK wirelessly to your computer. However, in some locations Bluetooth technology is not allowed. When this is the case, simply connect FittingLINK with the computer via the provided USB cable. Before you start connecting FittingLINK to a PC for the first time, please make sure that you have the latest version of your fitting software installed on the PC. Please also make sure that FittingLINK is fully charged. See “How to charge FittingLINK”. Please note that the provided Bluetooth adaptor connects only to FittingLINK and that FittingLINK only connects to the Bluetooth adaptor provided. To obtain wireless connection between FittingLINK and your PC, simply plug the provided Bluetooth adaptor into a USB port on your PC and turn the PC ON. FittingLINK has already been paired by the manufacturer with the Bluetooth adaptor provided in the box set. However the first time you connect to a PC, a message may appear on the screen and inform you that the applicable driver is being installed. Allow the installation to run before you proceed. Now turn ON FittingLINK. See "Turning FittingLINK ON/OFF". FittingLINK is now ready for programming compatible wireless hearing instruments. 24 25 How to re-establish pairing between FittingLINK and the Bluetooth adaptor FittingLINK has been paired by the manufacturer with the adaptor provided in the box set. If for some reason the PC running your fitting software does not recognize FittingLINK, you may have to re-establish the pairing between FittingLINK and the Bluetooth adaptor. In this case please close the fitting software before you continue. 1. Press and hold the pairing button on the Bluetooth adaptor for five seconds until the LED lights up with a flashing blue light. 2. Press the ON/OFF button on FittingLINK for five seconds and the top LED will light up with a flashing blue light. The pairing will begin automatically. FittingLINK must be close to the Bluetooth adaptor (approx. 10 cm) while the pairing takes place. 3. When the pairing is successfully completed the adaptor LED will show steady blue (until the fitting software is turned on) while the top LED on FittingLINK shows steady blue for approximately 10 seconds. Please note that FittingLINK can only be paired to a single Bluetooth adaptor at a time and vice versa. Pairing button 26 27 ON/OFF Pairing Top LED indicator Description FittingLINK in pairing mode To connect FittingLINK to your PC with the USB cable, insert the USB cable in the USB port in the bottom of FittingLINK and then insert the other end of the cable in a USB port on your PC. Turn ON your PC and then turn ON FittingLINK. Open your fitting software, detect and select FittingLINK as your programming device. It is only necessary to perform and complete this selection procedure the first time. Pairing complete Flash Connect to a PC via the USB cable Steady FittingLINK is now ready for programming wireless hearing instruments. When the pairing is finished, open your fitting software, detect and select FittingLINK as your programming device. It is necessary to perform and complete this selection procedure only once. Please note, you can leave the Bluetooth adaptor in your PC while connecting via the USB cable. FittingLINK is now ready for programming the hearing instruments. IMPORTANT NOTICE If you connect the USB cable to a non-powered USB hub, FittingLINK may not charge. It is recommended to connect the USB cable directly to your PC. 28 29 FittingLINK and your fitting software How to use FittingLINK When opening your fitting software the first time after FittingLINK has been installed on the PC, it will be detected as a programming device. FittingLINK has been designed to offer you the best possible daily use during programming sessions with and without your clients. Depending on which fitting software you are using, FittingLINK is either automatically added as an option on the "Detect button" or needs to be manually detected and selected as programming device in the "Preferences" menu. For specific information about how to use FittingLINK with your fitting software, please refer to the documentation delivered with your fitting software (e.g. installation handbooks, help files or instructional videos). Programming without a client When you want to program hearing instruments without a client wearing them, turn ON FittingLINK. cm/ 5-10 . 2-4 in Place FittingLINK with the neck loop flat on a table and the hearing instruments on each side of the neck loop as shown in the drawing. When you program hearing instruments, the neck loop must always be closed as shown in the drawing. 30 31 5-10 cm 2-4 in / . Make sure that the neck loop is not curled or touching any electrical wires or equipment and that the hearing instruments are not touching the neck loop. At the end of the session and before disconnecting or removing FittingLINK make sure that you have saved your programming to the hearing instruments. The optimal placement of the hearing instruments is on the outside of the neck loop, between 5-10 cm/2-4 in. from the neck loop as shown in the drawing. Please consult the fitting software for further guidance. The distance between FittingLINK and the Bluetooth adaptor in your PC can be no more than 10 meters (in direct line of sight). Devices and installations such as power cables, TVs, PC monitors, LED light bulbs and other devices emitting magnetic noise might decrease the programming performance if placed too close to FittingLINK. Likewise a table made of or containing a lot of metal, may lead to decreased performance. Please note that other active FittingLINK devices and wireless hearing instrument accessories in proximity may create interference and should be turned OFF. If you experience decreased performance, we recommend that you relocate FittingLINK or turn off possible sources of interference. 32 33 Programming with a client When you want to program hearing instruments while your client is wearing them, please make sure that FittingLINK is sufficiently charged. For easy placement, the neck loop can be opened, as shown on the drawing below, while placing FittingLINK around the client's neck. When opening the neck loop, pull the connectors apart. Do not pull the neck loop antenna. When you program hearing instruments, the neck loop must always be closed as shown in the drawing to the right. The distance between FittingLINK and the Bluetooth adaptor in your PC can be no more than 10 meters (in direct line of sight). Devices and installations such as power cables, TVs, PC monitors, LED light bulbs and other devices emitting magnetic noise might decrease the programming performance if placed too close to FittingLINK. Please note that other active FittingLINKs and wireless hearing instrument accessories in proximity may create interference and should be turned off. 34 35 If you experience decreased performance, we recommend that you turn off possible sources of interference. At the end of the session and before disconnecting or removing FittingLINK make sure that you have saved your programming to the hearing instruments. Please consult the fitting software for further guidance. 36 How to use FittingLINK on children For children who are old enough to provide verbal feedback regarding their hearing instrument, it will be possible to use FittingLINK for programming, real-ear verification or fine-tuning. It is also possible to use FittingLINK with babies or small children. However, the programming process with infants and small children differs from adults since they are not able to provide verbal feedback on their hearing instruments’ sound quality. Therefore, it is recommended that the actual verification of the hearing instrument be done using the coupler-based verification method. See below for instructions. When working with children, it can be necessary to shorten the neck loop. Always use the provided clip to shorten the neck loop. Do not shorten or modify the neck loop in an unauthorized way. Please refer to the drawing on how to place the clip. 38 39 How to use FittingLINK for coupler-based verification using hearing instrument analyzers Place FittingLINK in the test chamber. Connect the hearing instrument to the 2cc coupler and place the hearing instrument 5-10 cm away from the outside of the neck loop, as shown here. Close the lid of the test chamber and proceed with the coupler-based verification. Please note that FittingLINK will not work in some test chambers, due to the chambers being too small to ensure the 5-10 cm distance, or due to electromagnetic interference. If this is the case, programming must be done using the hearing instrument programming cables and a non-wireless programming interface (e.g., EXPRESSlink). 40 41 Overview of the LED indicators How to read FittingLINK LED indicators. How to read the Bluetooth adaptor LED indicator. The top LED indicator is the battery status indicator. Bluetooth adaptor LED indicator Description Top LED indicator Description Bluetooth adaptor active FittingLINK on and battery fully charged Bluetooth adaptor searching for in-range FittingLINK Battery charging Bluetooth adaptor pairing Low battery Bluetooth adaptor inactive Very low battery Self test error - contact your supplier Steady Battery status Slow flash Fast flash Steady Flash LED off 42 43 The front LED indicators are programming status indicators. Programming status Front LED indicator Description Connected to right hearing instrument Communicating with right hearing instrument Connected to left hearing instrument Front LED indicator - red Front LED indicator - blue Communicating with left hearing instrument Not connected to the hearing instruments Steady Flash LED off 44 45 Cleaning and maintenance Technical information FittingLINK FittingLINK is a sealed device that requires minimum maintenance. To ensure high levels of hygiene always disinfect FittingLINK before a programming session begins. FittingLINK contains a radio transmitter using short-range magnetic induction technology, working at 3.84 MHz and a Bluetooth radio operating at 2.4 GHz. To disinfect, wipe FittingLINK and the neck loop with a 70% alcohol / 30% water solution. FittingLINK and the neck loop must never be washed or immersed in water or other liquids. The magnetic field strength of the transmitter at 3.84 MHz is < -15 dBμA/m @10m (measured in 10 kHz bandwidth) and the radiated power of the Bluetooth radio is < +8 dBm EIRP. The power supply, the charging cradle and the Bluetooth adaptor must be kept free of dirt or debris. These parts are to be cleaned with a soft dry cloth only. The emission power from FittingLINK is below international emission limits for human exposure. FittingLINK complies with international standards concerning electromagnetic compatibility. When FittingLINK is not in use, turn it OFF and store it in the charging cradle in order for it to be sufficiently charged and ready for the next fitting session. Due to the limited size available on the device, many of the relevant approval markings are found in this document. This device contains a module with: FCC ID: 2ACAHWLP020 IC: 11936A-WLP020 46 47 The device complies with Part 15 of the FCC rules and RSS-210 of Industry Canada. Operation is subject to the following two conditions: 1. This device may not cause harmful interference. 2. This device must accept any interference received, including interference that may cause undesired operation. Changes or modifications not expressly approved by the party responsible for compliance could void the user’s authority to operate the equipment. If this equipment does cause harmful interference to radio or television reception, which can be determined by turning the equipment off and on, the user is encouraged to try to correct the interference by one or more of the following measures: • Reorient or relocate the receiving antenna. • Increase the distance between the equipment and the receiver. • Connect the equipment to an outlet on a circuit different from that to which the receiver is connected. • Consult your supplier for help. NOTE: This equipment has been tested and found to comply with the limits for a Class B digital device, pursuant to Part 15 of the FCC rules. These limits are designed to provide reasonable protection against harmful interference in a residential installation. This equipment generates, uses and can radiate radio frequency energy and, if not installed and used in accordance with the instructions, may cause harmful interference to radio communications. However, there is no guarantee that interference will not occur in a particular installation. 48 49 Technical information Bluetooth adaptor This device contains a module with: FCC ID: DMOCBBSKE IC: 2099D-BTD800 The device complies with Part 15 of the FCC rules and RSS-210 of Industry Canada. Operation is subject to the following two conditions: 1. This device may not cause harmful interference. 2. This device must accept any interference received, including interference that may cause undesired operation. NOTE: This equipment has been tested and found to comply with the limits for a Class B digital device, pursuant to Part 15 of the FCC rules. These limits are designed to provide reasonable protection against harmful interference in a residential installation. This equipment generates, uses and can radiate radio frequency energy and, if not installed and used in accordance with the instructions, may cause harmful interference to radio communications. However, there is no guarantee that interference will not occur in a particular installation. 50 If this equipment does cause harmful interference to radio or television reception, which can be determined by turning the equipment off and on, the user is encouraged to try to correct the interference by one or more of the following measures: • Reorient or relocate the receiving antenna. • Increase the distance between the equipment and the receiver. • Connect the equipment to an outlet on a circuit different from that to which the receiver is connected. • Consult your supplier for help. Changes or modifications made to this equipment not expressly approved by the party responsible for compliance may void FCC authorization to operate this equipment. This Class B digital apparatus complies with Canadian ICES-003. RF Radiation Exposure Information Since the radiated output power of this device is far below the FCC radio frequency limits, it is not subjected to routine RF exposure evaluation as per Section 2.1093 of the FCC rules. This device complies with the US and Industry Canada portable device RF exposure limits set forth for an uncontrolled environment and is safe for intended operation as described in the user manual. 51 Technical data WP-2 Bluetooth adaptor model BTD 800 USB Bluetooth adaptor version WP-3 Operating conditions Temperature: 5 °C to 40 °C Humidity: 15% to 93%, non-condensing Atmospheric pressure: 700 hPa to 1060 hPa Storage and transportation conditions Temperature: -25 °C to 70 °C Humidity: 15% to 93%, non-condensing Manufactured by: SBO Hearing A/S Kongebakken 9 DK-2765 Smørum www.sbohearing.com 168426US / 04.16 FittingLINK model 168426US / 04.16 SBO Hearing A/S hereby declares that FittingLINK is in compliance with the essential requirements and other relevant provisions of Directive 1999/5/EC. Declaration of conformity is available at SBO Hearing A/S. 0682 Waste from electronic equipment must be handled according to local regulations. 52 E2831 53 0000168426000001
