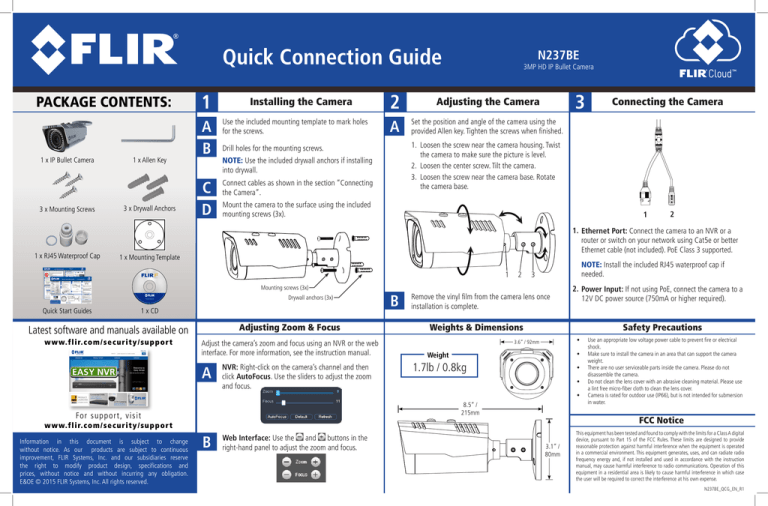
Quick Connection Guide
PACKAGE CONTENTS:
1 x IP Bullet Camera
3 x Mounting Screws
1 x RJ45 Waterproof Cap
1 x Allen Key
3 x Drywall Anchors
1
A
B
C
D
Installing the Camera
Use the included mounting template to mark holes
for the screws.
N237BE
3MP HD IP Bullet Camera
2
Adjusting the Camera
A
Set the position and angle of the camera using the
provided Allen key. Tighten the screws when finished.
3
1. Loosen the screw near the camera housing. Twist
the camera to make sure the picture is level.
2. Loosen the center screw. Tilt the camera.
3. Loosen the screw near the camera base. Rotate
the camera base.
Drill holes for the mounting screws.
NOTE: Use the included drywall anchors if installing
into drywall.
Connect cables as shown in the section “Connecting
the Camera”.
Mount the camera to the surface using the included
mounting screws (3x).
1
1 x Mounting Template
2
NOTE: Install the included RJ45 waterproof cap if
needed.
3
Mounting screws (3x)
Drywall anchors (3x)
1 x CD
Latest software and manuals available on
Adjusting Zoom & Focus
www.flir.com/security/support
Adjust the camera’s zoom and focus using an NVR or the web
interface. For more information, see the instruction manual.
A
NVR: Right-click on the camera’s channel and then
click AutoFocus. Use the sliders to adjust the zoom
and focus.
B
Remove the vinyl film from the camera lens once
installation is complete.
2. Power Input: If not using PoE, connect the camera to a
12V DC power source (750mA or higher required).
Weights & Dimensions
Safety Precautions
•
3.6” / 92mm
Weight
•
1.7lb / 0.8kg
•
•
•
8.5” /
215mm
For s u p p o r t , vi s i t
B
Web Interface: Use the and buttons in the
right-hand panel to adjust the zoom and focus.
Use an appropriate low voltage power cable to prevent fire or electrical
shock.
Make sure to install the camera in an area that can support the camera
weight.
There are no user serviceable parts inside the camera. Please do not
disassemble the camera.
Do not clean the lens cover with an abrasive cleaning material. Please use
a lint free micro-fiber cloth to clean the lens cover.
Camera is rated for outdoor use (IP66), but is not intended for submersion
in water.
FCC Notice
www.flir.com/security/support
Information in this document is subject to change
without notice. As our products are subject to continuous
improvement, FLIR Systems, Inc. and our subsidiaries reserve
the right to modify product design, specifications and
prices, without notice and without incurring any obligation.
E&OE © 2015 FLIR Systems, Inc. All rights reserved.
2
1. Ethernet Port: Connect the camera to an NVR or a
router or switch on your network using Cat5e or better
Ethernet cable (not included). PoE Class 3 supported.
1
Quick Start Guides
Connecting the Camera
3.1” /
80mm
This equipment has been tested and found to comply with the limits for a Class A digital
device, pursuant to Part 15 of the FCC Rules. These limits are designed to provide
reasonable protection against harmful interference when the equipment is operated
in a commercial environment. This equipment generates, uses, and can radiate radio
frequency energy and, if not installed and used in accordance with the instruction
manual, may cause harmful interference to radio communications. Operation of this
equipment in a residential area is likely to cause harmful interference in which case
the user will be required to correct the interference at his own expense.
N237BE_QCG_EN_R1

