Physica MCR
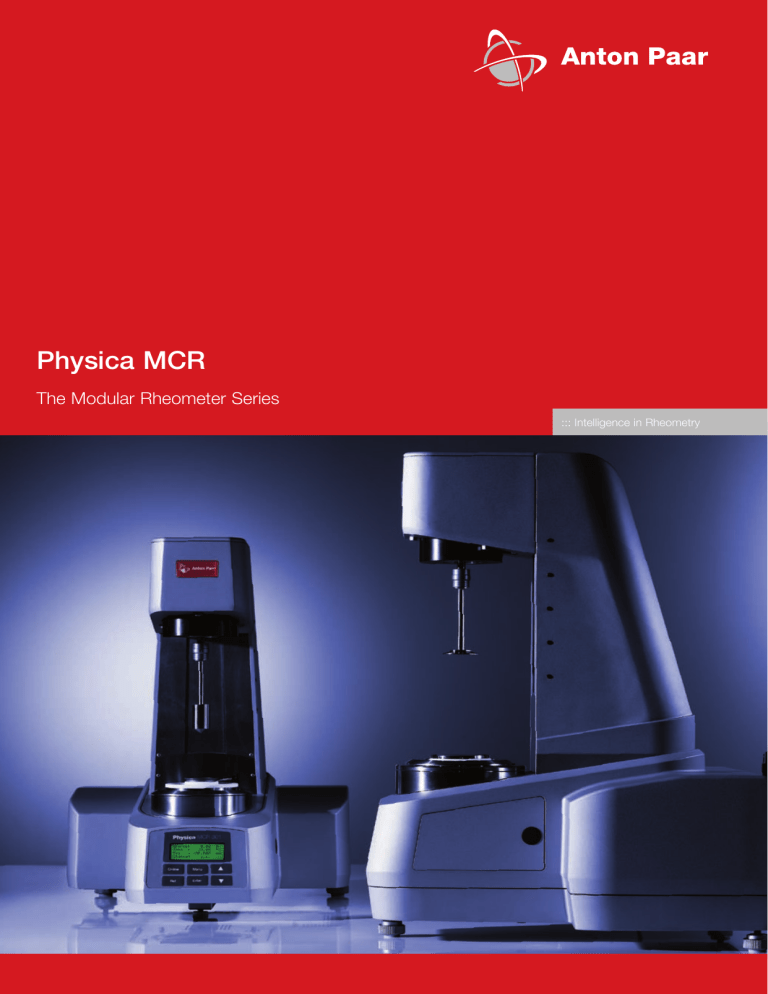
Physica MCR
The Modular Rheometer Series
::: Intelligence in Rheometry
Physica MCR
Modular Compact Rheometer
At Anton Paar we have a close relationship with our customers, are constantly searching for answers and pushing back physical and technical boundaries. We enjoy the challenge of research and development and take pride in our achievements. The result: customers receive instruments produced to the highest level of technical perfection, tailored to meet their special needs.
Key factors in our success:
4 Highly motivated employees working on their own initiative
4 More than 20% of the yearly turnover invested in R&D
4 Long-term investment in and cultivation of key technologies
4 An international sales and service network
4 Efficient and respectful use of both natural and human resources
4 A flat decision-making structure consisting of responsible teams
4 A charitable foundation as the owner
4 Thorough and continuous training of employees and apprentices
Over the last ten years, the development of
Physica rheometers has been characterized by innovation and the continuous integration of new technologies in the design concept.
In keeping with our company philosophy, all improvements were made with the customer in mind, whether that be providing additional technical features or making the instruments easier to use. The new Physica MCR rheometer series is the result of this process.
Setting the standard for rheological measurements since its introduction in 1999, the new MCR series raises the bar even higher.
Discover the difference that years of innovation can make!
1990
Introduction of
Physica Rheolab
1995
Introduction of
Physica UDS 200 –
First rheometer with EC motor (brushless DC)
1999
Introduction of
Physica MCR xx0
2004
Introduction of
Physica MCR xx1 with
Toolmaster
TruGap TM
TM and
technology
2007
Introduction of High
T h roughput Rheometer
HTR xx1
Physica MCR
The Success Story Continues
The idea
Galileo Galilei’s vision is the driving force behind the new Physica MCR rheometer series:
“Measure what is measurable, and make measurable that which is not.”
Fulfilling this vision required input from customers, developing the third generation of components, and implementing the use of new technologies. The result: an innovative rheometer series which extends the measuring possibilities to new levels!
From the basic configuration for quality control to the high-end model for research and development, we have made the new series of MCRs easier to use, more accurate, and have extended the range of applications through the innovative use of new technologies.
The concept
The new Physica MCR series is based on technical concepts at the cutting edge of technology. The revolutionary modular design features innovations such as the Toolmaster TM (US-Patent 7,275,419)
– the first automatic measuring and accessory detection system, TruGap TM - a patented measuring gap detection system (US-Patent 6,499,336), an extended torque range, a patented normal force sensor (US-Patent 6,167,752) with improved normal force capabilities, and unprecedented thermal stability of the normal force signal.
The Physica MCR series incorporates modern design with a compact, low-compliance frame which houses both the mechanical and electronic control components. It provides a wide selection of measurement geometries, interchangeable environmental systems and special accessories.
All the main components, such as the motor, air bearing, electronic control units, and frame have been optimized using state-of-the-art technologies.
The Technologies
Simple and sophisticated: the housing and frame
Ergonomics and functionality were the major design goals behind the compact, modern housing and frame. All the mechanical and electrical control components are incorporated into one single unit.
4 Fast and simple exchange of environmental systems and accessories
4 Integrated instrument requiring minimum laboratory space; easy installation
4 Extremely rigid and stable frame for optimized mechanical and thermal stability
4 Machined to perfection for durability and longevity
4 Large working area provides optimal access for sample loading and trimming
4 Easy to clean
High resolution: the optical encoder
A high-resolution optical encoder using data oversampling technology enables precise measurements of the angular deflection. This, combined with our proprietary real time position control in oscillation (DSO), provides the ability to control oscillatory strains as low as 100 nanorad – important for studying material with delicate structures. There is no limit to the upper value of the amplitude.
Unrivaled precision: the air bearing
Together with the synchronous motor, the new, very rigid air bearing in the Physica MCR 101/301/501 series sets new standards in drift stability and low torque capabilities.
A patented normal force sensor (US-Patent 6,167,752) located inside the air bearing performs a capacitive measurement and detects the natural movement of the bearing due to applied normal forces.
Calling on our many years of experience with air bearing technology, we were once again able to push back the boundaries and develop air bearings which have unmatched accuracy and stability.
4 Position-sensitive torque mapping reduces residual torques to insignificant levels for measurements at the lowest torque values.
4 Excellent normal force measurement with minimal signal drift and high thermal stability is available for all environmental systems and accessories.
4 All bearings are machined and mounted in-house and undergo exhaustive quality control testing. This guarantees the highest quality and reliability of these components.
Maximum ease of use: the quick-fitting coupling
All Physica rheometers have a quick-fitting coupling for maximum ease of use. Geometries can be changed in seconds.
Tireless response: the motor drive
Principle
The air bearing-supported synchronous motor is one of the unique key components of the Physica MCR rheometer series. High-energy permanent magnets mounted on a small rotor disc produce a constant magnetic field, providing fast, delay-free response. The rotor moves at the same speed, i.e. synchronous, with the stator field, which is produced by a series of coils.
It is possible to adjust the torque in such a way that it is linear to the total amount of stator current. A change in the stator current therefore causes a simultaneous change in the torque.
In contrast to induction motors, the rotor field in a synchronous motor does not change. This means there are no eddy currents causing heating problems, which significantly alter the motor characteristics and lead to signal drifts.
Rapid, linear response coupled with advanced control electronics results in unmatched speed and strain control.
Advantages
4 Highest efficiency
4 Absolute torque calibration due to the linear relationship between the electro-magnetic motor torque and the stator current
4 Suitable for all CSS and CSR tests over large stress, strain and frequency ranges
4 The real time position control in oscillation (DSO) enables strain controlled oscillatory tests at the smallest torques and deflection angles
4 No heat production and no unwanted signal drifts due to the constant rotor field
4 No overshoots in CSS and CSR tests.
4 Over seven decades of torque
4 Speeds as low as 10 -7 min -1 can be set, example:
a simple shear flow test for direct measurement of the zero shear viscosity of high molecular weight polymer melt
4 Excellent speed control over more than 9 decades.
4 Precision air bearing allows accurate measurements at extremely low torques
4 Fast response for step tests.
Unique and Error-free
Unique and error-free: the Toolmaster TM
The revolutionary Toolmaster TM (US Patent 7,275,419) represents the first completely automatic tool recognition and configuration system.
All Physica measurement geometries and environmental systems are recognized automatically as soon as they are connected to the rheometer.
With QuickConnect, the measuring geometries are easily connected to the instrument using the reliable
Physica quick-fitting coupling. A transponder chip integrated in the geometry contains all relevant geometry data, which are automatically transferred to the software. The data from the connected environmental system or accessory is initialized in the software by SmartLink.
Advantages
4 No more errors resulting from a user inserting the wrong geometry or making the wrong selection in the software
4 Intelligent auto-configuration system for userspecific rheometer packages
4 Calculation of exact geometry factors using real geometry data, e.g. truncation, diameter and cone angle
4 Unique identification of individual measuring geometries by the transfer of geometry serial numbers
4 No more errors when documenting a configuration – perfect for traceable documentation
(e.g. 21CFR Part11)
True innovation: the TruGap TM function
For the first time it is possible to monitor and control the real gap in cone-and-plate or parallel-plate measurements. The new, patented
(US Patent 6,499,336) technology is based on an induction method which determines the exact gap size, therefore eliminating errors from thermal expansion and normal force.
The TruGap TM function is available for Peltier elements, electrically heated, and convection-based environmental systems. It uses special measuring geometries and lower plates for each environmental system.
Advantages
4 Allows truly accurate temperature sweeps with cone-and-plate geometries
4 Works over wide temperature ranges and heating rates
4 Determination of the measuring gap at all times, independent of the rheological test
True Innovation
Environmental Systems,
Accessories and Geometries
Temperature control technologies
Temperature greatly influences the rheological behavior of almost all substances. Anton Paar engineers have invested a lot of time and effort in the development of new temperature control systems. The result is a complete range of environmental systems. All the temperature control systems are highly accurate and virtually gradient-free in horizontal and vertical directions. In addition, traceable automatic temperature calibration sensors are available to ensure the system is always operating within specification and measures the real sample temperature. The product line covers a temperature range from
–150 °C to +1000 °C.
Environmental systems for the MCR rheometer series
Cone-and-plate/parallel-plate thermal chambers
4 Liquid temperature control (-30 to +180 °C).
4 Peltier temperature control (-40 to +200 °C) with actively heated Peltier hood (US Patent 6,571,610).
4 Electrical resistance heating with low temperature option
(-130 to +400 °C).
4 Convection oven (-150 to +1000 °C).
Concentric cylinder thermal chambers
4 Liquid temperature control (-30 to +180 °C).
4 Peltier temperature control (-20 to +200 °C)
(US Patent 6,240,770).
4 Electrical resistance heating (RT to +300 °C).
Additional accessories for the MCR rheometer series
4 Pressure cells
4 UV chambers for UV-curing inks, adhesives, and coatings
4 Magneto-rheology and electro-rheology systems
4 Measuring chamber for starch gelatinization testing
4 Interfacial rheology measuring cell
4 Immobilization cell for controlled drying of paper coatings
4 Rotating ball system for samples containing large particles
4 Dielectric measuring system
4 Standardized solid bar and film fixtures for DTMA testing
4 Additional options for simultaneous structural investigations, e.g. Small Angle Light Scattering (SALS), Small Angle Neutron
Scattering (SANS), Small and Wide Angle X-Ray Scattering
(SAXS/WAXS) as well as chambers for flow visualization, microscopy and particle imaging velocimetry (PIV)
4 Tool for extensional rheology (SER)
Geometries
Anton Paar offers a wide selection of geometries for concentric cylinder, cone-and-plate and parallel-plate systems. Almost any diameter, cone angle, truncation, surface treatment, coating and material can be supplied to cover all application needs. Special geometries include stirrers, disposable systems, and customerspecific designs for unique samples and applications.
Peltier temperature control
Electrical resistance heating
Convection oven
Physica RheoPlus
Like our rheometers, the Physica RheoPlus user software is a modular system which can be configured to meet individual requirements, from quality assurance to R&D. RheoPlus is multilingual, speaking to users in the language of their choice.
RheoManager
The RheoManager helps users who are new to the software or rheology in general. It condenses our application knowhow and suggests suitable measuring methods for a large number of applications. Standardized methods for numerous industrial branches are easy to find. Over 70 methods and
200 templates are provided.
Of course, users can also create and manage their own test profiles. The file structure helps keep files under control even when managing a large amount of data.
Convenient analysis routines are an integral part of the predefined RheoManager templates. All analysis routines run in RheoManager can be adapted to suit individual needs and organized in an analysis script. Reports can be configured automatically, and “pass/fail” tests are easily developed using the automation feature.
Auto-configuration
The Toolmaster TM is an intelligent configuration system, which automatically transfers geometry data and control parameters for the measuring and temperature control systems to the
RheoPlus. This eliminates user errors, which can occur when manually entering data for accessories.
Compatibility
Users of Microsoft ® Office will recognize many of the features in the RheoPlus software and use them intuitively. Drag & drop is just one of the many features which make working with RheoPlus easy and efficient. Data from earlier Physica software versions can be imported and data and graphs from
RheoPlus are easily exported into MS Excel ® , MS Word ® or as
ASCII data.
Reliability
Physica RheoPlus was developed according to ISO 9001 guidelines and runs as C/C++ software for the latest
Windows TM operating systems. The electronic signature, audit trail, archiving and retrieval of data comply with the regulations in 21 CFR Part 11 from the US Food and Drug
Administration (FDA).
PC connection
The LIMS-SAP module means results can be automatically saved in an external data base. Measuring profiles can also be activated by other programs via the interface, allowing users to work through the script.
RheoPlus is the first rheometer software to provide both a serial interface (RS 232) and an Ethernet interface for communicating with the instrument.
Flexibility
There are no limits for programming and linking test sequences. Test types can be combined in real time in whichever order required. Additional instruments or signals such as power supplies, relays and magnetic valves are supported by RheoPlus in real time and can be synchronized with the rheological measuring profile. This makes RheoPlus the perfect platform for setting up measuring procedures which simulate processes and applications.
Applications
Fig. 1: FLOW AND VISCOSITY CURVE…or: how to get information about the flowability of a polymer
Flow and viscosity curves reveal information about the flowability of polymers under different shear and simulated process conditions. The zero shear viscosity h
0
at low shear rates is an important material property and is directly proportional to the average molar mass M w
. To determine a viscosity curve over a broad range of shear rates, a master curve can be calculated using the timetemperature superposition (TTS) in combination with the conversion method according to the Cox-Merz rule.
Fig. 2: AMPLITUDE SWEEP...or: how to determine the deformation stability and yield stress of a suspension or emulsion
Rotational tests, often used in the past, can deliver very different results when calculating the yield stress. Using
G’ and G’’ of an amplitude sweep with preset strain
(Direct Strain Oscillation, DSO) plotted over the shear stress permits more reliable and practically relevant results for the yield stress value. Significant parameters for evaluating the mechanical stability of a material can be calculated using automated analysis routines in the software.
Fig. 3: INTERVAL THIXOTROPY TEST...or: how to measure the structural regeneration of a material after a short period of high shear
Almost every coating process consists of 3 phases
(1 – at rest, 2 – structural decomposition, 3 – structural regeneration). In Fig. 3, the material’s behavior is described by G’ and G’’ over time. Time-dependent effects such as leveling and sagging, dot sharpness, layer thickness and separation stability of emulsions and dispersions can be correlated directly to the curve progression.
Fig. 4: NANO TORQUE MEASUREMENTS... or: how sensitive is the rheometer
In order to measure sensitive structures in the linear and non-linear range it is necessary to have a reliable rheometer system with an excellent and proven control mechanism. The Physica MCR rheometers are capable of measuring nano torques and nano strains due to their unique EC motor (brushless DC), the high-precision air bearing and the Online Position Control in oscillation
(DSO).
Fig. 1
Fig. 2
Fig. 3
The torque limit of a rheometer system strongly depends on the measuring conditions and data sampling. Figure
4 proves that in a limited frequency range it is possible to perform measurements down to torque values as low as 1 nanoNm. The torque and strain limits given in our brochure are valid over a wide range of frequencies. The new Physica MCR series provides excellent nano strain resolution. Nano materials are not necessarily low-viscous.
For example nano composite polymers can be filled with nano particles (tubes) in order to obtain higher stiffness which requires high permanent torque without signal drift.
The MCR 501/300 offers a maximum torque of 300 mNm.
On the other hand it is sensitive enough to measure secondary relaxations of nano composites and thus gives insight into a material´s impact behaviour.
Fig. 5: TRANSIENT TEST TYPES (creep, stress relaxation tests)…or: what can we learn from the first normal stress difference?
Step stress (creep & recovery), step strain (stress relaxation) and step rate (stress growth/start-up flow) experiments are typically performed to measure the transient response of a material to a given constant shear stress, strain or rate. Besides the shear viscosity, the measurement of the first normal stress difference N coefficient y
1
1
and
also gives valuable information about the sample. Physica MCR rheometers include a patented normal force sensor (US-Patent 6,167,752) which allows the evaluation of the first normal stress difference N
1 and the coefficient y
1 thermal drift.
over a large range with virtually no
FIG. 6: COMBINATION OF SMALL ANGLE LIGHT
SCATTERING AND RHEOLOGY…or: how to get information about both the micro- and macrostructure
The combination of a Physica MCR rheometer and the small angle light scattering (SALS) system enables the simultaneous determination of microstructural properties
(using the optical method) and macroscopic, or bulk, material properties (using rheology).
The flow behavior of a polymer blend (1% Polyisobutylene
(PIB) in Polydimethylsyloxane (PDMS)) can be explained by looking at the scattering images. At rest and in the zero viscosity range the scattering patterns have a symmetrical shape. This is due to the circular PIB droplets in the PDMS matrix. At higher shear rates, the viscosity decreases and the sample starts to flow. The scattering patterns become elliptical, indicating the orientation and deformation of the PIB domains in the direction of flow.
Fig. 4
Fig. 5
Fig. 6
Specifications
Unit
- Bearing
EC motor (brushless DC) with high resolution optical encoder
Permanent maximum torque, no signal drift
Minimum torque rotation
Minimum torque oscillation
Maximum torque rotation/oscillation
Torque resolution
Angular deflection, set value
Angular deflection, resolution
Minimum speed, CSS
Minimum speed, CSR
Maximum speed, CSS/CSR
Minimum angular frequency
Maximum angular frequency
Normal force range
Normal force resolution
Dimensions
Weight
Toolmaster TM , measuring system
Toolmaster TM , measuring cell
QuickConnect for measuring systems, screwless
Electronic trim lock
1/min
1/min
1/min rad/s rad/s
N
N mm
-
-
µNm
µNm mNm nNm
µrad
µrad kg
-
-
-
-
More than 25 modular measuring cells, see catalogue
Digital Eye, Rheoplus video option and camera
Virtually gradient-free (horizontal, vertical) temperature control systems
Maximum temperature range
Automatic gap control/setting, AGC/AGS
TruGap TM
Real time position control oscillation, DSO
Sample (direct) strain control, virtually compliance free
Sample torque control, virtually inertia-free
Gap control, normal force and velocity,
Tack/Squeeze
1st normal stress measurement N1
Waveform and Lissajous**
Multiwave and higher harmonics**
Steady state**
* MCR 501/300 available on request with 300 mNm EC motor
** Monitoring and Recording
-
°C
-
-
-
-
-
-
-
-
-
-
-
Physica
MCR 51 ball yes yes
250
-
125
100
1 to ∞
0.01
10 -5
10 -3
3000
10 -3
628
-
-
440x600x620
43 yes yes yes yes
Physica
MCR 101 air yes optional yes
-150 to +1000 yes no no
-
- no no no no no yes optional yes
-150 to +1000 yes no no yes yes optional optional optional yes yes yes yes
0.1
0.1
150
0.2
1 to ∞
0.01
10 -6
10 -5
3000
10 -5
628
0.1 to 30
0.02
440x600x620
43 yes yes yes yes yes optional yes
-150 to +1000 yes optional optional yes yes yes yes optional yes yes
Physica
MCR 301 air yes yes
0.05
0.01
200
0.1
0.1 to ∞
0.01
10 -7
10 -7
3000
10 -5
628
0.01 to 50
0.002
440x600x620
43 yes yes yes yes yes optional yes
-150 to +1000 yes yes yes yes yes yes yes yes yes yes
Physica
MCR 501 air yes yes
0.05
0.01
230, 300*
0.1
0.1 to ∞
0.01
10 -7
10 -7
3000
10 -5
628
0.01 to 50
0.002
440x600x720
50 yes yes yes yes
We Accompany
Our Customers
Our international sales network
Total expertise assures flexibility
Anton Paar has a long tradition of experienced and highly skilled employees researching and developing key technologies. All components of the MCR rheometers are manufactured at our high-precision facilities, certified to ISO 9001. The rigorous quality control throughout the whole development and production process is essential for attaining the high quality we expect from our instruments.
Application know-how
We are proud to provide our customers with unmatched application know-how in the field of rheology. New applications are constantly tested and analyzed in our laboratories. In addition to our own rheology book, we offer a comprehensive collection of publications, application reports, and technical information covering all aspects of rheological testing.
Learn from the experts
When performing and interpreting rheological measurements, it is especially important to have a good understanding of the rheological background and the correlation between the rheological data and the practical application. To help customers expand their knowledge of rheology and better utilize some of the advanced features of our instruments, we offer classes and seminars throughout the year. Course schedules and locations can be found on our website.
Professional after-sales service
Rheometers are high-precision measuring instruments.
We therefore recommend regular adjustment checks and maintenance, and offer maintenance contracts. Our worldwide after-sales service is carried out by qualified engineers who undergo regular and systematic training at our headquarters.
Headquarters
Anton Paar GmbH
Austria info@anton-paar.com
Countries with sales representatives Direct sales via Anton Paar GmbH Exact location of sales representative
www.anton-paar.com
Photos: Croce & Wir
Anton Paar
®
GmbH
Anton-Paar-Str. 20
A-8054 Graz
Austria - Europe
Tel: +43 (0)316 257-0
Fax: +43 (0)316 257-257
E-mail: info@anton-paar.com
Web: www.anton-paar.com
Instruments for:
Density & concentration measurement
Rheometry & viscometry
Sample p reparation
Microwave synthesis
Colloid science
X-ray structure analysis
Refractometry
Polarimetry
High-precision temperature measurement
Specifications subject to change without notice
01/08 C22IP01-D
