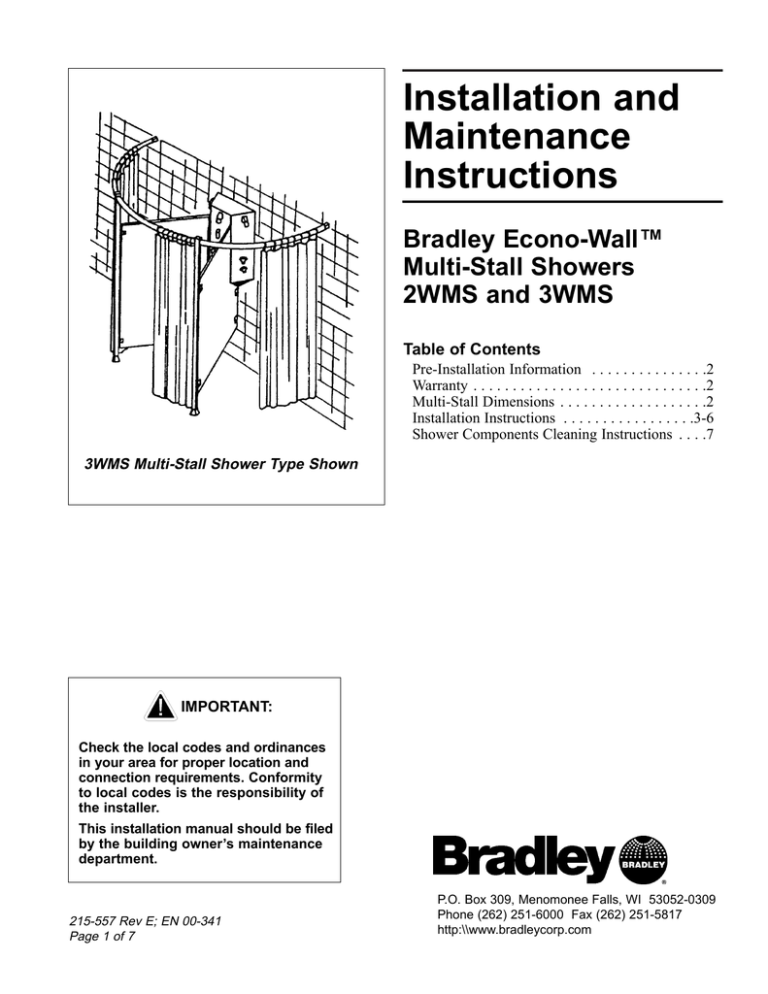
WS-2W, WS-3W Privacy Multi-Stall Wall Shower
advertisement

Installation and Maintenance Instructions Bradley Econo-Wall™ Multi-Stall Showers 2WMS and 3WMS Table of Contents Pre-Installation Information . . . . . . . . . . . . . . .2 Warranty . . . . . . . . . . . . . . . . . . . . . . . . . . . . . .2 Multi-Stall Dimensions . . . . . . . . . . . . . . . . . . .2 Installation Instructions . . . . . . . . . . . . . . . . .3-6 Shower Components Cleaning Instructions . . . .7 3WMS Multi-Stall Shower Type Shown IMPORTANT: Check the local codes and ordinances in your area for proper location and connection requirements. Conformity to local codes is the responsibility of the installer. This installation manual should be filed by the building owner’s maintenance department. 215-557 Rev E; EN 00-341 Page 1 of 7 P.O. Box 309, Menomonee Falls, WI 53052-0309 Phone (262) 251-6000 Fax (262) 251-5817 http:\\www.bradleycorp.com Bradley Econo-Wall™ Multi-Stall Shower 2WMS and 3WMS Installation Instructions Pre-Installation Information IMPORTANT: Read and save this manual, which contains maintenance and repair information, for future reference. Overview The Bradley Multi-Stall Showers serving 2 or 3 persons, offer everything Econo-Wall™ Showers offer with privacy as well. Bradley's Multi-Stall Shower Warranty Bradley Corporation warrants to commercial and institutional purchasers only each unit free from defects in material and workmanship under normal use and service upon the following terms and conditions: 1. This warranty is limited to replacing or repairing, at our option, transportation charges prepaid by the purchaser, any Bradley unit or part thereof which our inspection shall show to have been defective within the limitations of this warranty. 2. The period during which Multi-Stall Shower components are warranted is one (1) year, measured from the date of our invoice. 3. This warranty does not cover installation or any other labor charges and does not apply to any units which have been damaged by accident, abuse, improper installation or improper maintenance. 4. The replacement or repair of defective units as stated in this warranty shall constitute the sole remedy of the purchaser and the sole liability of Bradley Corporation under this warranty. Bradley Corporation shall not otherwise be liable under any circumstances for incidental, consequential or indirect damages caused by defects in the repair or replacement thereof. 5. This warranty extends only to commercial and institutional purchasers and does not extend to any others, including consumer customers of commercial and institutional purchasers. 6. This warranty is in lieu of all other warranties, express or implied, including any implied warranty of merchantability or fitness for a particular purpose or otherwise. Econo-Wall™ Multi-Stall Shower Dimensions 2WMS Shower Type 2 3WMS Shower Type Bradley Corporation • 215-557 Rev. E; EN 00-341 Bradley Econo-Wall™ Multi-Stall Shower 2WMS and 3WMS Installation Instructions Figure 1 Figure 2 Installation Instructions Step 1a: For 2WMS Multi-Shower types (See Step 1b on page 4 for 3WMS Shower Types) 1. Install your Bradley Econo-Wall™ Shower as instructed in the "Econo-Wall™ Shower Installation and Maintenance Instructions" provided with your new Multi-Stall Shower. 2. Position the partition in place so the top of the partition is even with the tip of the showerhead and a 1/4" space exists between the partition and shower. Make sure the partition is level and plumb. 3. Using the wall brackets as templates, mark the two wall bracket positions on the partition (see Figures 1 and 2). 4. Drill 1/4" diameter holes into the partition at the marked locations. 5. After the holes are drilled into the partition, secure the wall brackets to the partition using the #10 x 1/2" Allen head screws and spacers provided (see Figure 2). Figure 3 NOTE: Assemble spacers to button head screws before installing partition. 6. Secure the wall brackets to the wall using the hardware provided as shown in Figure 2. NOTE: Drill 3/8" holes into the wall for lead anchors. 7. Fasten the post brackets to the posts (see Figure 3). Bradley Corporation • 215-557 Rev. E; EN 00-341 3 Bradley Econo-Wall™ Multi-Stall Shower 2WMS and 3WMS Installation Instructions Installation Instructions continued... Step 1b: For 3WMS Multi-Shower types (See Step 1a on page 3 for 2WMS Shower Types) 1. Install your Bradley Econo-Wall™ Shower as instructed in the "Econo-Wall™ Shower Installation and Maintenance Instructions" provided with your new Multi-Stall Shower. 2. Secure the two wall brackets to the wall with lead anchors and 1/4"-20 hex. head screws supplied as shown in Figures 4 and 5. 3. 4. 5. 6. NOTE: Wall brackets should be installed on shower's centerline. Position the 2 partitions in place so the top of the partitions are approximately 6" from the tip of the showerhead and a 1/4" space exists between the partitions and shower. Make sure the partitions are level and plumb. Using the wall brackets as templates, mark the two wall bracket positions on the partitions. Drill 1/4" diameter holes into the partitions at the marked locations. After the holes are drilled into the partitions, secure the wall brackets to the partitions using the #10 x 1/2" screws and spacers provided . Figure 4 Figure 5 NOTE: Assemble spacers to button head screws before installing partition. 7. Fasten the post brackets to the posts (see Figure 6). Figure 6 4 Bradley Corporation • 215-557 Rev. E; EN 00-341 Installation Instructions Bradley Econo-Wall™ Multi-Stall Shower 2WMS and 3WMS Installation Instructions continued... Step 2: Post Installation 1. Position a post in line with a partition so a 1/4" spaces exists between the post and partition. 2. Scribe a line completely around the bottom of post (see Figure 7). 3. Remove the post and scribe horizontal lines through the scribed line around the post (see Figure 7). 4. Drill 3/8" holes into the floor at the point where the lines intersect. 5. Install floor anchors and post foot angles as shown in Figure 8. 6. Slide the shoes onto the bottom of posts (see Figure 8). 7. Set the posts into position over the post foot angle and fasten mounting hardware (see Figure 8). 8. Repeat Steps 1-7 for all posts to be installed. Figure 7 Figure 8 Bradley Corporation • 215-557 Rev. E; EN 00-341 5 Bradley Econo-Wall™ Multi-Stall Shower 2WMS and 3WMS Installation Instructions Installation Instructions continued... Step 3: Installing Curtain Rails and Completing Installation 1. Slide the curtain hooks onto the curtain rails. NOTE: The same number of curtain hooks goes on each rail as shown in Figure 9. 2. Assemble curtain rails to posts as shown in Figure 9. 3. Secure brackets to wall and install curtain rails as shown in Figure 10. 4. Secure posts to partitions with the #10 x 1/2" button head screws and spacers provided (see Figure 11). Figure 9 NOTE: Assemble spacer to screws before installing into partition. Figure 10 Figure 11 Step 4: Final Inspection 1. Be sure that all hardware is mounted with proper number of screws and securely tightened. 2. Clean the stainless steel, partitions, post, etc. before use (see page 7 for cleaning information). If these instructions are followed, your Bradley Multi-Stall Shower will provide years of dependable service. However, if these cleaning instructions are not followed, Bradley will not accept any responsibility for product failure. 3. Hang shower curtains on shower curtain hooks installed on curtain rails. 6 Bradley Corporation • 215-557 Rev. E; EN 00-341 Installation Instructions Bradley Econo-Wall™ Multi-Stall Shower 2WMS and 3WMS Cleaning Instructions IMPORTANT: Cleanliness is of utmost importance. Do not permit salty solutions to evaporate and dry on stainless steel. Never use ordinary steel wool or steel brushes on stainless steel. Always use stainless steel wool or stainless steel brushes. 1. Remove ordinary deposits of dirt and grease with soap and water. Whenever possible, the metal should be thoroughly rinsed and dried after washing. 2. Use stainless steel polishing powder to get rid of tightly adhering deposits. 3. Look for the source of rust in some iron or steel not actually a part of the stainless steel structure. Sometimes the appearance of rust streaks on stainless steel leads to the belief that the stainless steel is rusting. A steel nail or screw may be the cause of the trouble. 4. If the showerhead delivers an uneven spray, remove the showerhead from the unit, disassemble, and remove foreign matter. 5. Reassemble showerhead and reinstall into unit. Bradley Corporation • 215-557 Rev. E; EN 00-341 7


