AVR205: Frequency Measurement Made Easy
with Atmel tinyAVR and Atmel megaAVR
Features
• Frequency measurement from 10Hz to Timer_Clock_frequency/2.5
®
• Accurate measurement: Up to 99% or better, depending on the AVR device clock
source
• Two measurement methods: Busy wait (polled) and interrupt driven
8-bit
Microcontrollers
Application Note
1 Introduction
Measuring cycles with a periodically varying signal per unit of time – frequency – is
a fundamental activity in embedded electronics. This application note describes
how to measure frequency of any type of waveform – sine, square, etc. – with a
variable duty cycle. A basic requirement is for the signal to have an amplitude that
is within the I/O pin threshold for the selected AVR device.
A second requirement for the example code presented here to work is that the
selected AVR device have at least two timers, and that one of them can be used
with an external clock source. One of these timers can be created by a software
delay loop. The idea is to feed the signal to be measured into one timer’s clock
input, and then use the other timer as a time reference.
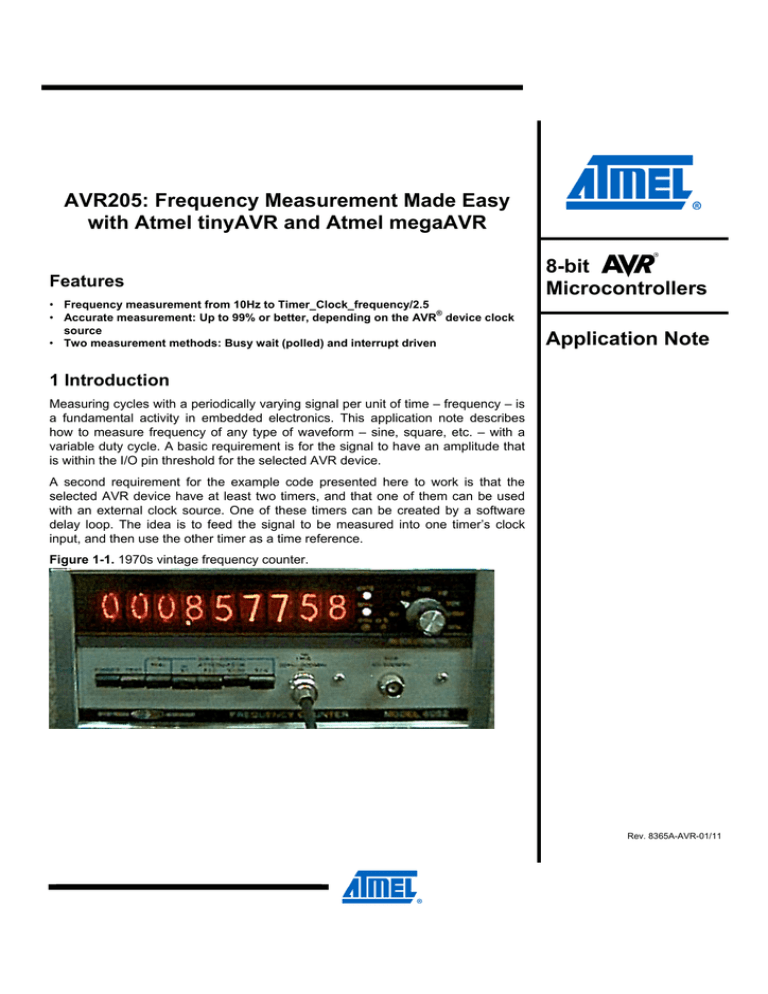
Figure 1-1. 1970s vintage frequency counter.
Rev. 8365A-AVR-01/11
2 Requirements to run the code
The code implemented as a part of this application note is based on Atmel® tinyAVR®
and Atmel megaAVR® devices. For Atmel XMEGA® devices, please refer to
application note AVR1617: Atmel XMEGA Uses the Event System.
As mentioned briefly above, two timers need to be available on the selected device,
and one timer needs to be able to be clocked from an external source.
Figure 2-1. The AVR input clock scheme used as a synchronizer circuit.
Figure 2-1 shows how the input signal is sampled. The maximum frequency of the
external clock that can be detected is half the sampling frequency (Nyquist sampling
theorem). However, due to variations in the system clock frequency and duty cycle
caused by the selected clock source (crystal, resonator, and capacitor) tolerances, it
is recommended that the maximum frequency of the external clock source be less
than Timer_Clock_frequency/2.5. In this application note, the 8MHz RC oscillator
frequency is fed to the timer/counter clock. Therefore, in this particular example, the
recommended maximum frequency to be measured is less than 3.2MHz.
Symmetrical input signals (50% duty cycle) may be measured up to 3.2MHz, as
described above. For non-symmetrical input signals, the high or low periods of the
input must be greater than one timer clock pulse width, or the synchronization circuit
shown above may miss an input pulse and cause inaccuracies in the frequency being
measured.
For example, if an 8MHz clock is used to run the timer, the clock high and low periods
add up to 125ns. Therefore, the input high or low pulse width must be greater than
125ns.
See the tinyAVR or megaAVR datasheets for more details on this sampled input
technique.
2.1 List of Atmel AVR devices with external input for timer/counter clock
A simple way to determine if an external input can be used to clock a timer/counter is
to observe the Atmel AVR device’s pinout diagram and look for the pin designation,
T0. See Figure 2-2 for an example.
A non-inclusive list of Atmel AVR devices with this feature includes: Atmel ATtiny10,
ATtiny13, ATtiny20, ATtiny26, ATtiny28, ATtiny2313, ATmega48/88/168, ATmega8,
ATmega16, ATmega32, ATmega8515/8535, ATmega162, ATmega164/324/644/
1284, and ATmega165/325/3250/645/6450.
2
AVR205
8365A-AVR-01/11
AVR205
Figure 2-2. Atmel ATtiny13A pinout.
3 Measurement principle
In this application note, the “gate-open” interval was chosen to be 0.1s, or 100ms,
and so the signal to be measured will clock a counter for this time interval, and
produce a frequency count result in 100ms. The resultant frequency measurement
will be one-tenth the actual frequency.
This was also chosen to take advantage of the timer/counter’s 16-bit resolution; in this
case, measuring frequencies from 500Hz to 5000Hz. If a frequency of 500kHz is to be
measured, a gate time of 1ms would result in good use of the 16-bit timer/counter’s
range.
Figure 3-1. Schematic indicating the logical gating.
3
8365A-AVR-01/11
4 Two techniques: Busy wait and interrupt driven
4.1 Busy wait loop
A busy wait loop is a loop that repeatedly checks to see if an event occurs. Some
applications can wait the 0.1s (100ms) for the loop to cycle, and do not require
interrupts to be used.
Figure 4-1 is the flowchart for the main part of the program. Figure 4-2 is the flowchart
for the C function call that actually measures the incoming signal’s frequency and
returns it to the main (calling) program.
Figure 4-1. Main flowchart.
Function:
get_frequency
Clear Timer 0 contents
Clear Timer 0 OVF flag
Power-on reset could also be an activelow signal applied to the AVR device’s
Reset pin.
The user’s variables would also be
initialized here.
Timer contents are cleared.
Connect input pin
to Timer 0 clock
No
Has Timer 0
increment
once?
0.1s
elapsed?
Yes
No
User code executes at this point, and
when there is a need for frequency
measurement, the function call is
accessed.
Disconnect Timer 0 clock
from input
The function call is initiated at this point.
Yes
Timer 1 OVF
set?
No
Return freq_divd_by_10
= 0xFFFF -> OVF
Return freq_divd_by_10
= Timer 0 contents
Results from the function call are
returned via a 16-bit, non-zero number. If
a 0xFFFF (65535 decimal) is returned,
this indicates a timer overflow. The result
is a non-valid frequency. This could
occur if a too-high frequency was applied
to the AVR device’s input pin.
Return from function call
4
AVR205
8365A-AVR-01/11
AVR205
Figure 4-2. Function flowchart.
Function:
get_frequency
Clear Timer 0 contents
The function entry point.
Clear both timers.
Clear Timer 0 OVF flag
Start Timer 0 counting.
Connect input pin
to Timer 0 clock
No
If Timer 0 has clocked once, start the 0.1s (100ms) gate
counter.
0.1s
elapsed?
When 100ms has elapsed, disconnect Timer 0 from the
input signal.
Yes
No
Has Timer 0
increment
once?
Disconnect Timer 0 clock
from input
Yes
Timer 1 OVF
set?
No
Return freq_divd_by_10
= 0xFFFF -> OVF
Did timer overflow? If so, return a value of 0xFFFF;
otherwise, return the actual 16-bit count value.
Return freq_divd_by_10
= Timer 0 contents
Return from function call
5
8365A-AVR-01/11
Figure 4-3. Block diagram.
Signal source or
signal generator
tinyAVR or
megaAVR
on STK600
or other
development
board
T0 is an input pin on the AVR
4.1.1 How to run the project using busy wait
Atmel AVR Studio 4.18 was used to develop this code. Later versions may or may not
compile the code correctly. WinAVR C compiler version 20100110 was also used.
Later versions may or may not compile the code correctly. It is available from
http://sourceforge.net/projects/winavr/files/.
•
•
•
•
Refer to Figure 4-1. Connect the signal source to the AVR input pin T0
Using AVR Studio 4, open the project, freq_meter_busy_wait_demo.apx
Build the project
Using JTAGICE mkII, start the debugging session with AVR Studio, and set a
breakpoint at the C instruction delay100ms(2);
• Run the project, and when the breakpoint is reached, the frequency count result
will be in the C variable freq_div_by_10
• The resulting value will be one-tenth of the actual frequency because the AVR
timer counts for 100ms. If the frequency exceeds the algorithm capability, the
result returned will be 0xffff, indicating overflow
4.1.2 How to build the project using busy wait
Prerequisite: knowledge of how to build, compile, and debug an AVR Studio 4 project.
• Three files will be necessary to build this project. In this example they are:
o avr205_frequency_meter_busy_wait_demo.c, where the
main() function is located
o freq_meter.c, where the functions are located
o freq_meter.h, where the specifics such as port and register
names are specified, including the CPU clock speed, in this case
8,000,000Hz
• Specify which AVR, such as ATtiny861 or ATmega48
4.1.3 How to call and use these functions, using busy wait
In freq_meter_demo.c
• The function freq_meter_init(); initializes relevant registers of the AVR
• The function user_init(); initializes user variables
• AVR interrupts are not used in this demo
6
AVR205
8365A-AVR-01/11
AVR205
• A call to freq_cntr_get_frequency(); sets up pin change interrupts on T0 to
enable frequency measurement to begin on a pin change of T0. Inside this
function is the call to delay100ms(1);
• The busy wait technique is realized by the function call delay100ms(1);
• delay100ms(2)
simulates
the
user’s
code
before
the
function
freq_cntr_get_frequency(); is called again
4.2 Interrupt driven
When the busy wait approach is not acceptable, an implementation that uses
interrupts may be used. Instead of waiting synchronously for the period timer to
complete, it can simply interrupt and stop the gate counter. See the illustrations below
for details.
Figure 4-4. Main loop.
Power-on
reset
Initialize variables
and AVR peripherals
Power-on reset could also be an activelow signal applied to the AVR device’s
Reset pin.
The user’s variables would also be
initialized here.
User
enables
interrupts
at
appropriate time in the application.
Enable interrupts
the
This point is only a suggestion.
Does user’s code need a frequency
measurement now?
Need a freq.
measurement?
Yes
No
Start freq measurement
w/ function call enabling
Pin Change Interrupts
Execute user code
If so, enable pin change interrupts.
See the following flowchart for the AVR
device’s response to the first pin change
interrupt.
If no frequency measurement is needed
at this time, continue with user’s code.
7
8365A-AVR-01/11
4.2.1 How to run freq_meter_interrupt_demo
Atmel AVR Studio 4.18 was used to develop this code. Later versions may or may not
compile the code correctly. WinAVR C compiler version 20100110 was also used.
Later versions may or may not compile the code correctly. It is available separately
from http://sourceforge.net/projects/winavr/files/.
• Refer to Figure 4-1. Connect the signal source to the AVR input pin T0
• Using
AVR
Studio
4,
open
the
project,
frequency_meter_interrupt_demo.apx
• Build the project
• Using JTAGICE mkII, start the debugging session with AVR Studio, and set a
breakpoint at the C instruction freq_cntr_clear_result();
• Run the project, and when the breakpoint is reached, the frequency count result
will be in the C variable freq_cntr_result
• The resulting value will be one-tenth of the actual frequency because the gate is
100ms. If the frequency exceeds the algorithm capability, the result returned will
be 0xffff, indicating overflow
4.2.2 How to build the project using interrupts
Prerequisite: knowledge of how to build, compile and debug an AVR Studio 4 project.
• Three files will be necessary to build this project. In this example they are:
o avr205_frequency meter_busy_wait.c, where the main()
function is located
o freq_meter.c, where the functions are located
o freq_meter.h, where the specifics such as port and register
names are specified, including the CPU clock speed, in this case
8,000,000Hz
• Specify which AVR, such as ATtiny861 or ATmega48
4.2.3 How to call and use these functions, using interrupts
In freq_meter_demo.c
•
•
•
•
The function freq_meter_init(); initializes relevant registers of the AVR
The function user_init(); initializes user variables
AVR interrupts are enabled by the user
A call to freq_cntr_start_measurement(); sets up pin change interrupts on
T0 to enable frequency measurement to begin on a pin change of T0
• A call to freq_cntr_get_result(); returns either 0x00, if the frequency
measurement is not yet ready, or a hex number less than 0xffff as the resultant
frequency. An error is reported via a result of 0xffff
• A call to freq_cntr_clear_result(); clears the result returned above to
prepare for the next frequency measurement
8
AVR205
8365A-AVR-01/11
AVR205
Figure 4-5. Pin change interrupt response.
Pin change
interrupt
Is input pin
logic high?
Is the input signal pin
a logic high? If not,
return from the pin
change interrupt.
Yes
Return from interrupt
No
This is the pin change
interrupt response
code.
Stop Timer 0 and 1
A positive-going edge
has been detected.
Stop both timers.
Connect Timer 0 to
input pin
Using a register
access instruction,
enable the external
signal to be routed to
the Timer 0 clock pin.
Clear Timer 0 count
Set Timer1 to overflow
in 0.1s
Enable Timer1 interrupt
Return from interrupt
Clearing Timer 0
assures the best
possible accuracy.
Timer 1 controls the
100ms gate period
and is loaded with its
starting value to count
up to overflow, OVF.
This allows for the code in Figure 4-5 to be entered and executed.
9
8365A-AVR-01/11
Figure 4-6. Timer 1 overflow interrupt code.
Timer 1 OVF
interrupt
Stop Timer 0
Power-on reset could also be an active-low
signal applied to the AVR device’s Reset pin.
The user’s variables would also be initialized
here.
Timer contents are cleared.
Timer 1 OVF
set?
No
Return freq_divd_by_10 Yes
= 0xFFFF -> OVF
User code executes at this point, and when
there is a need for frequency measurement,
the function call is accessed.
Return freq_divd_by_10
= Timer 0 contents
Return from interrupt
10
AVR205
8365A-AVR-01/11
AVR205
5 A word about input capture (not used in this application note)
Many AVR devices contain timers that offer “input capture,” which uses a set of 8-bit
latches. When clocked, these latches save the instantaneous contents of the timer.
Input capture is an advanced feature which is not available with simpler AVR devices,
such as the Atmel ATtiny13.
Input capture registers are clocked by an input pin. But for frequency measurements,
this action would need to be triggered by an output pin, and so this technique requires
the use of two I/O pins, which often are not available on devices with a smaller pin
count.
An Atmel XMEGA implementation of a frequency counter could use the event system
to trigger an input capture.
11
8365A-AVR-01/11
6 Conclusion
Most Atmel tinyAVR and Atmel megaAVR devices have the capability to clock a
timer/counter by an external signal. This feature allows the internal counter to be
clocked as fast as 2.5MHz or higher (a function of AVR device’s main clock
frequency).
If a timing gate of 100ms is used as a counting period, then the counter will have the
value of one-tenth the input signal frequency.
This technique can be done with or without interrupts. Both of these techniques are
demonstrated here.
12
AVR205
8365A-AVR-01/11
AVR205
7 Table of contents
Features ............................................................................................... 1
1 Introduction ...................................................................................... 1
2 Requirements to run the code ........................................................ 2
2.1 List of Atmel AVR devices with external input for timer/counter clock ................ 2
3 Measurement principle .................................................................... 3
4 Two techniques: Busy wait and interrupt driven .......................... 4
4.1 Busy wait loop ..................................................................................................... 4
4.1.1 How to run the project using busy wait ...................................................................... 6
4.1.2 How to build the project using busy wait.................................................................... 6
4.1.3 How to call and use these functions, using busy wait................................................ 6
4.2 Interrupt driven .................................................................................................... 7
4.2.1 How to run freq_meter_interrupt_demo..................................................................... 8
4.2.2 How to build the project using interrupts.................................................................... 8
4.2.3 How to call and use these functions, using interrupts................................................ 8
5 A word about input capture (not used in this application note) 11
6 Conclusion ..................................................................................... 12
7 Table of contents ........................................................................... 13
13
8365A-AVR-01/11
Atmel Corporation
2325 Orchard Parkway
San Jose, CA 95131
USA
Tel: (+1)(408) 441-0311
Fax: (+1)(408) 487-2600
www.atmel.com
Atmel Asia Limited
Unit 01-5 & 16, 19F
BEA Tower, Milennium City 5
418 Kwun Tong Road
Kwun Tong, Kowloon
HONG KONG
Tel: (+852) 2245-6100
Fax: (+852) 2722-1369
Atmel Munich GmbH
Business Campus
Parkring 4
D-85748 Garching b. Munich
GERMANY
Tel: (+49) 89-31970-0
Fax: (+49) 89-3194621
Atmel Japan
9F, Tonetsu Shinkawa Bldg.
1-24-8 Shinkawa
Chou-ku, Tokyo 104-0033
JAPAN
Tel: (+81) 3523-3551
Fax: (+81) 3523-7581
© 2011 Atmel Corporation. All rights reserved. / Rev.: CORP072610
®
®
®
®
®
®
®
Atmel , Atmel logo and combinations thereof, AVR , AVR logo, tinyAVR , megaAVR , XMEGA , AVR Studio and others are registered
trademarks of Atmel Corporation or its subsidiaries. Other terms and product names may be trademarks of others.
Disclaimer: The information in this document is provided in connection with Atmel products. No license, express or implied, by estoppel or otherwise, to
any intellectual property right is granted by this document or in connection with the sale of Atmel products. EXCEPT AS SET FORTH IN THE ATMEL
TERMS AND CONDITIONS OF SALES LOCATED ON THE ATMEL WEBSITE, ATMEL ASSUMES NO LIABILITY WHATSOEVER AND DISCLAIMS
ANY EXPRESS, IMPLIED OR STATUTORY WARRANTY RELATING TO ITS PRODUCTS INCLUDING, BUT NOT LIMITED TO, THE IMPLIED
WARRANTY OF MERCHANTABILITY, FITNESS FOR A PARTICULAR PURPOSE, OR NON-INFRINGEMENT. IN NO EVENT SHALL ATMEL BE
LIABLE FOR ANY DIRECT, INDIRECT, CONSEQUENTIAL, PUNITIVE, SPECIAL OR INCIDENTAL DAMAGES (INCLUDING, WITHOUT LIMITATION,
DAMAGES FOR LOSS AND PROFITS, BUSINESS INTERRUPTION, OR LOSS OF INFORMATION) ARISING OUT OF THE USE OR INABILITY TO
USE THIS DOCUMENT, EVEN IF ATMEL HAS BEEN ADVISED OF THE POSSIBILITY OF SUCH DAMAGES. Atmel makes no representations or
warranties with respect to the accuracy or completeness of the contents of this document and reserves the right to make changes to specifications and
product descriptions at any time without notice. Atmel does not make any commitment to update the information contained herein. Unless specifically
provided otherwise, Atmel products are not suitable for, and shall not be used in, automotive applications. Atmel products are not intended, authorized, or
warranted for use as components in applications intended to support or sustain life.
8365A-AVR-01/11


