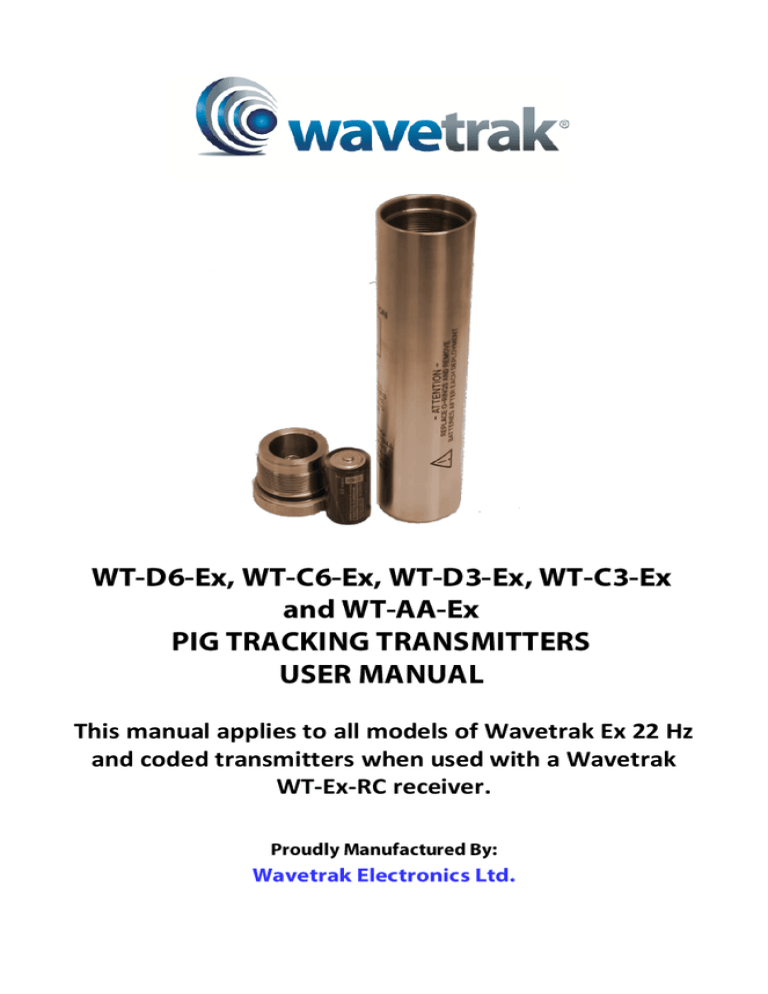
This manual applies to all models of Wavetrak Ex 22 Hz
and coded transmitters when used with a Wavetrak
WT-Ex-RC receiver.
Wavetrak Ex model transmitters come ready to use, with both of
the sealing o-rings and a battery sleeve installed.
The body of the transmitter is marked with the type of pulse the
transmitter will give off:
Standard (pulsing 22 Hz signal at 48 beats per minute
[bpm])
Continuous (continuous 22 Hz signal)
Code A (pulsing 22Hz signal at 48 bpm with a Code A signal
after each pulse)
Code B (pulsing 22Hz signal at 48 bpm with a Code B signal
after each pulse)
Code C (pulsing 22Hz signal at 48 bpm with a Code C signal
after each pulse)
Before using the transmitter, it is recommended that the o-rings
be visually inspected for damage. Always use fresh batteries of
the size appropriate to your transmitter (see the SPECIFICATIONS
section for battery specifications for each transmitter model). If
either of the o-rings are damaged, replace them with the
appropriate o-ring for the transmitter model you are using (see
the SPECIFICATIONS section for the o-ring sizes).
There is no on/off switch on the transmitter. Power on/off is
solely controlled by installing/removing the batteries.
It is also recommended that the transmitter is placed in a delrin
can before putting it in the pipeline. This will provide more
protection for the transmitter, decreasing the chances of damage.
Using a can will also minimize the probability of a breach of seal in
high-pressure pipelines. Contact Wavetrak to obtain the proper
delrin can for your transmitter.
To place the transmitter into operation, insert the batteries into
the transmitter with the positive side going in first (as indicated by
the markings on the transmitter). Put the cap on the transmitter
and screw it on, making sure that it goes all the way down. There
should be no gap between the cap and the body of the
transmitter when it is properly installed.
Check that the transmitter is functioning properly by using a
receiver. Place batteries in the transmitter and position it parallel
to the receiver, then turn the receiver on. The appropriate light
should flash on the receiver for the type of transmitter being
used. The standard 22 Hz light (red) will flash if the transmitter is
standard and, if the transmitter is coded, before the code light
flashes. If coded, the appropriate light should follow the 22 Hz
light (red), Code A (yellow), Coded B (blue), Code C (white). The
buzzer will sound periodically (if turned on), in harmony with the
flash of the lights. If the transmitter is continuous, the same
should happen with the difference being that it will not pulse,
rather the detect lights on the receiver will remain on continually.
This will also be evident by the buzzer sounding constantly (if
turned on), while the transmitter is emitting signal.
1) WARNING: NEVER UNSCREW OR OPEN THE BATTERY
COMPARTMENT OR INSTALL BATTERIES IN A HAZARDOUS
ENVIRONMENT.
2) Always install new batteries appropriate to your model of
transmitter. Do not mix old and new batteries, or batteries
from different manufacturers. Failure to do this can result in
reduced battery life or transmitter failure.
3) Always remove the batteries from the transmitter after use,
4) If installing a heat-shrunk battery pack in place of separate
batteries, remove the battery sleeve from the inside of the
battery compartment to allow enough room for the battery
pack to slide in.
5) Always check the condition of the o-rings and internal plastic
sleeves.
6) Always ensure that the cap is tightened so that it is tight to
the body of the transmitter to ensure proper sealing and
avoid damage.
7) Recommended torque settings for installing the cap to the
transmitter body are listed in the specifications table.
8) Do not clamp the transmitter in a vice or use a pipe wrench or
damage may result.
Foam Polypigs
Depending on the transmitter and the pig being used, the
transmitter can often be fit into the recessed cavity of the pig.
Metal Bodied Pigs
In many cases a flange mount will be required to bolt the
transmitter to the pig. Contact the pig manufacturer for mounting
hardware and instructions.
1) Always attach the transmitter with the transmitter cap end
first into the pig.
2) Always ensure that the transmitter is attached to an
appropriately sized pig that will provide sufficient clearance
for the transmitter from the pipe wall.
WARNING: ENSURE THAT THE TRANSMITTER WILL AT NO
TIME CONTACT THE PIPE WALL WHILE THE PIG IS
TRAVELLING THROUGH THE PIPELINE. THIS WILL CAUSE
DAMAGE AND WILL VOID THE WARRANTY. THIS COULD ALSO
CAUSE THE TRANSMITTERS EXPLOSION PROOF FEATURES
LOSE THEIR EFFECTIVENESS.
3) It is recommended that the transmitter be mounted inside a
delrin can. These are available as a separate accessory from
Wavetrak.
WARNING: NEVER UNSCREW OR OPEN THE BATTERY
COMPARTMENT WHILE IN A HAZARDOUS ENVIRONMENT.
Always remove the batteries from the transmitter after use.
Inspect the transmitter and sleeve in the battery compartment for
damage. Contact Wavetrak for new plastic sleeves.
It is recommended that the o-rings be replaced after each use.
Consult the specifications in this manual to find the proper size of
o-ring for your transmitter and recommended closing torque
value.
Power up the transmitter. Before placing it into use in the
pipeline, a function test should be conducted with the receiver to
ensure that maximum signal strength is being generated by the
transmitter, and that the receiver is operational (Refer to:
OPERATION). Once the open air test is complete, fasten the
transmitter to the tool and insert into the launch barrel. Locate
the transmitter and ensure transmitter is operational prior to
launch. (Refer to: LOCATING THE TRANSMITTER AT THE LAUNCH /
TRAP).
To detect tool passage, the external antenna (or receiver itself if
not using the external antenna) should be placed parallel with the
pipeline and on top of the pipeline location waiting for the tool to
pass. The receiver gain should be set as high as possible without
detecting interference or noise. When the tool passes underneath
the antenna, the operator should be able to see the transmitter
signal rise in strength on the receiver. The 22Hz light and any
appropriate code lights will turn on (to match either a standard,
continuous, or coded transmitter), and the buzzer will sound. As
the transmitter continues on down the pipeline the signal strength
will decrease until the transmitter is out of range. When the signal
is at its peak the transmitter is directly under the antenna.
When working near noise generated by neighboring electrical
lines, areas with large electrical apparatus, or by erratic movements of the antenna, the technician should recognize that these
signals can trigger the 22 Hz detect light and buzzer, as well as the
A, B and C code lights of the receiver. If the receiver seems to
have picked up a stray signal then simply stop and steady the
receiver. Check to see if there is the distinctive solid tone or beat
of the transmitter. If no solid tone or pulsing beat is detected
then most likely noise triggered the receiver and the operator
should continue the search. When walking with the receiver to
locate a transmitter (such as to locate a stuck pig), the external
antenna is least likely to pick up noise when gently suspending
the antenna by holding the cable, allowing the antenna to point to
the ground. As the technician approaches the transmitter with the
antenna in a vertical position over the line, the signal level
indicated by both the meter and lights will increase until the
antenna is directly over the transmitter. (Detection could start
well over 30 feet from the transmitter’s actual location). When
the antenna is exactly over the transmitter a sharp signal loss or
“null” will occur. As the antenna is moved on either side of the
null point the signal strength will again increase. The receiver
signal gain should be adjusted to suit the strength of the
transmitter and distance between transmitter and receiver.
In most cases, technicians find it convenient to use the internal
antenna to locate the transmitter at launch and trap facilities.
Depending on facility interference, the receiver is usually set on a
3/4 gain and pointed in the direction of the where the transmitter
is thought to be. With a slow sweeping motion and advancing
towards the transmitter the technician watches the meter or
signal lights for the greatest signal, the technician is then able to
identify the direction in which the greatest gain comes from.
While moving closer to the transmitter the technician will likely be
required to turn down the gain due to the proximity of the signal.
Move the receiver from side to side or back and forth with
receiver or external antenna (if used) pointing perpendicular to
the tool. When the receiver is perpendicular to and exactly in the
middle of the transmitter a null (sharp loss) in the signal strength
will be evident. In fact, at that precise position the receiver may
indicate that there is no signal.
Specification
Value
Operating Voltage
-
4.5 Volts
Batteries
-
3 x C Cell Alkaline (LR6)
Wavetrak recommends: Duracell
Procell PC2400
Operating
Temperature
-
-20oC to +54oC (for batteries)
-30oC to +85oC (for electronics)
Weight
-
1.5 lbs
Transmitter
Dimensions
-
7.2”x 1.5”
18.3 cm x 3.6 cm
Materials
-
304 Stainless Steel body, 303 Stainless
Steel cap
O-Ring Size
-
AS 568-DASH #024
Recommended
Cap Torque
Setting
-
48 in∙lbs
4 ft∙lbs
5.4 N∙m
Delrin Can Size
-
8.6” x 1.91”
Detection Range
-
Half gain, half scale: 28 ft. (open air)*
Battery Life:
Standard
Continuous
-
100+ hours
100+ hours
-
6” + in diameter
Recommended
Pipeline Size
Specification
Value
Operating Voltage
-
3 Volts
Batteries
-
2 x C Cell Alkaline (LR14)
Wavetrak recommends: Duracell
Procell PC1400
Operating
Temperature
-
-20oC to +54oC (for batteries)
-30oC to +85oC (for electronics)
Weight
-
2 lbs
Transmitter
Dimensions
-
5.2” x 1.9”
13.3 cm x 4.8 cm
Materials
-
304 Stainless Steel body, 303 Stainless
Steel cap
O-Ring Size
-
AS 568-DASH #128
Recommended
Cap Torque
Setting
-
54 in∙lbs
4.5 ft∙lbs
6.1 N∙m
Delrin Can Size
-
6.5” x 2.45”
Detection Range
-
Half gain, half scale: 24 ft. (open air)*
Battery Life:
Standard
Continuous
-
100+ hours
100+ hours
-
8” + in diameter
Recommended
Pipeline Size
Specification
Value
Operating Voltage
-
6 Volts
Batteries
-
4 x C Cell Alkaline (LR14)
Wavetrak recommends: Duracell
Procell PC1400
Operating
Temperature
-
-20oC to +54oC (for batteries)
-30oC to +85oC (for electronics)
Weight
-
4 lbs
Transmitter
Dimensions
-
9” x 1.9”
23 cm x 4.8 cm in diameter
Materials
-
304 Stainless Steel body, 303 Stainless
Steel cap
O-Ring Size
-
AS 568-DASH #128
Recommended
Cap Torque
Setting
-
54 in∙lbs
4.5 ft∙lbs
6.1 N∙m
Delrin Can Size
-
10.6” x 2.45”
Detection Range
-
Half gain, half scale: 42 ft. (open air)*
Battery Life:
Standard
Continuous
-
275+ hours
200+ hours
-
8” + in diameter
Recommended
Pipeline Size
Specification
Value
Operating Voltage
-
3 Volts
Batteries
-
2 x D Cell Alkaline (LR20)
Wavetrak recommends: Duracell
Procell PC1300
Operating
Temperature
-
-20oC to +54oC (for batteries)
-30oC to +85oC (for electronics)
Weight
-
4.5 lbs
Transmitter
Dimensions
-
6.3” x 2.5”
16 cm x 6.3 cm
Materials
-
304 Stainless Steel body, 303 Stainless
Steel cap
O-Ring Size
-
AS 568-DASH #137
Recommended
Cap Torque
Setting
-
108 in∙lbs
9 ft∙lbs
12.2 N∙m
Delrin Can Size
-
8.1” x 2.99”
Detection Range
-
Half gain, half scale: 27 ft. (open air)*
Battery Life:
Standard
Continuous
-
150+ hours
125+ hours
-
10” + in diameter
Recommended
Pipeline Size
Specification
Value
Operating Voltage
-
6 Volts
Batteries
-
4 x D Cell Alkaline (LR20)
Wavetrak recommends: Duracell
Procell PC1300
Operating
Temperature
-
-20oC to +54oC (for batteries)
-30oC to +85oC (for electronics)
Weight
-
8.5 lbs
Transmitter
Dimensions
-
11” x 2.5”
28 cm x 6.3 cm in diameter
Materials
-
304 Stainless Steel body, 303 Stainless
Steel cap
O-Ring Size
-
AS 568-DASH #137
Recommended
Cap Torque
Setting
-
108 in∙lbs
9 ft∙lbs
12.2 N∙m
Delrin Can Size
-
13.3” x 3.49”
Detection Range
-
Half gain, half scale: 46 ft. (open air)*
Battery Life:
Standard
Continuous
-
250+ hours
150+ hours
-
10” + in diameter
Recommended
Pipeline Size
Along with the regular stock transmitters, Wavetrak offers custom
transmitters to meet the requirements of different tracking
circumstances. Stock size transmitters can be built for specific
signal strength or battery life.
*NOTE: Transmitter detection range depends on a number of
variables including pipe thickness and amount of earth the signal
must pass through. Therefore, the detection range in different
field circumstances may not be the same as the open air detection
range listed above.
Problem
The transmitter will
not emit signal:
Solution
-
-
Fluid and/or gas
leaks into battery
compartment:
-
Ensure that the unit has fresh
batteries installed properly with
correct polarity and making good
contact.
Ensure that the internal sleeve is in
good condition.
Ensure that both springs are in good
condition.
Check transmitter operation with a
different Receiver to ensure that the
receiver is working properly.
Inspect o-rings and replace if
necessary.
The information contained in this manual is subject to
change without notice.
This manual is copyright © 2013 Wavetrak Electronics
Ltd. All rights reserved.
To the maximum extent permitted by law, Wavetrak
Electronics Ltd. is not responsible for any direct,
special, incidental, or consequential damages by the
operator(s), the operator’s employer, or any party,
resulting from any breach of warranty, use or misuse of
this product, or under any other legal theory (including,
but not limited to, lost profits, downtime, goodwill and
damage to or replacement of equipment and property),
even if Wavetrak Electronics Ltd. has been advised of
the possibility of such damages. (Some jurisdictions do
not allow the exclusion or limitation of incidental or
consequential damages, so the above limitations may
not apply.)
All Wavetrak Electronics equipment is proudly backed
by a one (1) year warranty against manufacturing
defects.
For more details see
http://www.wavetrak.ca/pdf/Wavetrak Warranty
Card.pdf


