Chapter 2
advertisement
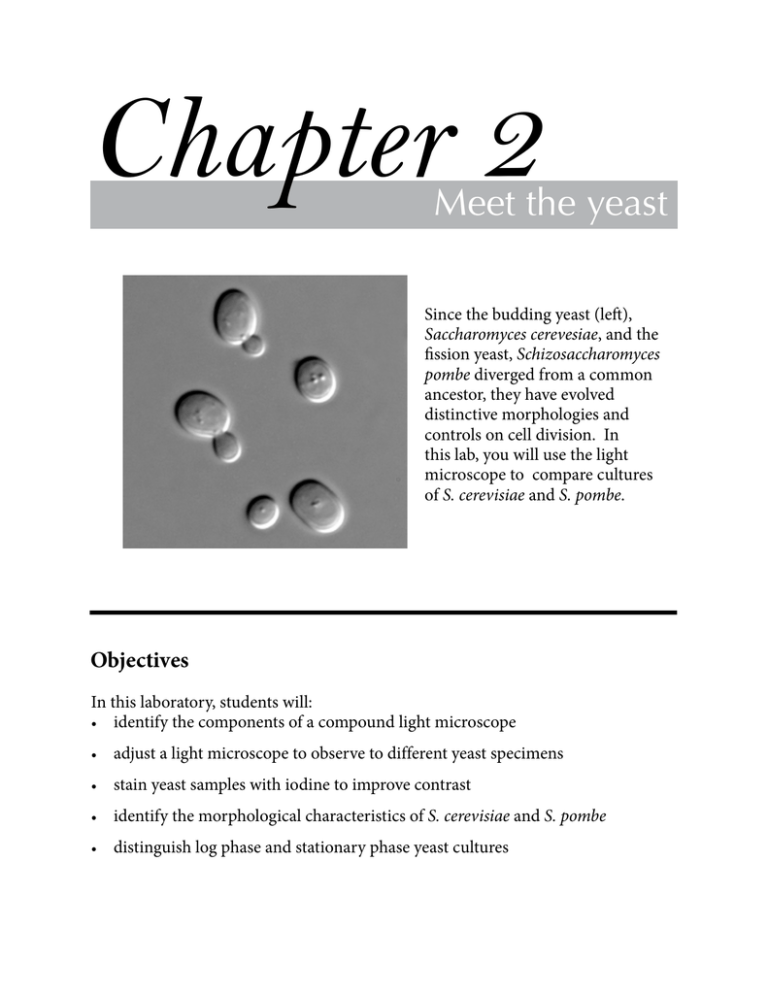
Chapter 2 Meet the yeast Since the budding yeast (left), Saccharomyces cerevesiae, and the fission yeast, Schizosaccharomyces pombe diverged from a common ancestor, they have evolved distinctive morphologies and controls on cell division. In this lab, you will use the light microscope to compare cultures of S. cerevisiae and S. pombe. Objectives In this laboratory, students will: • identify the components of a compound light microscope • adjust a light microscope to observe to different yeast specimens • stain yeast samples with iodine to improve contrast • identify the morphological characteristics of S. cerevisiae and S. pombe • distinguish log phase and stationary phase yeast cultures Chapter 2 Two very different yeast As their names imply, the budding yeast, Saccharomyces cerevisiae, and the fission yeast, Schizosaccharomyces pombe, are sugar-loving fungi that were originally isolated from beer. S. cerevisiae has been important to human civilization for millenia, because of its various roles in the preparation of wine, bread and beer. Over the past century, scientists have worked with genetically pure strains in the laboratory (Mortimer, 2000). S. cerevisiae and S. pombe are members of the ascomycota phylum, which can exist in both diploid and haploid forms. In response to various stresses, haploid strains of opposite mating type are induced to mate and undergo meiosis. The four spores generated from meiosis are contained within a resistant structure known as the ascus, which gives the phylum its name, ascomycota. Diversification of yeast in the Phylum Ascomycota. Most phylogenetic trees predict that the budding and fission yeast diverged from a common ancestor ~1 billion years ago. S. pombe is considered more similar to the common ancestor. This partial reconstruction shows that the lineage leading to S. cerevisiae has evolved rapidly (Mortimer, 2000). In this lab, you will use a compound light microscope to observe S. cerevisiae and S. pombe from both rapidly-growing and nutrient-rich and nutrient-depleted cultures. Our microscopes do not have the sophisticated optics used to obtain the images shown above, but you will be able to distinguish cells at various points in the cell cycle and to distinguish S. cerevisiae and S. pombe. In nutrient-rich media, cells grow exponentially, and this period of rapid growth is often referred to as log phase. Log phase yeast pass continuously through the cell cycle, and a log phase culture will have cells in the G1, S, G2 and M phases of the cell cycle. As shown in the figure on the opposite page, however, the proportion of cells in each phase varies signicantly in S. cerevisiae and S. pombe cultures, because the principal cell cycle checkpoint occurs at a different place in the cycle (Turner et al., 2012). In S. cerevisiae, buds begin to form when cells enter S phase. The size of the bud, which will become the daughter cell, continues to grow until the cells divide in M phase. At the time that the cell divides, the daughter cell is still smaller than the mother cell. The daughter cell will need to grow a bit before it enters another round of cell division. By contrast, S. pombe divides by medial fission. Cells grow in length until they are 12-15 µm, at which point the cell divides and a septum begins to form. The unusually long G2 phase of S. pombe may reflect the fact that it is found primarily as a haploid in nature, unlike S. cerevisiae, which is found in both diploid and haploid forms. One would expect that haploid yeast to be more susceptible to adverse effects of spontaneous mutations than diploid yeast, in which deleterious mutations may be masked by a functional second allele. 8 Meet the yeast Cell cycle control is different in S. cerevisiae and S. pombe. The principal size checkpoint in S. cerevisiae occurs at the G1/S boundary. The corresponding checkpoint in S. pombe, which spends most of its cell cycle in G2, occurs at the G2/M boundary. When nutrients are depleted, however, cells need to down-regulate their metabolism and enter a stress-resistant state. Yeast entering stationary phase adjust their metabolism by altering the transcription of hundreds of genes, leading to many physiological changes, including the accumulation of carbohydrate reserves and the assembly of a more resistant cell wall (reviewed in Werner-Wasburne et al., 1993). Cells can survive in stationary phase for extended periods of time, resuming growth when conditions are favorable. S. pombe enters stationary phase more rapidly than S. cerevisiae which passes through an intermediate metabolic stage in which the rate of cell division is sharply reduced before it enters true stationary phase. The “stationary” phase S. cerevisiae cells in this experiment are in this intermediate state. Observing microorganisms with light microscopy Microscopes are essential for viewing microorganisms. The first person to observe yeast and bacteria, was Anton van Leeuwenhoek, who called them animalcules. Yeast cells typically have diameters of ~10 µm, while bacteria have diameters of ~1 µm, both of which are far too small to be seen without considerable magnification. Light microscopes have a maximum resolution of ~0.2 µm, which is sufficient to resolve individual yeast cells and provide rough infomation about intracellular organization. (More detailed information about subcellular structure requires an electron microscope.) Compound light microscopes use a system of lenses to gather and focus light passing through a specimen and to project the image on the viewer’s retina. The specimens used for light microscopy are usually stained to increase their contrast prior to observations. Today, a large number of specialized reagents and protocols for staining cells have been described, and investigators select stains to suit the purposes of their individual experiments. In this lab, we will use an iodine solution that stains glycogen particles present in yeast. Our labs are equipped with Leica DM500 light microscopes (see the following page). Light from an LED source at the base of the microscope enters a condenser that focuses the light that will reach the specimen on the microscope stage. Users are able to control the amount of light reaching the specimen by opening or closing an iris diaphragm on the condenser. The microscope has four, interchangeable objective lenses, with magnifications of 4X, 10X, 40X and 100X. Ocular lenses in the eyepieces magnify specimens an additional 10-fold, producing final magnifications of 40X, 100X, 400X and 1000X. The lenses on the DM500 are parfocal, meaning 9 Chapter 2 Leica DM500 Light microscope Eyepieces have 10X magnification Interpupillary distance is adjustable Parfocal objective lenses 4X, 10X, 40X and 100X Slide holder is mounted on microscope stage Coarse focus Fine focus XY Controls for moving stage Light source Condenser focuses the light reaching the specimen Iris diaphragm regulates the amount of light reaching the condenser Dimmer switch (not visible here) 10 Meet the yeast that specimens remain reasonably well-focused when the lenses are changed. (We will not be using the 100X lens, which requires immersion oil.) When working with the microscope, always begin with the lowest power objective, which is easiest to focus, and work your way to the higher power objectives. Exercise 1 - using the compound light microscope NOTE: Lenses are fragile and expensive—treat them with care! Objectives should NEVER touch the slide! Clean lenses with lens paper only. KimwipesTM and other paper may scratch a lens. Students should work in groups of three. 1. I dentify the parts of the microscope. Note the positions of the objectives, the coarse and fine focus adjustments, the adjustable light switch and the condenser diaphragm. Adjust the positions of the eyepieces to fit the distance between your eyes. 2. L ocate the four objective lenses on the microscopes. The magnification of each lens (4x, 10x, 40x, and 100x) is stamped on its casing. Rotate the 4x objective into position. Adjust the position of the iris diaphragm on the condenser to its corresponding 4x position. 3. T urn on the microscope lamp and adjust the dimmer switch until the light is not too intense when you look through the eyepieces. You may need to adjust the distance between the eyepieces to fit your eyes. 4. P lace the transparent ruler on the microscope stage. Use the coarse focus knob to bring the ruler into focus. You may also need to adjust the light. Make additional adjustments with the fine focus knob. The ruler is graduated into 1 mm divisions. (Remember that 1 mm is equal to 1000 µm, the unit of distance usually used by microscopists.) What is the diameter of the field of view with the 4x objective? 5. U se the stage manipulators to move the ruler to either the right or the left. What direction does the image move? 6. D ial the 10x objective into position and adjust the condenser diaphragm. How does the distance between the specimen and the objective change? Adjust the focus with the coarse and fine focus adjustment knobs. What is the diameter of the field of view with the 10x objective? Can you find a mathematical relationship between the magnification and the diameter of the field of view? 7. S wing the 40x objective into position and adjust the condenser diaphragm. Adjust the focus using ONLY the fine focus knob. What happens to the working distance and the field of view? 11 Chapter 2 Exercise 2 - observing yeast cultures with the microscope Each student will prepare one slide. Students should observe the specimens on each other’s slides. 1. Prepare three slides: In this experiment, you will prepare three slides, each of which contains two different samples for easy comparison. The slides are large enough to accommodate two samples—and two coverslips. Number the slides with a Sharpie (Use the frosted area, if the slide has one.) As you work, be sure to record which of the two samples is closer to the labeled end of the slide. Use the space provided on the opposite page to record your data. Slide 1: compare log phase cultures of S. pombe and S. cerevisiae. Slide 2: compare log and stationary phase cultures of S. cerevisiae. Slide 3: compare log and stationary phase cultures of S. pombe. 2. Prepare concentrated cell suspensions. • Concentrate the cells in your log phase yeast cultures by centrifuging the culture tube for a count of 10 in a microcentrifuge set at top speed. Hold down the Quick button on the Labnet microcentrifuges or the button between the two dials on the Eppendorf microcentrifuges. • Use a transfer pipet to remove most of the culture medium, until the medium just covers the cell pellet. • Resuspend the cells with the vortex mixer. • Note: It is not necessary to centrifuge the stationary phase cultures, which are more concentrated than the log phase cultures. 3. Transfer and stain the cell samples • Transfer a very small drop (the size of this o) of each cell suspension to the slide, using a disposable pipet. • Stain the cells by adding a drop of Gram’s Iodine to each cell suspension. The drop of iodine should be about three times greater than the drop of cells. • Cover each sample with a coverslip. 4. Observe the cells and record your observations • Use the same sequence of microscope adjustments that you used in the ruler exercise to visualize the cultures. Start at low magnification and gradually increase the magnification, making changes in the condenser diaphragm as needed. (Play with the position of the aperture diaphragm a bit to maximize the quality of the image.) • In the space provided, draw some examples of the forms that you see in the cultures and the relative proportions of each form. Comment on both the sizes and shapes of the cells. What differences did you observe between the two species? What differences did you observe between stationary and log phase cells ? Were there any differences in iodine staining between species or growth phases? What would that infer about glycogen storage? 12 Meet the yeast Slide 1: Compare S. cerevisiae and S. pombe log phase cultures Slide 2: Compare S. cerevisiae log and stationary phase cultures Slide 3: Compare S. pombe log and stationary phase cultures When you are finished with your observations, dispose of the slides in the glass waste. 13 Chapter 2 References Mortimer, RK (2000) Evolution and variation of the yeast (Saccharomyces) genome. Genome Res 10: 403-409. Turner, JJ, Ewald, JC & Skotheim, JM (2012) Cell size control in yeast. Curr Biol 22: R350-R359. Werner-Washburne, M, Braun, E, Johnston, GC & Singer, RA (1993) Stationary phase in the yeast Saccharomyces cerevisiae. Microbiol Rev 57: 383-401. 14
