Classic Apps Editor Help Card
Classic Article Library and Headlines & Features Editor
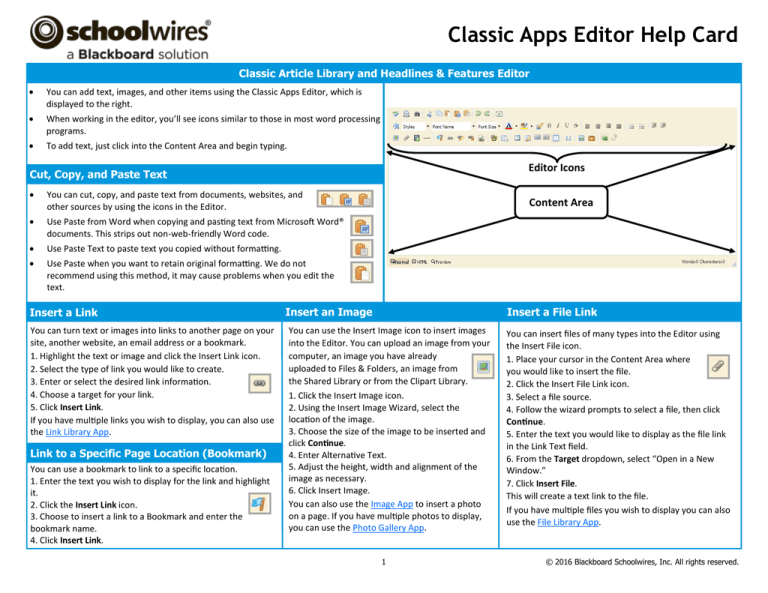
You can add text, images, and other items using the Classic Apps Editor, which is
displayed to the right.
When working in the editor, you’ll see icons similar to those in most word processing
programs.
To add text, just click into the Content Area and begin typing.
Editor Icons
Cut, Copy, and Paste Text
You can cut, copy, and paste text from documents, websites, and
other sources by using the icons in the Editor.
Use Paste from Word when copying and pasting text from Microsoft Word®
documents. This strips out non-web-friendly Word code.
Use Paste Text to paste text you copied without formatting.
Use Paste when you want to retain original formatting. We do not
recommend using this method, it may cause problems when you edit the
text.
Insert a Link
You can turn text or images into links to another page on your
site, another website, an email address or a bookmark.
1. Highlight the text or image and click the Insert Link icon.
2. Select the type of link you would like to create.
3. Enter or select the desired link information.
4. Choose a target for your link.
5. Click Insert Link.
If you have multiple links you wish to display, you can also use
the Link Library App.
Link to a Specific Page Location (Bookmark)
You can use a bookmark to link to a specific location.
1. Enter the text you wish to display for the link and highlight
it.
2. Click the Insert Link icon.
3. Choose to insert a link to a Bookmark and enter the
bookmark name.
4. Click Insert Link.
Content Area
Insert an Image
Insert a File Link
You can use the Insert Image icon to insert images
into the Editor. You can upload an image from your
computer, an image you have already
uploaded to Files & Folders, an image from
the Shared Library or from the Clipart Library.
1. Click the Insert Image icon.
2. Using the Insert Image Wizard, select the
location of the image.
3. Choose the size of the image to be inserted and
click Continue.
4. Enter Alternative Text.
5. Adjust the height, width and alignment of the
image as necessary.
6. Click Insert Image.
You can also use the Image App to insert a photo
on a page. If you have multiple photos to display,
you can use the Photo Gallery App.
1
You can insert files of many types into the Editor using
the Insert File icon.
1. Place your cursor in the Content Area where
you would like to insert the file.
2. Click the Insert File Link icon.
3. Select a file source.
4. Follow the wizard prompts to select a file, then click
Continue.
5. Enter the text you would like to display as the file link
in the Link Text field.
6. From the Target dropdown, select “Open in a New
Window.”
7. Click Insert File.
This will create a text link to the file.
If you have multiple files you wish to display you can also
use the File Library App.
© 2016 Blackboard Schoolwires, Inc. All rights reserved.
Classic Apps Editor Help Card
Insert ActiveBlocks™
Special Use Icons
Insert a Table
The Special Characters icon allows you to
You can use ActiveBlocks™ to add dynamic content to your
website. They will display in the Schoolwires Editor as code
that looks something like “[$LongDate$].” Here’s how o
insert an ActiveBlock into the Schoolwires Editor.
1. Place your cursor where you wish
to insert the table.
2. Click on the Insert Table icon.
Position by Pixel lets you position images
3. From the drop-down list, select
exactly where you want them.
the number of rows and columns
you want in the table or select Table
Format Eraser allows you remove formatting Wizard to build a custom table.
from highlighted text and objects.
4. Click on the Table Options icon .
Insert or delete rows, columns,
Full Screen expands your Content area to a
or cells.
full screen view.
Merge cells or split merged cells.
Edit the properties (e.g., borders or background
Formatting allows you to apply text
images) of a cell or row.
formatting,
borders, backgrounds and more.
5. To edit the Table Properties, click the table tag and select
Table Properties from the pop-up menu.
Note that these tables are not adaptive and may be askew
Content E-Alert
when displayed on the end-user website. Use the Table
App instead to create responsive tables.
enter symbols, special characters and more.
1. Place your cursor where you’d like your content
to display.
2. Click the Toolbox icon.
3. Select an ActiveBlock from the dropdown list.
Embed Content from other Websites
You can also use ActiveBlocks™ to embed content from
another location on your website or another website in the
Editor. This can be helpful if you want to display content
from one section of your website in another section (e.g.,
embedding a Current Events page in several different
Send a
sections). Any edits to the original content displays
You can use Content E-Alerts to easily communicate
everywhere it is embedded.
1. Click the Open Toolbox icon.
2. Scroll down and select Embed Simple Content.
3. Enter the URL of the website you wish to display
(e.g., http://www.schoolwires.com).
4. Click Insert.
5. Click Save.
with students, parents and other community members
who have subscribed to your area of the website. You Adding a Border to a Table
can send a Content E-Alert to let your subscribers
1. Insert a table.
know that you have updated content on a page.
2. Edit the Table Properties.
If you want to embed a web page that requires user
interaction (e.g., search engines like Google.com)
choose ‘Embed Complex Content’. This displays the
target URL in an frame that allows the user to interact with
its content.
You can use the Embed Code App to embed content on a
page or the Document Viewer App allows you to display a
document on a page without embedding and adjusting code
within the Editor.
Click Create E-Alert to send an email to your
subscribers.
You may edit the sender name and email address
as well as subject and body.
The E-Alert body contains a link to the page you
created it on; do not edit this.
2
3. Click the Table Options tab.
4. Enter a value in the Border field and select px from the
drop-down list.
5. Click the Border Color field and select a color.
6. Select an option from the Rules drop-down list.
7. Click OK.
© 2016 Blackboard Schoolwires, Inc. All rights reserved.


