Solder-Point Temperature Measurement of Cree® XLamp® LEDs
CLD-AP157 rev 1C
Application Note
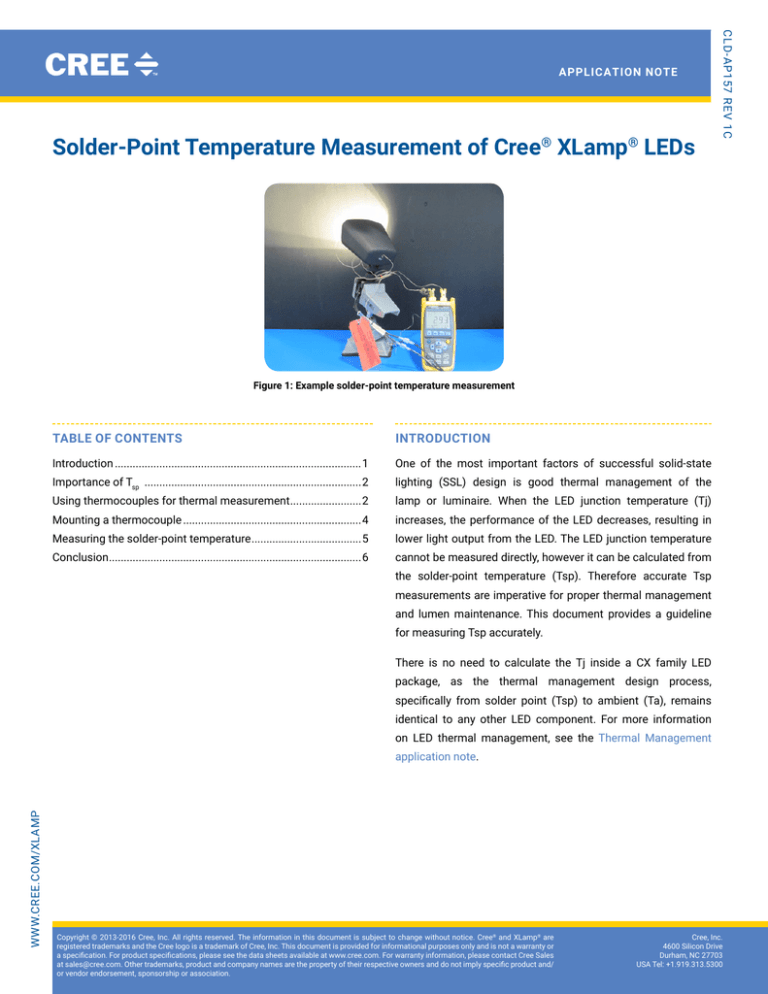
Figure 1: Example solder-point temperature measurement
Table of Contents
Introduction
Introduction....................................................................................1
One of the most important factors of successful solid‑state
Importance of Tsp ..........................................................................2
lighting (SSL) design is good thermal management of the
Using thermocouples for thermal measurement.........................2
lamp or luminaire. When the LED junction temperature (Tj)
Mounting a thermocouple.............................................................4
increases, the performance of the LED decreases, resulting in
Measuring the solder‑point temperature......................................5
lower light output from the LED. The LED junction temperature
Conclusion......................................................................................6
cannot be measured directly, however it can be calculated from
the solder‑point temperature (Tsp). Therefore accurate Tsp
measurements are imperative for proper thermal management
and lumen maintenance. This document provides a guideline
for measuring Tsp accurately.
There is no need to calculate the Tj inside a CX family LED
package, as the thermal management design process,
specifically from solder point (Tsp) to ambient (Ta), remains
identical to any other LED component. For more information
on LED thermal management, see the Thermal Management
www.cree.com/Xlamp
application note.
Copyright © 2013-2016 Cree, Inc. All rights reserved. The information in this document is subject to change without notice. Cree® and XLamp® are
registered trademarks and the Cree logo is a trademark of Cree, Inc. This document is provided for informational purposes only and is not a warranty or
a specification. For product specifications, please see the data sheets available at www.cree.com. For warranty information, please contact Cree Sales
at sales@cree.com. Other trademarks, product and company names are the property of their respective owners and do not imply specific product and/
or vendor endorsement, sponsorship or association.
Cree, Inc.
4600 Silicon Drive
Durham, NC 27703
USA Tel: +1.919.313.5300
Solder-Point Temperature Measurement of Cree XLamp ® LEDs
Importance of Tsp
LEDs produce light when a current is passed across the junction of the chip. As efficient as LEDs currently are, a large percentage of the
input power generates heat rather than light. Heat that is not dissipated will have not only an immediate negative impact on light output
but also decrease the LED’s light output over time and could cause premature catastrophic failure. Cree provides data characterizing how
each of its XLamp LEDs performs versus Tj. The Tj of an LED cannot be measured directly; it must be calculated using Equation 1 below,
based on the measured Tsp, the total power input to the LED and the thermal resistance of the LED as stated on its data sheet.
Tj = Tsp + θth Ptotal
Equation 1: Junction temperature calculation
where:
Tj
Junction temperature in degrees Celsius (°C)
Tsp Measured solder‑point temperature (°C)
θth Thermal resistance of the LED in degrees Celsius per watt (°C/W)
Each XLamp LED’s thermal resistance can be found in the LED’s data sheet.
PtotalTotal power input to the LED (W)
Ptotal can be calculated by multiplying the input current (If) by the forward voltage (Vf)
Using thermocouples for thermal measurement
Thermocouples are the equipment most commonly used for temperature measurements. A thermocouple is made of two thin metal
wires of two different types of metal. The ends of the wires are welded together, and the leads are separated with insulation, so that only
the welded end is in contact with the device under test. When the welded end is heated or cooled, a DC voltage differential is created
between the two metals, often referred to as the Seebeck effect. The DC voltage is interpreted by a thermometer to provide a temperature
reading; the voltage generated is proportional to the temperature of the device under test.
Nickel-Chromium
Nickel-Aluminum
Figure 2: Typical type K thermocouple
Thermocouple types are determined according to the metals from which they are made. Each type is color coded according to American
National Standards Institute (ANSI) and Illuminating Engineering Society (IES) standards, as shown in Table 1.1
1
www.omega.com/temperature/pdf/tc_colorcodes.pdf
Copyright © 2013-2016 Cree, Inc. All rights reserved. The information in this document is subject to change without notice. Cree® and XLamp® are registered trademarks and the Cree logo is a trademark of
Cree, Inc. This document is provided for informational purposes only and is not a warranty or a specification. For product specifications, please see the data sheets available at www.cree.com. For warranty
information, please contact Cree Sales at sales@cree.com. Other trademarks, product and company names are the property of their respective owners and do not imply specific product and/or vendor
endorsement, sponsorship or association.
2
Solder-Point Temperature Measurement of Cree XLamp ® LEDs
Table 1: ANSI and IES thermocouple color codes
Organizations such as the Alliance for Solid-State Illumination Systems and Technologies (ASSIST)2 recommend that thermocouples be
shielded from direct light and other forms of optical radiation. Arrange the thermocouple wires to minimize the amount of direct light
exposure to them. Cree recommends using type T thermocouples to take measurements on CX family LEDs. The CX Family Design
Guide provides information on attaching a thermocouple and temperature measurement for CX family LEDs. For other XLamp® LEDs,
2 Alliance for Solid-State Illumination Systems and Technologies (ASSIST). 2014. ASSIST recommends… Recommendations for measuring
high‑power LED primary lens surface temperature with thermocouples. Vol. 13, Iss. 1. Troy, N.Y.: Lighting Research Center. Internet:
http://www.lrc.rpi.edu/programs/solidstate/assist/recommends/lensTemp.asp
Copyright © 2013-2016 Cree, Inc. All rights reserved. The information in this document is subject to change without notice. Cree® and XLamp® are registered trademarks and the Cree logo is a trademark of
Cree, Inc. This document is provided for informational purposes only and is not a warranty or a specification. For product specifications, please see the data sheets available at www.cree.com. For warranty
information, please contact Cree Sales at sales@cree.com. Other trademarks, product and company names are the property of their respective owners and do not imply specific product and/or vendor
endorsement, sponsorship or association.
3
Solder-Point Temperature Measurement of Cree XLamp ® LEDs
Cree recommends using type K thermocouples that are insulated with Teflon® (FEP) or wrapping the thermocouple leads that are on the
printed‑circuit board (PCB) with three layers of white Teflon tape.3 Doing so blocks any direct light on the thermocouple during testing.
Mounting a thermocouple
A thermocouple junction should be mounted so that it makes direct physical contact with the surface of the LED to be measured, as close
as possible to the LED’s thermal pad. Refer to the XLamp LED’s Soldering and Handling document on Cree’s website to find the specific Tsp
location. Thermocouples can be mounted several different ways, but the two most common ways are solder mount and adhesive mount.
1. Solder Mount
The solder mount method guarantees secure contact with the thermocouple and good thermal contact with the LED measurement
point. This method offers reliable temperature measurement, however soldering requires a considerable amount of skill and experience
to perform properly, and a compatible surface to which to solder. This method cannot be used to attach a thermocouple to surfaces
with which solder cannot bond, such as plastic, solder mask, and FR4 boards, on which LEDs are commonly mounted. However, a
thermocouple can be connected to an exposed contact pad as shown in the applicable Soldering and Handling document for each Cree
XLamp LED.
2. Adhesive Mount
Adhesive products are easier to use than solder, though they can pose other challenges such as short work life, requiring a post‑attach
cure, or simply causing a mess. This method can be performed with adhesive tape such as Kapton or a two‑part thermal adhesive
such as Arctic Silver™. Cree has found that using Arctic Silver thermal adhesive to secure the thermocouple provides accurate thermal
measurements and is the recommended method for attaching thermocouples.
Figure 3: Arctic Silver thermal adhesive
After mixing, the Arctic Silver adhesive takes about ten minutes to cure at room temperature. Therefore, Cree recommends that, prior to
mixing Arctic Silver, the thermocouple junction be placed at the desired Tsp location and the lead taped down so that the thermocouple
junction does not move. With the thermocouple junction flat against the Tsp location, cover the thermocouple junction with a small dab of
Arctic Silver. As shown in Figure 4, there should be just enough Arctic Silver to completely cover the thermocouple junction and attach it
securely to the Tsp location.
3Dupont™ Teflon®
Copyright © 2013-2016 Cree, Inc. All rights reserved. The information in this document is subject to change without notice. Cree® and XLamp® are registered trademarks and the Cree logo is a trademark of
Cree, Inc. This document is provided for informational purposes only and is not a warranty or a specification. For product specifications, please see the data sheets available at www.cree.com. For warranty
information, please contact Cree Sales at sales@cree.com. Other trademarks, product and company names are the property of their respective owners and do not imply specific product and/or vendor
endorsement, sponsorship or association.
4
Solder-Point Temperature Measurement of Cree XLamp ® LEDs
Figure 4: Applying Arctic Silver thermal adhesive
Figure 5 shows an example of a properly mounted thermocouple.
Figure 5: Left and center: properly mounting a thermocouple, right: the finished result
Measuring the solder‑point temperature
After the thermocouple junction is securely attached and shielded from direct light, which can affect the temperature measurement, use
a calibrated thermometer to measure the temperature. Cree recommends using a thermometer with data logging capabilities such as
an OMEGA HH147U or Fluke 54-II to graph the temperature over time and monitor the temperature stabilization. Set the thermometer
to record the temperature at one-minute intervals and apply power to the LED until the temperature stabilizes, which can take up to two
hours or more. The temperature is stable when the temperature reading does not change more than 1% for five minutes. See Figure 6
for an example measurement of stabilized Tsp. Make sure to place the LED under test in a location with a constant ambient temperature.
Copyright © 2013-2016 Cree, Inc. All rights reserved. The information in this document is subject to change without notice. Cree® and XLamp® are registered trademarks and the Cree logo is a trademark of
Cree, Inc. This document is provided for informational purposes only and is not a warranty or a specification. For product specifications, please see the data sheets available at www.cree.com. For warranty
information, please contact Cree Sales at sales@cree.com. Other trademarks, product and company names are the property of their respective owners and do not imply specific product and/or vendor
endorsement, sponsorship or association.
5
Solder-Point Temperature Measurement of Cree XLamp ® LEDs
Figure 6: Tsp stabilizing time
Conclusion
Observe the following practices to accurately measure LED Tsp.
•
Use an insulated thermocouple whenever possible.
•
Minimize the amount of direct light exposure on the thermocouple junction. Photons of light contacting the thermocouple junction
will affect the measurement.
•
Ensure that the thermocouple junction is in good mechanical contact with the specified LED Tsp measurement location.
•
Use tape to hold the thermocouple lead in place and relieve stress on the thermocouple junction.
•
Attach the thermocouple junction directly to the Tsp location using thermally conductive epoxy or by soldering.
•
Log the temperature measurement from turn‑on until stable, i.e., the temperature not changing by more than 1% for five minutes,
which can take several hours.
Copyright © 2013-2016 Cree, Inc. All rights reserved. The information in this document is subject to change without notice. Cree® and XLamp® are registered trademarks and the Cree logo is a trademark of
Cree, Inc. This document is provided for informational purposes only and is not a warranty or a specification. For product specifications, please see the data sheets available at www.cree.com. For warranty
information, please contact Cree Sales at sales@cree.com. Other trademarks, product and company names are the property of their respective owners and do not imply specific product and/or vendor
endorsement, sponsorship or association.
6


