installation instructions - vt3
advertisement

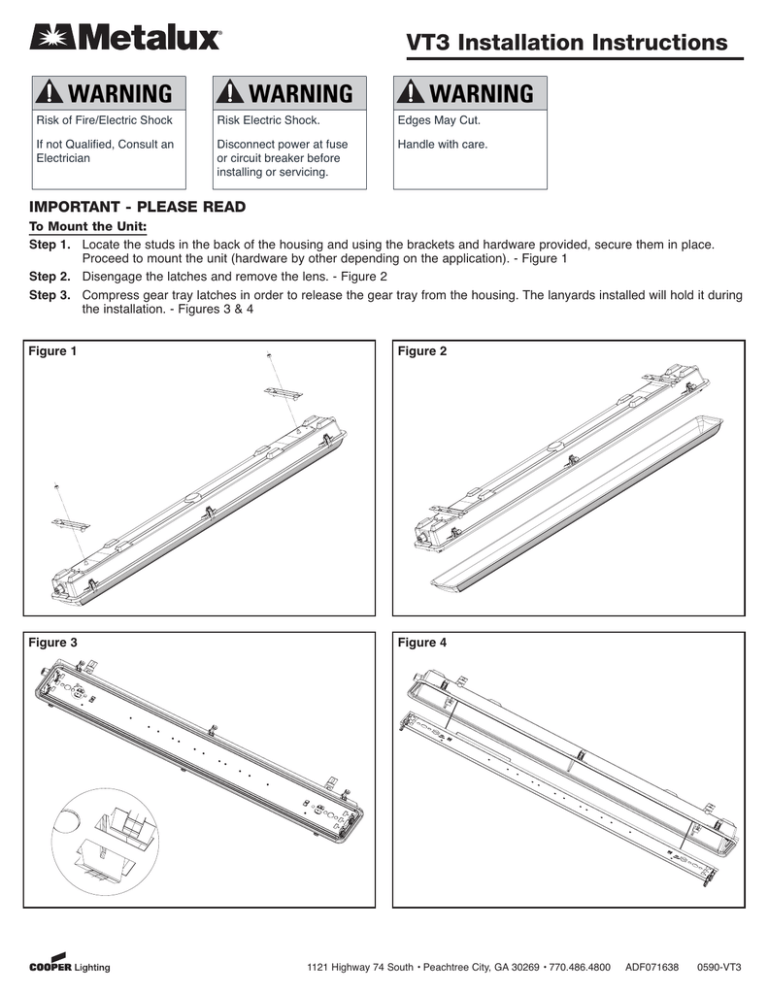
VT3 Installation Instructions WARNING WARNING WARNING Risk of Fire/Electric Shock Risk Electric Shock. Edges May Cut. If not Qualified, Consult an Electrician Disconnect power at fuse or circuit breaker before installing or servicing. Handle with care. IMPORTANT - PLEASE READ To Mount the Unit: Step 1. Locate the studs in the back of the housing and using the brackets and hardware provided, secure them in place. Proceed to mount the unit (hardware by other depending on the application). - Figure 1 Step 2. Disengage the latches and remove the lens. - Figure 2 Step 3. Compress gear tray latches in order to release the gear tray from the housing. The lanyards installed will hold it during the installation. - Figures 3 & 4 Figure 1 Figure 2 Figure 3 Figure 4 B 1121 Highway 74 South • Peachtree City, GA 30269 • 770.486.4800 ADF071638 0590-VT3 VT3 Installation Instructions Step 4. Locate the conduit hubs included in the parts bag and install them on each end of the unit. Perform the electrical installation according to code. Make provisions for the power supply to have additional 12” of wire to ease maintenance. - Figure 5 Step 5. Insert gear tray into the housing until it engages the clips and secures in place. - Figure 6 Step 6. Install the Lamps, center the Lens in the unit and close all the latches. - Figure 7 Figure 5 Figure 6 Figure 7 1121 Highway 74 South • Peachtree City, GA 30269 • 770.486.4800 ADF071638 0590-VT3


