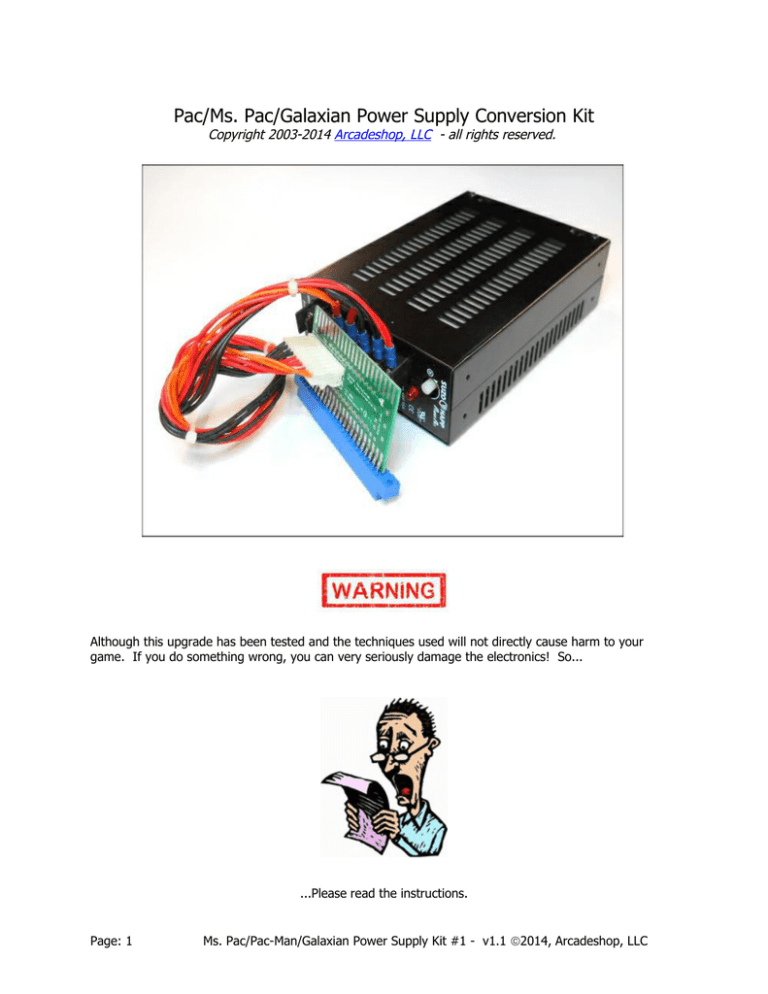
Pac/Ms. Pac/Galaxian Power Supply Conversion Kit
Copyright 2003-2014 Arcadeshop, LLC - all rights reserved.
Although this upgrade has been tested and the techniques used will not directly cause harm to your
game. If you do something wrong, you can very seriously damage the electronics! So...
...Please read the instructions.
Page: 1
Ms. Pac/Pac-Man/Galaxian Power Supply Kit #1 - v1.1 ã2014, Arcadeshop, LLC
To perform this upgrade you should:
•
Have a working understanding of electronics.
•
Be familiar with safe handling procedures for electronic components.
•
Be able to follow directions.
Anytime you start messing around with something (particularly something electronic) you
accept a certain amount of risk that you may break something. This kit carries with it no
guaranty of compatibility to your particular game. If you carefully follow these
instructions, you’ll do fine and everything will work. If this looks like it’s above your
confidence level please recruit someone to install the kit for you!
Introduction
Congratulations! You now have the power supply conversion kit which should bullet
proof your game. The original power supply could be rebuilt, but a new switching power
supply is power efficient, has built in shut down protection and runs cooler.
Before we get started, grab your favorite beverage, maybe something to snack on, and
find a quiet place to read this manual so you fully understand what to do before you start
tinkering around with your precious labor of love!
Necessary Parts and Tools:
You will need the following parts/tools for this upgrade...
•
Phillips Screwdriver
•
Pliers
Step One: Unplug the game from its power source!
While installing this kit, electric shock is possible if power is present!
Page: 2
Ms. Pac/Pac-Man/Galaxian Power Supply Kit #1 - v1.1 ã2014, Arcadeshop, LLC
Step Two: Assembly and mounting new power supply
First, attach the wires from the interface adapter to the new power supply. Red wires go
to +5, Orange wires go to +12 and Black wires go to Ground (GND). Attach the two A.C.
power wires to the “AC” terminals. Next, find a convenient location to mount the new
power supply. Note: It must be mounted close enough to the game board so the
interface adapter will reach. Next, you will need to disconnect the 44 pin wiring harness
connector for your game PCB and plug in the interface adapter to your game PCB, Now
attach the 44 pin wiring harness connector to the top of the interface adapter. Be sure
the connector is plugged in the correct way by matching the missing wire to the missing
pin on the new power adapter.
Locate the two A.C. power wires leading to the monitor. Find a convenient spot and tap
the two A.C. wires from the new power supply to each of the monitor power wires.
Step Three: Check your work
Verify all connectors and be sure everything is secure. You may need to adjust the +5 volts to
5.05 volts. For additional help visit our web site: www.arcadeshop.com
You have installed the kit – congratulations!
Final Notes:
This kit carries with it no guaranty of compatibility to your particular game. Although this kit has
been tested with numerous games, there is a possibility that some of them are different. This kit
carries no liability protection for you game, while there is no reason this kit should cause damage
to your game, it is possible that incorrect or poor wiring can damage your game board(s).
Liability is limited to repair/replacement of the Kit only.
Page: 3
Ms. Pac/Pac-Man/Galaxian Power Supply Kit #1 - v1.1 ã2014, Arcadeshop, LLC


