The technology
of inspection
June 2011
How technology has improved inspection
Technology, inspection, risk-management and your business.
Over relatively recent years, technology has enabled significant advances in the effectiveness of
inspection services. What’s more: the speed of change is set to increase.
There are three key aspects of an inspection service: the competence of the inspector, the reliability of
the inspection and the quality of information used and created by the inspector. Technology is rapidly
enhancing all three.
Inspector competence
Competence is a combination of skill, knowledge and ability.
Qualifications and experience are good indicators of competence.
When it comes to plant and equipment inspections, raw
competence manifests itself as the ability to assess risk and to
recognise a defect, while categorising and reporting defects
reliably and quickly.
The most striking innovations are therefore those that assist in
acquiring, processing and conveying information effectively and
efficiently. Inspection, like most sectors, has benefited from using
PCs, specialist software available thereon and, more recently, the
internet. Zurich Engineering inspectors combine all three on
specialist outdoor PCs built by Panasonic called Toughbooks.
Why we use Panasonic Toughbooks
• Uninterrupted access to a vast library of the latest quality
technical- and health and safety information.
• Ability to create electronic reports in ‘real time’ with photographs
from the scene to enhance reports where relevant.
• Access to online assessments, such as those provided by
Cognisco Ltd , to test individuals’ understanding, and
confidence in, key technical- and health and safety matters.
• Assimilated training and assessment data allows ranking
and grouping of inspectors to focus training and other
interventions accordingly.
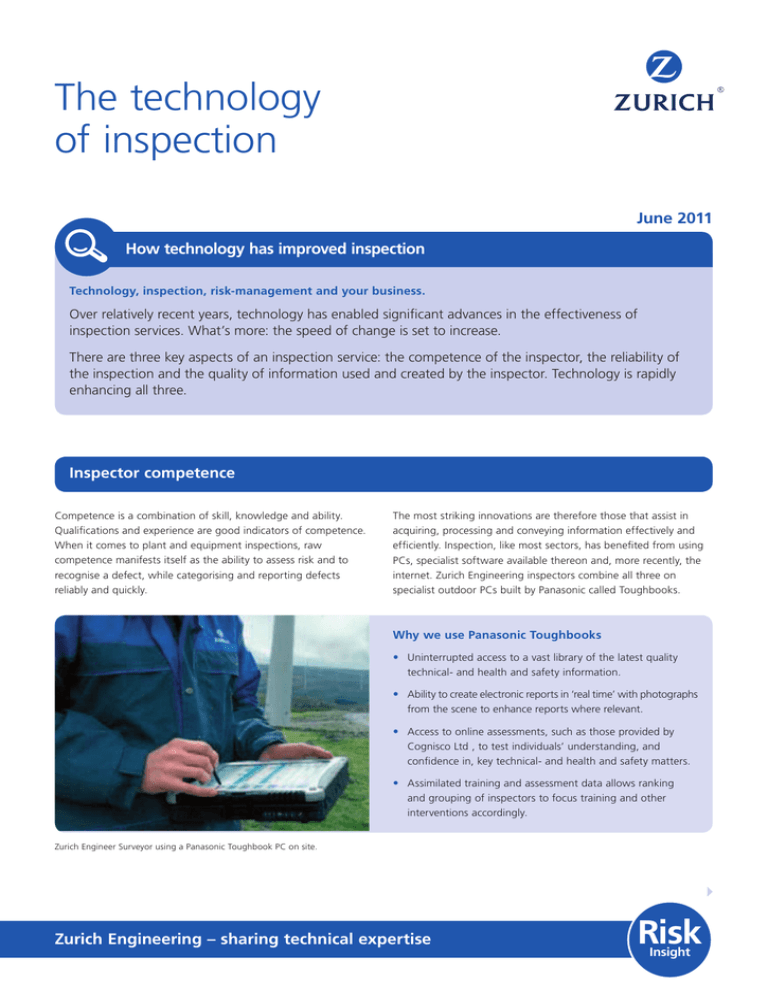
Zurich Engineer Surveyor using a Panasonic Toughbook PC on site.
Zurich Engineering – sharing technical expertise
Risk
Insight
Zurich Engineering – sharing technical expertise
Inspector competence (continued)
In future, the ability to access information securely and quickly
from any location is likely to lead to more integration of systems.
In turn, this technology could soon be used to maintain and
develop inspectors’ competence by automatically accrediting
continuous professional development (CPD) points as they gain
relevant experience and pass assessments. Third parties could be
invited to verify the individual’s competency, referencing official
online registers. This technology enables us to provide evidence to
you that our inspectors are competent, which is useful when one
of your legal obligations is to ensure safety-related tasks are
undertaken by competent persons.
Inspection reliability
The reliability of inspections can be expressed in terms of the ratio of ‘true calls’ versus ‘false calls,’ as defined in the table below:
Defect not present
Defect present
Defect reported
False-pos call X
True Call √
Defect not reported
True Call √
False-neg call X
Historically, an inspector would have relied much more on human
senses. Inspectors would visually inspect the item and, where
relevant, would listen to it, feel it and possibly smell it. Although the
effectiveness of this unaided method of inspection is inherently
limited, as a person cannot see through steel, for example, a good
inspector will still incorporate these methods with modern practises.
Innovations that have enhanced the capability and, generally, the
reliability of inspection include use of the following:
• Non-destructive testing (NDT) techniques — to detect
buried or otherwise invisible defects. For example, the
ultrasonic testing of welded joints in steam boilers.
• Remote visual inspection (RVI) techniques — to
acquire images of items in areas otherwise inaccessible to
the inspector. For example, the deployment of digital
cameras on crawlers to inspect pipes.
• Condition monitoring (CM) techniques — to predict
the remnant life of a component. For example, use of
the PulseTM system to monitor the integrity of flat
coated steel belt-suspension ropes on Otis Gen 2TM
passenger lifts.
It is likely that NDT, RVI and CM techniques will be used more in
future, especially in highly regulated industries, in order to provide
more robust evidence of the continued fitness-for-service of key
plant and equipment. This technology allows you to:
• Have items of plant and equipment inspected without taking
them out of service, thereby increasing their availability.
• Record inspection data and make accurate comparisons
from one inspection to the next, thereby allowing defects
to be monitored and either repaired, or replaced in an
organised manner.
• Increase the efficiency of your preventative maintenance regime
by replacing key components when their condition requires it
rather than at sporadic intervals.
In short: these innovations improve the reliability of inspections,
which reduces your risk and, directly or indirectly, saves you money.
Zurich Engineering – sharing technical expertise
Quality of information
The key deliverable of an inspection is the report. In the past,
hard-copy reports could be overwhelmingly long. Reading and
filing them and — where action was necessary — copying and
forwarding them, could be arduous, to say the least.
Today, PCs, business software and broadband digital data transfer
have made electronic reporting the norm. Zurich Engineering
inspection reports are created by our inspectors live at the scene
using their Panasonic Toughbook computers. The reports are
replicated onto a server using our secure Esitrak system, which was
designed for purpose.
Esitrak delivers your report to a web portal called CRIMSON, where
you can access it securely at any time. If you prefer, it can be
delivered directly to your inbox in portable document format (PDF)
attached to an email. The depth and quality of information available
to you when reports are delivered using CRIMSON is significantly
greater than the information was when it was delivered on paper.
CRIMSON enables you to:
• View the status of your engineering reports.
• Create one-off reports to highlight plant and equipment
with serious defects.
• Get an early warning to mobilise resources when defect
trends present a risk to workplace safety.
• Take data from reports and integrate it into MS Excel
spreadsheets to create powerful management information.
• Identify follow-up actions.
• Add, delete or amend CRIMSON users within your business –
Esitrak and CRIMSON can now deliver photographs,
acquired at the scene of inspection using our Toughbook
PCs’ integrated cameras (or other digital camera, smart
phone etc. on the scene). This significantly enhances the
quality of a defect report.
to control who has access to the system and the amount of
information they can view.
For an online tutorial covering CRIMSON, visit
http://www.zurich.co.uk/engineering/onlinereporting/
onlinereporting.htm
Radio Frequency Identification
Another innovation at an advanced stage of development
currently is radio frequency identification (RFID). This technology
enables ‘smart tagging’ of plant and equipment. A very small
passive chip is attached to the item, which contains an entirely
unique identification number. The number is read by a device
that, when placed close to the RFID tag, energises the tag, reads
the ID and transmits this to the computer or mobile phone, or
other processing device. Software installed on the computer,
phone etc. enables data pertaining to the tagged item to be
called-up almost instantly. For example, someone could, as part
of a safety audit of a site, call-up inspection reports for items
of plant and equipment simply by waving a reader at the
respective tags, and instantly check that the inspection is
in date, that defects have been repaired etc.
Sample Zurich RFID tags
RFID tags can come in many
different sizes and shapes
Zurich Engineering – sharing technical expertise
Radio Frequency Identification (continued)
In future, it will be possible to record everything that the inspector
sees, hears and says during every inspection. Together with written
summary reports, this information will provide irrefutable evidence
of both the efficiency and effectiveness of the inspection, and of
any defects reported.
It will be possible for customers to freely access the information
held by us, sorted in any way they define.
This efficient information processing enables you to manage risks
more effectively, and it provides further assurances that the
information is pinpoint accurate.
Imagine a scenario where an accident occurs and litigation is
contemplated. Quality information would enable you and others to
apportion blame or at least eliminate one or more parties from the
proceedings, thereby reducing litigation risks and costs.
Summary
New technologies have improved three key aspects of inspection services: inspector competence, inspection reliability and
information quality. This includes:
• Mobile computer hardware and software, and access to the web
• Supplementary tests, including non-destructive testing, remote visual inspection and condition monitoring
• Accessibility to information via a web portal
• Electronic tagging of equipment
The bottom line is that technology drives down the cost of managing risk.
For more information
UKGI411.01 (712213001) (06/11) RRD
Should you require any further guidance, please contact:
Cameron Sinclair, Engineering Manager,
Zurich Engineering, 126 Hagley Road,
Edgbaston, Birmingham B16 9PF
Telephone: 0121 697 9223
Mobile: 07887 634581
Email: cameron.sinclair@uk.zurich.com
Zurich Management Services Ltd
Registered in England and Wales no. 2741053.
Registered Office: The Zurich Centre, 3000 Parkway, Whiteley, Fareham, Hampshire, PO15 7JZ.
Communications may be monitored or recorded to improve our service and for security and
regulatory purposes.
© Copyright – Zurich Management Services Ltd 2011. All rights reserved. Reproduction, adaptation,
or translation without prior written permission is prohibited except as allowed under copyright laws.


