Rooftop Tent Owners Manual
advertisement
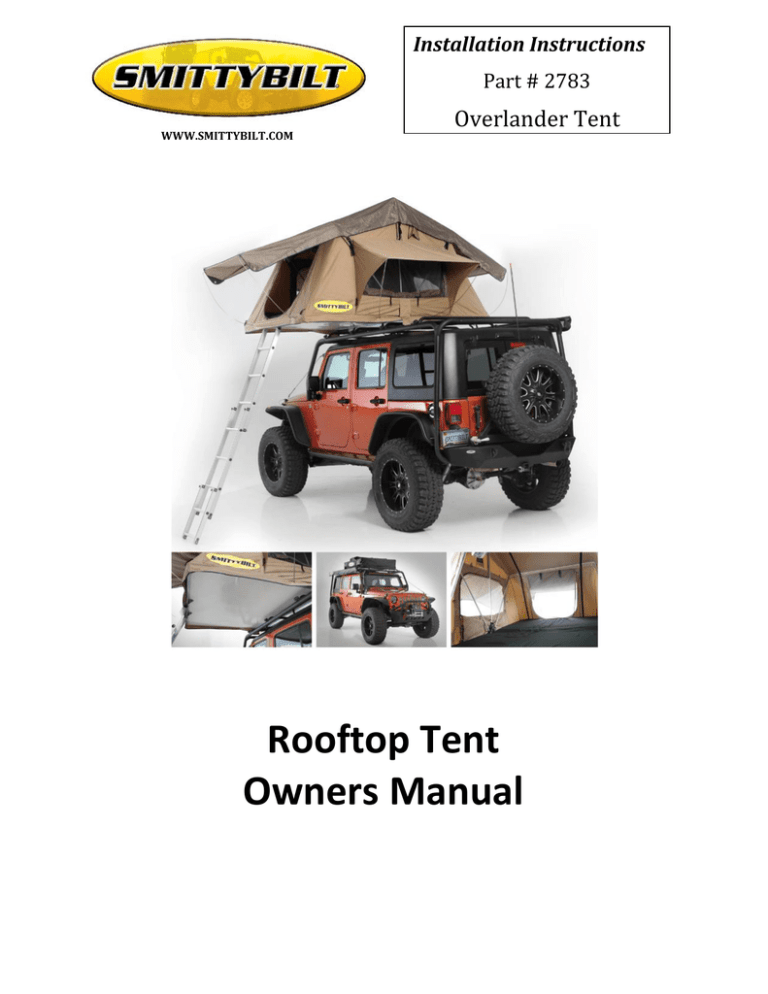
Installation Instructions WWW.SMITTYBILT.COM Part # 2783 Overlander Tent Rooftop Tent Owners Manual Read instruction manual entirely before assembling and installing this product. The Smittybilt Overlander Tent is designed to mount easily on your stock roof rack system or on an aftermarket rack/crossbar system. The Smittybilt Overlander Tent weights only 118 lbs, so it can be mounted to most rack systems. Generally, most OE roof racks will have a capacity of 100-200 lbs while vehicle is in motion(dynamic rating). However, when the vehicle is parked and you are utilizing your Smittybilt Overlander Tent you are applying a static load which is easier to support and most rack systems can generally handle this static load with ease. Always check with the manufacturer of your vehicle and your roof rack system to determine the applicable weight limitations as they vary from vehicle to vehicle. If you need a roof rack system or more carrying capacity you may check with your local supplier for Smittybilt, Thule, or Yakima racks to suit your needs. Check local and state laws regarding roof mounted load capacities. Many states have a limit of 165lbs while vehicle is in motion, and therefore most vehicle manufactures will built their roof racks to meet that limit. The Smittybilt Overlander Tent weights only 118 lbs, so it can be mounted to most rack systems. 2 Attaching the Mounting Rails to the Smittybilt Rooftop Tent Direction of Opening Before you fit your new rooftop tent to your vehicle, you will need to decide whether you wish to have the rooftop tent open to the back or to the side of your vehicle. A. “Off the Back” For most larger size ( SUV) vehicles opening “off the back” is preferable. The advantages of this orientation are: Leaves extra roof space for additional storage. With the tent open you will gain weather protection from the tent above you head when accessing the back of your vehicle. The mounting extrusions need to be cut off at both ends up to the second pre-drilled hole, prior to being fitted to the base of the rooftop tent. The mounting extrusions are then bolted to the base of the tent at right angles to the roof rack or roof bars, in the direction of opening (along the length of the tent base). 4 ½ ft. 4 ft. OR B. “Off the Side” For most medium (such as Jeep Wrangler) or small vehicles opening “off the side” is preferable. The advantages of this orientation are: Allows for tailgates to operate normally. Means the closed tent pack is better balanced on the roof and creates less wind drag as the narrow face of the tent pack is travelling forward. The mounting extrusions bolt to the base of the tent at right angles to the roof rack or roof bars (across the width of the tent base) 4 ½ ft. 4 ft. Once you have decided which is best suited to your application, follow the mounting instructions. 3 Mounting Extrusion - Attachment Instructions 1. Remove mounting extrusion from the carton (cut as per Diagram 1 if you intend opening the rooftop tent off the rear of your vehicle.) 2. Place the tent on its side on the ground onto a clean surface. 3. Using the supplied 6mm bolts and washers, slide your hand in between the inside of the base and the mattress and insert the bolts into the pre-drilled holes. See Diagram 2. 4. Place the mounting extrusion into position over the bolts. 5. Slide the 6mm nuts into the mounting extrusions and tighten the bolts from inside the tent. See Diagram 2. 6. Near the outside edges of the mounting extrusion you will find holes for the self drilling screws supplied. Use the self drilling screws and washers to attach the outside edge of the mounting extrusion to the base of the tent through the end pre-drilled holes. 7. Mount the Ladder brackets to the ladder using the supplied 6mm x 20mm bolts, washer, plastic washer, spring washer and nut. See Figure 1. 8. Mount the ladder to the base of the tent using 4 x 6mm x 40mm bolts. Bolt each ladder bracket to the base of the tent through the pre-drilled holes. See Figure 2. If using ladder extension simply slide onto ladder and secure with lock pins ( Fig 2A) Diagram 2 4 Figure 2A Fitting the Rooftop Tent to your Roof Rack or Roof Bars 1. With assistance, carefully lift the tent onto the vehicle. 2. Place 8mm bolt into the slide plate. Slide the plate and bolt into the mounting extrusion. See Figure 3. 3. Attach the rooftop tent to your roof rack or roof bars in four places as per Figure 4, 5, 6. Use 2 bolts and 2 slide plates with the base plate to hug the bar. 1 set per corner. Figure 5 Figure 6 4. Prior to tightening all the nuts, ensure that your rooftop tent is centered (side to side) on the roof of your vehicle and that the mounting points (as far as possible) are symmetrically positioned near each corner of the tent. 5. Do not over tighten nuts as this will cause the bolt head to strip the aluminum slide plate. 5 Set Up Instructions Step 1: Unfasten the cover strap and then remove the cover from the tent by unfastening the Velcro around the edge and then carefully fold the cover over to the side. (Fig A, B) Step 2: Release the hold down Velcro straps on each side of the tent (Fig C) (Fig A) (Fig B) (Fig C) Step 3: Slide out the ladder until locking pins engage. The ladder can now be used as a lever to help open the tent. Carefully fold open tent. (Fig D, E, F) Rest the ladder on the ground. Note: if ladder is too vertical you will require a ladder extension. (Part # 2785) The ladder should be at an angle not straight up. (Fig D) (Fig E) (Fig F) Step 4: If using the rain fly, slide the ends of the rain fly poles into the pockets on the side of the tent. After the poles are set into pockets and you have installed the side rods in the next step, go back and tighten the quick release straps/buckles on the sides of the rain fly. (G, H, I) (Fig G) (Fig H) (Fig I) Step 5: You can now enter your tent. Install door/window cover rods. Line up the grommet on the base of the tent with the predrilled hole. (Fig J) Slide base of rod through grommet and into base of tent, make sure rod is installed completely. (Fig K, L) Note: They are meant to have a “bow” in them when installed. They will be at an angle to the side when installed into the holes. Place the hook end of rod through grommet on rain fly/shade cover with the hook part facing outward and downward. (Fig M, N, O) Proceed to do this on all 4 sides (If desired) 6 (Fig J) (Fig K) (Fig M) (Fig L) (Fig N) (Fig O) Features A. The tent features red nylon grab handle straps for assistance on getting in and out. ( Fig M) Always use caution when going up and down ladder. B. The screens and covers can be rolled up and held up using the attached cords. ( Fig N, O) (Fig M) C. (Fig N) (Fig O) LED –Light, pull out battery tab first. Then press on/off button to use ( Fig P) D. Shoe Bag- Included is a shoe/storage bag that can be installed on the ladder or side of tent on the clips on the underside of the tent. (Q, R, S) (Fig Q) (Fig R) 7 (Fig S) E. Sun-Roof – This can be used with or without rain fly. For best use, remove the rainfly. F. 12-Volt- Plug into your vehicle 12 volt outlet, run wire through vehicle window or door up towards tent and through side opening ( Fig T) G. The side flaps can be strapped down by pulling the bottom cord with handle through the grommets. (Fig U) (Fig T) (Fig U) NOTES Repeat all the above steps in the reverse order to pack away your rooftop tent. A Ladder Extension may be required depending on the height of your vehicle ( Smittybilt part # 2785) WARNINGS The tent weighs approx 116lbs, make sure accessory it is being installed on can hold this and content weight. Failure to do so may cause damage to part and/or vehicle The weight capacity of this tent is approx 661 (evenly distributed) If tent is overloaded it can cause damage to your tent or vehicle. Disconnect 12v wire when not in use, do not use accessory that draws more than 5amps. Never drive with tent set-up Assist children when using ladder 8 Storage and Handling Guidelines Cautions - Do not pull down on side retaining Velcro straps when closing the tent. These straps are designed only to hold the tent base together, and are not designed to be used to pull the bases together. When you are closing the tent, hold down the top folded base to compact the tent, then use the velcro straps to secure the bases in this position. These straps will tear out of the tent if excessive force is applied to the strap. - Do not store the tent wet. If you do have to pack away when the tent is wet, zip closed all canvas doors and windows to protect the inside of the tent, and pack away. As soon as you can, open the tent and let it dry out thoroughly to prevent mould and rot. If the tent is to be closed up for extended periods of time it is very important that the tent is completely dry. - Do not drill locking holes below the existing locking pin holes in the ladder. This will weaken the structure of the ladder and can cause injury. If you need to extend the length of your ladder, please purchase a ladder extension. If you need to shorten the ladder you can drill holes above the existing ladder locking pin holes. - Be aware that with a rooftop tent fitted to your vehicle the overall height is increased. Your should measure the overall height of your vehicle with the rooftop tent fitted as you will need this information to decide if the vehicle can enter carparks etc. - Centre of gravity. The attachment of a rooftop tent to your vehicle (similar to any other load on your roof rack) will alter its centre of gravity. Adjust your driving accordingly. - In trip inspections. Regularly check that all nuts and bolts attaching your rooftop tent to the roof of your vehicle are tight and in good repair. - Please note the roof top tent is not made for extreme conditions, and a fair use policy is required. Excessive rain, wind and other extreme conditions can affect the tent. Storage of the Tent 1. If storing the tent off the vehicle, ensure the tent is packed away completely dry. 2. Be careful not to drag the tent on the ground. This will damage the cover and allow potential water ingress the next time you use your rooftop tent. 3. Do not store directly on concrete floor. Care Instructions 1. Clean only with cold water and a soft brush - do not use soap or detergent. 2. Do not expose to petrol, oil or solvents. 3. New poly/cotton fabric will initially experience some weeping through the seems. This will reduce over time as the fabric cures. 4. Well worn products may be re-proofed using a good quality waterproofing solution. This is highly recommended 9 Limited Warranties Smittybilt’s products are covered under various limited warranties only. Note that the duration of the limited warranty differs according to the material and finish of the product purchased. Subject to the duration and conditions of the limited warranty stated below, Smittybilt warrants to the original retail purchaser that its products are free from defects in material and workmanship. All other warranties and representations express or implied, are hereby disclaimed, including fitness for merchantability and buyer’s intended use or purpose. All parts are sold “AS IS” except for the limited warranties granted herein. Buyer assumes all risks as to the selection, suitability and performance of all goods and products selected. This limited warranty does not cover damage or impairment in any part due to misuse, improper installation, accident or contact with on-road or off-road hazards, product modification, improper or inadequate cleaning and/or maintenance. Smittybilt is not responsible for items damaged during shipping. This warranty is not transferable from the original buyer. For the original Buyer to be eligible for the limited warranty coverage, the Buyer must provide proof of purchase. Smittybilt strongly recommends returning the warranty registration card. Customer’s remedy hereunder shall be limited only to repair or replacement (at Smittybilt’s option) of any defective part(s) returned to Smittybilt at customer’s expense. The determination of whether or not a returned part is defective or subject to coverage under the limited warranties stated herein shall be made at Smittybilt’s sole discretion. To assure product quality, Smittybilt reserves the right to change product design, material, specification and finishes without prior notice to customers. This limited warranty gives you specific legal rights and you may also have other rights, which may vary from state to state. Some states do not allow limitations on how long an implied warranty lasts, so the above limitations may not apply as to you. Also, some states do not allow the exclusion or limitation of incidental or consequential damages, so the above limitations or exclusions may not apply to you. Smittybilt reserves the right to discontinue product lines and substitute products, or provide other remedies than those listed in this limited warranty for those discontinued products. Warning Rollover and other types of vehicle accidents may result in serious injury or death to you, your passengers and others sharing the road. Smittybilt accessories are decorative and are not intended to reduce or avoid injury or damage in the event of an accident. The weight and location of Smittybilt accessories may affect your vehicles’ handling, stability and performance, creating an increased risk of accident or rollover. Before installing any accessory, check state laws and assure that the accessory will not obscure any lights or interfere with proper operation on your vehicle’s safety equipment. Consult your owner’s manual and the Smittybilt instructions, or additional safety information. Smittybilt products, nor the warnings contained herein, are not a substitute for your safe driving. Don’t drink and drive, always use seat belts and don’t drive faster than conditions permit. Requesting Warranty Coverage To make a claim under this limited warranty, contact Smittybilt at (888) 717-5797 400 West Artesia Blvd Compton, CA 90220 10
