®
L C F — Q U I C K I N S TA L L G U I D E
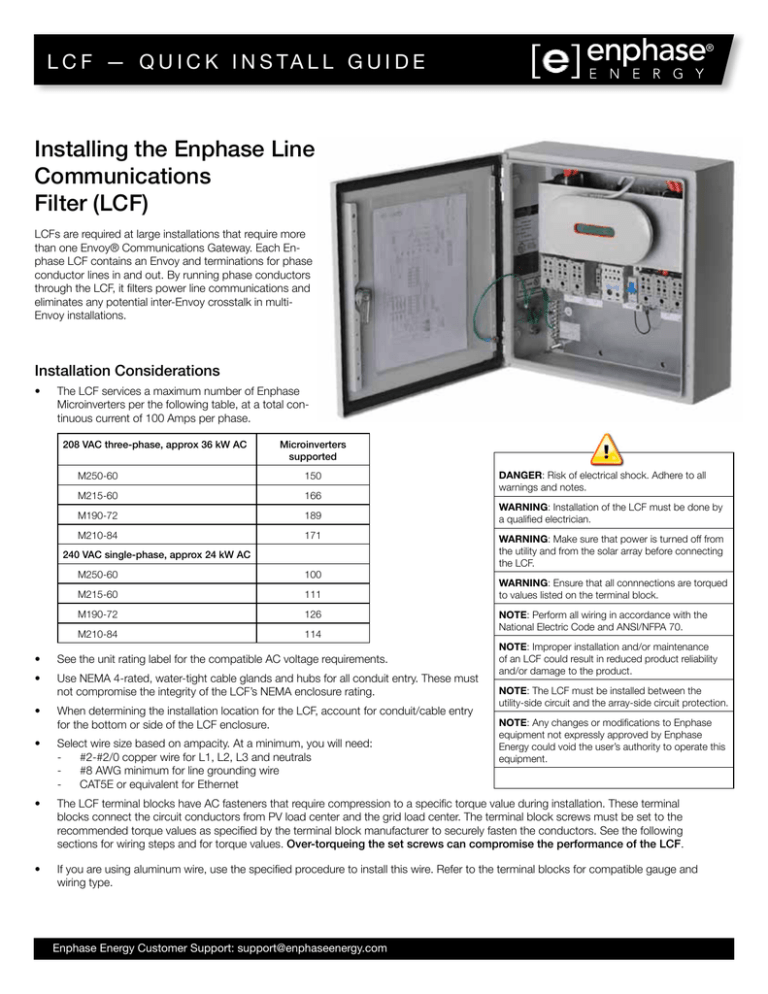
Installing the Enphase Line
Communications
Filter (LCF)
LCFs are required at large installations that require more
than one Envoy® Communications Gateway. Each Enphase LCF contains an Envoy and terminations for phase
conductor lines in and out. By running phase conductors
through the LCF, it filters power line communications and
eliminates any potential inter-Envoy crosstalk in multiEnvoy installations.
Installation Considerations
•
The LCF services a maximum number of Enphase
Microinverters per the following table, at a total continuous current of 100 Amps per phase.
208 VAC three-phase, approx 36 kW AC
Microinverters
supported
M250-60
150
M215-60
166
M190-72
189
M210-84
171
240 VAC single-phase, approx 24 kW AC
M250-60
100
M215-60
111
M190-72
126
M210-84
114
DANGER: Risk of electrical shock. Adhere to all
warnings and notes.
WARNING: Installation of the LCF must be done by
a qualified electrician.
WARNING: Make sure that power is turned off from
the utility and from the solar array before connecting
the LCF.
WARNING: Ensure that all connnections are torqued
to values listed on the terminal block.
NOTE: Perform all wiring in accordance with the
National Electric Code and ANSI/NFPA 70.
NOTE: Improper installation and/or maintenance
of an LCF could result in reduced product reliability
and/or damage to the product.
•
See the unit rating label for the compatible AC voltage requirements.
•
Use NEMA 4-rated, water-tight cable glands and hubs for all conduit entry. These must
not compromise the integrity of the LCF’s NEMA enclosure rating.
•
When determining the installation location for the LCF, account for conduit/cable entry
for the bottom or side of the LCF enclosure.
•
Select wire size based on ampacity. At a minimum, you will need:
- #2-#2/0 copper wire for L1, L2, L3 and neutrals
- #8 AWG minimum for line grounding wire
- CAT5E or equivalent for Ethernet
•
The LCF terminal blocks have AC fasteners that require compression to a specific torque value during installation. These terminal
blocks connect the circuit conductors from PV load center and the grid load center. The terminal block screws must be set to the
recommended torque values as specified by the terminal block manufacturer to securely fasten the conductors. See the following
sections for wiring steps and for torque values. Over-torqueing the set screws can compromise the performance of the LCF.
•
If you are using aluminum wire, use the specified procedure to install this wire. Refer to the terminal blocks for compatible gauge and
wiring type.
Enphase Energy Customer Support: support@enphaseenergy.com
NOTE: The LCF must be installed between the
utility-side circuit and the array-side circuit protection.
NOTE: Any changes or modifications to Enphase
equipment not expressly approved by Enphase
Energy could void the user’s authority to operate this
equipment.
Mount the LCF
1
1. Use the mounting holes on the back of the LCF enclosure for installation.
2. Remove all four hole seals and hang the LCF using
8mm mounting hardware with sealing washers.
11. If needed, to allow the CAT5E to pass through the strain relief,
cut and reterminate the CAT5E.
12. Connect the one end of the CAT5E to the Envoy, and connect
the other end to the broadband router.
13. After 30 minutes, retighten all terminations to the appropriate
torque value. Do not over-torque.
Wire the LCF
2
1. De-energize all circuits before wiring the LCF.
2. Use antioxidant joint compound on all field termination
connection points.
3. On the utility side, use cable ties to hold L1, L2 and L3
together. Allow offset for cable bending.
Terminal Block Types & Torque Specifications
4. Remove the ferrite core from the assembly bag and slip
it over the utility-side wire bundle.
5. Use a torque wrench and the specified hex bit to make
the terminations in steps 6, 7 and 8.
Tighten the terminals to the torque values specified on the terminal blocks, according to conductor gauge and material. See table.
6. Terminate the utility-side lines to the terminal block
labeled “Utility”.
•
For black terminal blocks, use a 3/16 wrench that
is at least 1.25 inches long.
•
For grey terminal blocks, use both a 5mm wrench
(at least 1.5 inches long) and a 6mm wrench (at
least 1.25 long).
7. Terminate the neutral lines to the block labeled “Neutral” using an 8mm wrench that is at least
1 and 1/8 inches long.
Marathon Black (Line)
8. Terminate the array-side lines to the terminal block
labeled “Array”.
•
For black terminal blocks, use a 3/16 wrench that
is at least 1.25 inches long.
•
For grey terminal blocks, use both a 5mm wrench
(at least 1.5 inches long) and a 6mm wrench (at
least 1.25 long).
9. Route the ground wires through the LCF so that they
make contact with all hubs and connect them to the
ground bus using an approved grounding connection
method.
Marathon Grey (Line)
10. Use a 1/2 inch knockout set to create a conduit knockout on the left side of the enclosure, and pass the
CAT5E through the knockout.
Conductor
gauge
Terminal block type and torque specifications
Marathon Black
(Line)
Ferraz Shawmut
(Neutral)
Marathon Grey
(Line)
#2/0 - #6
120 lbf-in
---
---
#2/0 - #1
---
100 lbf-in
120 lbf-in
#2 - #6
---
80 lbf-in
80 lbf-in
40 lbf-in
60 lbf-in
40 lbf-in
#8
Ferraz Shawmut (Neutral)
3
Turn Up the LCF
All system diagnostics are performed using a Internet-connected computer or laptop and the Envoy. Prior to turn up, ensure that all AC
wiring is complete and that the Ethernet connection is complete to the Envoy.
Refer to the Envoy Communications Gateway Installation and Operation Manual for more information on the Envoy.
1. Energize the system at the utility side.
2. Energize all the array-side circuit breakers.
3. Flip the blue switch on (to the right of the neutral block) inside the LCF. This breaker protects the Envoy.
4. Ensure the Envoy starts up. The LCD screen will be active.
Periodic Maintenance
During regular scheduled maintenance of the PV system, do the following:
1. De-energize or disconnect all circuits before working with the LCF.
2. Check the terminal blocks for proper torque. The torque values of each terminal block should be checked for compliance with the torque
requirements listed on the terminal block.
3. Periodically check that the integrity of the enclosure and all internal connections are not compromised.
LCF Wiring Diagram
Solar subpanel
Ethernet cable to
broadband router
Utility side
Ferrite core
placed around
L1, L2 & L3
L1 L2 L3
LCF
N
Array side
125 A
Max
To the
solar array
L1 L2 L3
To meter or
AC distribution
panel
Copyright © Enphase Energy 2013. All rights reserved.
140-00018 Rev 04


