File Management Windows 7
advertisement

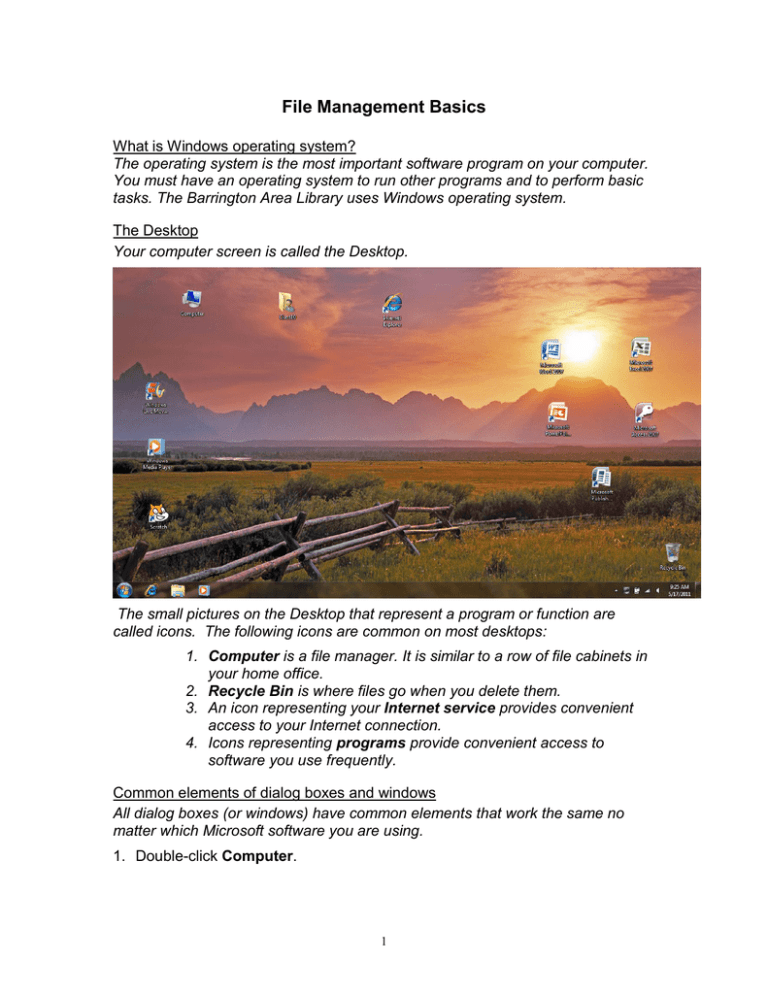
File Management Basics What is Windows operating system? The operating system is the most important software program on your computer. You must have an operating system to run other programs and to perform basic tasks. The Barrington Area Library uses Windows operating system. The Desktop Your computer screen is called the Desktop. The small pictures on the Desktop that represent a program or function are called icons. The following icons are common on most desktops: 1. Computer is a file manager. It is similar to a row of file cabinets in your home office. 2. Recycle Bin is where files go when you delete them. 3. An icon representing your Internet service provides convenient access to your Internet connection. 4. Icons representing programs provide convenient access to software you use frequently. Common elements of dialog boxes and windows All dialog boxes (or windows) have common elements that work the same no matter which Microsoft software you are using. 1. Double-click Computer. 1 2. The Title Bar at the top tells which program or function you are in. 3. Click the Minimize button (button with an underline symbol in the upper right corner of the Computer dialog box). The Computer dialog window will close and a button representing that window will go to the Taskbar (bottom of screen). 4. Click Computer in the taskbar. 5. Click the Maximize button (button with a square symbol in the upper right corner of the Computer box). The window will fill the screen. 6. Click the Restore button (the Maximize button has become the Restore button). The window will shrink back to its original size. 7. Click the Close button (button with an X in the upper right corner of the Computer box), and then double-click the Computer icon to open it again. 8. Your files or documents are stored in Libraries shown in the Navigation pane on the left side of the Computer box. The Documents folder is for storage of text documents, although other formats such as pictures may be stored there also. You can create new libraries for storage of a set of files. 9. The right pane shows the drives on your computer. 10. Put your mouse pointer over the lower right corner of the window until it becomes a double-sided arrow. Drag inward to shrink the window. 11. Put your mouse pointer over the Title bar and drag the window to a new location. 12. Close Computer by clicking the X in the top right corner. Opening a Program 1. Click the Start button in the lower-left corner of the screen. 2. Move the arrow up to All Programs. 3. Click Microsoft Office, choose Microsoft Word, and click. 2 Double-clicking an icon from your Desktop is a quick way to open a program. If you do not have an icon for the program on your Desktop, use the Start button to open up programs. Remember, you would use the same process to open any program. We are just using the Microsoft Word program as an example. We’re going to create a document and then we’ll file it away in our file manager. 4. After opening Microsoft Word, type Dessert to create a document. Saving a Document (file) 1. Click the Office Button and click Save As. 3 2. Click Documents under Libraries in the left navigation bar. Selecting Documents tells Word to save your document in the Documents folder. 3. Look in the File name box at the bottom of the dialog box and notice that Microsoft Word has suggested a name. Highlight the suggested name. You will be able to type over the highlighted words without deleting or clicking. 4. Type Strawberry Shortcake to replace the file name. 5. Click the Save button. 6. Click the Office Button and click Exit Word. Now For Some Practice Follow the procedure above to create another document. 1. Open Microsoft Word using either the Start button or by double-clicking the icon. 2. Type Pasta Primavera to create a new recipe. 3. Save the document by clicking the Office Button, then Save As. Be sure to save in Documents, and use the suggested file name. 4. Close Word by clicking the Office Button, and then Exit Word. Computer . . . or Your New Electronic File Cabinet Now that we have some documents (files) we need to file them away so that we can easily find them later on. Computer is a file management system that is used to organize files. (Note that files are also called documents.) 1. Double-click the Computer icon on the desktop. 2. In the Computer dialog box, select Documents from the left navigation bar under Libraries. 3. You should see the two recipe documents that you created. 4 Creating a Folder We’re going to organize our recipe documents into folders. Storing your documents in folders with descriptive names helps you find documents easily. 1. Click New Folder. 2. Type Recipes in the highlighted area next to the yellow folder icon. NOTE: When text is highlighted simply begin typing over it; if you use your mouse to click in the box and can no longer see the black lines around the words New Folder, you will need to follow the instructions below for renaming a folder in order to type in the name. 3. Drag the two recipe documents into the recipe folder (place your mouse pointer over the file name, hold down the left mouse button and drag over the destination folder, release when the folder becomes highlighted). Creating a Subfolder Now we have a folder to store our two recipes. But what will happen when our recipe collection grows? To make it easier to find different types of recipes, we need to categorize them into main courses and desserts. Windows operating system allows you to create a folder within any existing folder. 1. 2. 3. 4. 5. Double-click the Recipes folder to open it. Click New Folder. Type Main Courses in the highlighted box. Drag the Pasta Primavera recipe into the Main Courses folder. Repeat step 2 to create a Desserts folder. Drag the Strawberry Shortcake recipe into it. 5 Renaming Documents and Folders Suppose we want to make our folders even more specific. We’ll rename our Main Courses folder. 1. Right click the Main Courses folder. 2. 3. 4. 5. Choose Rename from the menu. Type Vegetarian Main Courses over the highlighted folder name. Press Enter or click the white area outside the name box to save the name. Close the window. 6 Opening a Document Now we’re ready to bake. But we need to find our Strawberry Shortcake recipe first. If you had a recipe box you’d look in there, right? Well let’s find our Recipes folder on the computer. We know we put it in Documents. 1. Double-click Computer. 2. Click the Documents folder under Libraries. 3. Double-click the Recipes folder. 4. Double-click the Desserts folder. 5. Double-click Strawberry Shortcake. 6. Close the Strawberry Shortcake file and close Word. In general the process of saving, closing and opening programs will be very similar in programs that run on Windows operating system. The boxes may look slightly different depending on the version and whether they are part of a Microsoft product. Copying Files You might need to move files from one folder or drive to another. 1. If it is not already highlighted,click Strawberry Shortcake once to highlight its name. 2. Right click and choose Copy from the menu. 3. In the left navigation bar find the folder where you want to put the copy. Click Documents. 4. Click Organize from the top menu bar and select Paste, or press Ctrl/V on your keyboard to paste the file into the Documents folder. You now have a copy in the Documents folder and the Desserts folder. Searching for Files or Folders 7 If you don't know what drive and folder a file is in, you can use the Search program to locate it. 1. Click the Start button, and then click in the box that says Search programs and files. Type pasta. 2. If you don’t see the Pasta Primavera file, click See more results. 3. Select the Pasta Primavera file. 4. Right click on the file name. From here you can open the file, rename it, or delete it. 8 5. Click Delete. Press the Enter key on the keyboard or click Yes in the box that appears. 6. Close the Search window. The Recycle Bin Files go to the Recycle Bin when you delete them. 1. Double-click the Recycle Bin icon (on the desktop) to open it, and then click Pasta Primavera once to select it. 2. You could choose to restore the selected file to the place it was deleted from by clicking Restore this item. 3. Delete the Pasta file (select it, push Delete on your keyboard, then click Yes.) 4. Close the Recycle Bin by clicking the X in the upper right corner. Getting Help 9 1. Click the Start button. Click Help and Support to display the Help and Support Center. 2. Click in the Search box. Type stop printing. 3. Click the arrow to the right of the Search box. 4. Under Suggested Topics, click View, pause, or cancel a print job. The selected help topic is displayed in the right pane. 5. Close the Help window by clicking the X in the upper right corner. 10 Using a USB drive Also called flash drive, jump drive, thumb drive, keychain drive USB or flash drives are usually more reliable than a floppy drive, do not require “burning software” like a CD, and hold a great deal of information in a very small package. They come in sizes from less than a gigabyte to several gigabytes, the price depending on the amount of information the drive will hold. Some will load software automatically onto the computer they are inserted into. To insert the USB/flash drive: 1. Find the USB port on your computer. You should see this symbol: 2. Take the cap off the USB/flash drive and insert into the USB port (female and male sides should be opposite to the female and male sides on the computer). If you are having trouble connecting, turn the drive over and try again. To save to a USB/flash drive: 1. Click the Office Button and select Save As from the menu. 2. Click the drive name under Computer in the left navigation bar. 3. Click Save. To safely disconnect a USB/flash drive: (if you do not tell Windows that you are disconnecting a device your drive could be corrupted, although this rarely happens). Because of the configuration of the classroom laptops, the USB drive cannot be safely removed using the following method. The most important thing to remember is to make sure that the drive is not actively working when it is removed. 1. Look for the Safely Remove Hardware icon (looks like a gray box with a green arrow over it) on the Taskbar in the lower right corner of your screen. 2. Right click on the icon and left click Safely Remove Hardware. 11 3. In the Safely Remove Hardware dialog box, select the device and click Stop. Close the dialog box and remove the USB/Flash drive. 505 N. Northwest Highway Barrington, IL 60010-3399 847/382-1300 www.balibrary.org 12

