F
WATE
R
FOAM
3/4
F
1/2
3/4
1/4
E
1/2
1/4
E
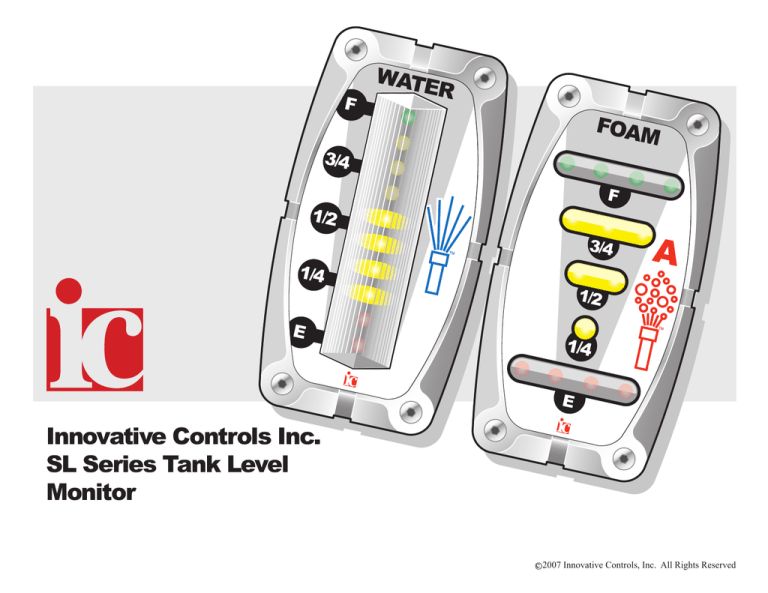
Innovative Controls Inc.
SL Series Tank Level
Monitor
c 2007 Innovative Controls, Inc. All Rights Reserved
All SL display modules are
easy to install requiring a
simple rectangular hole and
4 screw holes.
The decorative mounting
bezel is chrome plated
to the most stringent SAE
standards.
Both 14 LED and 10 LED
master and slave display
modules feature
3 dimensional lenses for
180 degree visibility.
WATER
3/4
1/2
1/4
E
F
1/2
1/4
WATER
Both 10 LED and 14 LED
dual displays are available
as a more compact,
economical, and
easier-to-install alternative
to individual tank level
displays.
E
F
5 LED mini slave displays feature
the same rugged construction
and related benefits as the larger
display modules.
3/4
All display modules are
self-calibrating for three
common tank styles
(rectangular, elliptical, and
T-shaped). A user-friendly
manual calibration mode is
accessible, if desired, and
can be done without any
truck or system
disassembly. An external
magnet is held in front of
the display to calibrate the
system. The calibration
information is stored in the
display unit.
Bright, bold, easy-to-read
graphics are sub-surface
screened on a polycarbonate
overlay, which protects the
graphics from wear and UV
degradation.
1/2
1/4
All SL display module
electronics are encapsulated
in potting compound to
protect the unit from shock,
vibration, water and dust.
E
All connectors are water
and dust resistant and
feature gold plated contacts
for superior reliability.
Bid Specifications
Date Originated: 02/28/05
Revision: A
Revision Date: 02/28/05
Standards No. 5000047
Subject: SL Series Tank Level Monitor Bid Specifications - 10-LED Master Foam A Unit
10-LED Master Class A Foam Tank Level Monitor
An Innovative Controls SL Series Tank Level Monitor System shall be installed. The system shall include an electronic
display module, a pressure transducer-based sender unit, and a 10' connection cable. The display module shall show
the volume of Class A foam in the tank using 10 superbright easy-to-see LEDs. Tank level indication is enhanced by the
use of green LEDs at the full and near-full levels, amber LEDs between ¾ and ¼ tank levels, and red LEDs at the
near-empty and empty levels. A wide-angle diffusion lens in front of the LEDs creates a 180° viewing angle. The
electronic display module shall be waterproof and shock resistant being encapsulated in a urethane-based potting
compound. The potted display module shall be mounted to a chrome plated panel-mount bezel with a durable
easy-to-read polycarbonate insert featuring red graphics and a foam icon.
All programming functions shall be accessed and performed from the front of the display module. The programming
includes self-diagnostics, manual or self-calibration, and networking capabilities to connect remote slave displays. Low
tank level warnings shall include flashing red LEDs starting below the ¼ level, down-chasing LEDs when the tank is
almost empty, and an output for an audible alarm.
Functional Specifications:
Level Sensing Range: Four discrete factory and user adjustable sensing levels.
Accuracy: 2.0% of set level
Supply Voltage Range: +10VDC to +26VDC supply voltage range with protective
shutdown above 30VDC
Operating Temperature Range: -40oF to +150oF
Maximum Supply Current: 350mA @ 12VDC
Bid specifications available:
Innovative Controls SL Series
Tank Level Monitor System
WATER
FOAM
3/4
FOAM
F
Photo-eye automatically
dims or brightens LEDs
as ambient light conditions
change.
The display module shall receive an input signal from a pressure transducer. This stainless steel sender unit shall be
installed on the outside of the foam tank near the bottom. All wiring, cables and connectors shall be waterproof
without the need for sealing grease.
Location of Class A foam tank level monitor shall be:
The easy-to-install sender unit is constructed of
stainless steel and features a vent to atmosphere,
which prevents inaccuracy typically associated with
altitude changes.
The sender unit remains accurate in all types of
water and foam.
The sender's electronics are encapsulated for
protection from shock, vibration, water and dust.
WATER
FOAM
FOAM
F
F
F
3/4
3/4
3/4
1/2
1/2
1/2
1/4
1/4
1/4
E
E
E
10-LED Master Water Display
P/N 3030358-01
10-LED Master Foam Display - Class A
P/N 3030393-01A
10-LED Master Foam Display - Class B
P/N 3030393-01B
10-LED Large Slave Water Display
P/N 3030395-01
10-LED Large Slave Foam Display Class A
P/N 3030396-01A
10-LED Large Slave Foam Display - Class B
P/N 3030396-01B
Innovative Controls SL Series
Tank Level Monitor System
WATER
FOAM
F
3/4
1/2
1/4
E
10-LED Master Dual Water/Foam Display
P/N 3030359-01
10-LED Dual Large Slave Water/Foam Display
P/N 3030397-01
Innovative Controls SL Series
Tank Level Monitor System
FOAM
FOAM
F
3/4
1/2
1/4
E
10-LED Dual Master Foam Display - Class A & B
P/N 3030394-01
10-LED Dual Large Slave Foam Display - Class A & B
P/N 3030398-01
Innovative Controls SL Series
Tank Level Monitor System
To 12 Volt Supply
FOAM
F
3/4
1/2
1/4
E
6 Pin
Slave
Receptacle
10-LED Master Foam Display
P/N 3030393-01A
Innovative Controls SL Series
Tank Level Monitor System
Base-Mount
Tank Sender
P/N 3030376-01
1 Slave Display
WATER
F
3/4
1/2
To 12 Volt Supply
1/4
E
WATER
2 Slave Displays
F
WATER
F
3/4
1/2
1/4
E
3/4
Y-Connector
P/N 3030374
WATER
F
3/4
1/2
1/2
1/4
E
1/4
E
3 Slave Displays
6 Pin
Slave
Receptacle
WATER
F
3/4
1/2
1/4
E
WATER
F
3/4
1/2
10-LED Master Water Display
P/N 3030358-01
1/4
E
WATER
F
3/4
1/2
1/4
E
Innovative Controls SL Series
Tank Level Monitor System
Base-Mount
Tank Sender
P/N 3030376-01
Monster Lights
WATER
F
+12 VDC
Supply
Ground
3/4
1/2
Monster Light
Driver Module
Ground
Gray
Lamps: each
5 Amps Max
@ 12 VDC
1/4
Orange
6 Pin
Slave
Receptacle
Slave
Connection
F
Blue
3/4
White
1/2
Green
Brown
1/4
E
Ground
Gray
P/N
E
+12 VDC
Red
2
36
30
30
10-LED Master Water Display
P/N 3030358-01
Innovative Controls SL Series
Tank Level Monitor System
Monster Lights
Relay Driver Module
P/N 3030362
Base-Mount
Tank Sender
P/N 3030376-01
Ground
WATER
FOAM
FOAM
F
F
F
3/4
3/4
3/4
1/2
1/2
1/2
1/4
1/4
1/4
E
E
E
14-LED Master Water Display
P/N 3030385-01
14-LED Master Foam Display - Class A
P/N 3030386-01A
14-LED Master Foam Display - Class B
P/N 3030386-01B
14-LED Large Slave Water Display
P/N 3030389-01
14-LED Large Slave Foam Display - Class A
P/N 3030390-01A
14-LED Large Slave Foam Display - Class B
P/N 3030390-01B
Innovative Controls SL Series
Tank Level Monitor System
WATER
FOAM
F
F
3/4
3/4
1/2
1/2
1/4
1/4
E
E
14-LED Dual Master Water/Foam Display
P/N 3030387-01
14-LED Dual Large Slave Water/Foam Display
P/N 3030391-01
Innovative Controls SL Series
Tank Level Monitor System
FOAM
FOAM
F
F
3/4
3/4
1/2
1/2
1/4
1/4
E
E
14-LED Master Dual Foam Display - Class A & B
P/N 3030388-01
14-LED Dual Large Slave Foam Display - Class A & B
P/N 3030392-01
Innovative Controls SL Series
Tank Level Monitor System
To 12 Volt Supply
FOAM
F
3/4
1/2
1/4
E
6 Pin
Slave
Receptacle
14-LED Master Foam Display
P/N 3030386-01
Innovative Controls SL Series
Tank Level Monitor System
Base-Mount
Tank Sender Unit
P/N 3030376-01
1 Slave Display
WATER
F
3/4
To 12 Volt Supply
1/2
1/4
E
WATER
2 Slave Displays
WATER
F
3/4
1/2
F
1/4
E
Y Connector
P/N 3030374
3/4
WATER
F
3/4
1/2
1/4
E
1/2
1/4
E
3 Slave Displays
6 Pin
Slave
Receptacle
WATER
F
3/4
1/2
1/4
E
WATER
F
3/4
1/2
14-LED Master Water Display
P/N 3030385-01
1/4
E
WATER
F
3/4
1/2
1/4
E
Innovative Controls SL Series
Tank Level Monitor System
Base-Mount
Tank Sender
P/N 3030376-01
Monster Lights
WATER
+12 VDC
Supply
Ground
F
3/4
1/2
Monster Light
Driver Module
Ground
Gray
+12 VDC
Red
Lamps: each
5 Amps Max
@ 12 VDC
1/4
6 Pin
Slave
Receptacle
Slave
Connection
F
Blue
3/4
White
1/2
Green
Brown
1/4
E
Ground
Gray
P/N
2
36
30
30
E
Orange
14-LED Master Water Display
P/N 3030385-01
Innovative Controls SL Series
Tank Level Monitor System
Monster Lights
Relay Driver Module
P/N 3030362
Base-Mount
Tank Sender
P/N 3030376-01
Ground
WATER
FOAM A
FOAM B
E 1/4 1/2 3/4 F
E 1/4 1/2 3/4 F
E 1/4 1/2 3/4 F
5-LED Mini Slave Water Display
P/N 3030423-01
5-LED Mini Slave Foam Display
Class A
P/N 3030423-01A
5-LED Mini Slave Foam Display
Class B
P/N 3030423-01B
WATER
FOAM
FOAM
F
F
F
3/4
3/4
3/4
1/2
1/2
1/2
1/4
1/4
1/4
E
E
E
5-LED Mini Slave Water Display
P/N 3030372-01
Innovative Controls SL Series
Tank Level Monitor System
5-LED Mini Slave Foam Display
Class A
P/N 3030373-01A
5-LED Mini Slave Foam Display
Class B
P/N 3030373-01B
Thread-Mount
Tank Sender
P/N 3030454-01-XX
Flanged Top-Mount
Tank Sender
P/N 3030448-01-XX
Master Display
Extension Cable
Innovative Controls SL Series
Tank Level Monitor System
Base-Mount
Tank Sender
P/N 3030376-01
Vent tube to atmosphere
prevents inaccuracy typically
associated with altitude
changes
Heavy-Duty 18 Gauge wire
in a jacketed shielded cable
1/4” NPT
Base-Mount
Tank Sender
IC P/N 3030376-01
The easy-to-install sender unit is constructed of
stainless steel and features a vent to atmosphere,
which prevents inaccuracy typically associated with
altitude changes.
Sensor is encapsulated in a durable stainless
steel housing
Pressure
sensor
The sender unit remains accurate in all types of
water and foam.
Orifice protected
behind
diaphragm.
The sender's electronics are encapsulated for
protection from shock, vibration, water and dust.
The sensor is protected from contact with the
foam or water by a stainless steel diaphragm
to prevent freeze-up and other sensor
malfunctions related to exposure.
A large bore allows the media to more easily
flush and drain from the sensor housing,
thereby preventing clogging caused by
mineral deposits.
Innovative Controls SL Series
Tank Level Monitor System
Molded durable cable strain
relief
Silicone film
barrier
Master Display
Y Connector
1 ft.
P/N 3030374-01
3 ft.
P/N 3030374-02
External Relay Warning Wire
P/N EXT
Monster Lights
Driver Module
P/N 3030362
Monster Light
Driver Module
Ground
Gray
+12 VDC
Red
Lamps: each
5 Amps Max
@ 12 VDC
P/
N
Orange
White
1/2
Green
1/4
Brown
E
34
N
2
36
30
30
Innovative Controls SL Series
Tank Level Monitor System
3/4
Ground
Gray
P/
Wiring Harnesses
5 ft.
P/N 4000418-01
10 ft.
P/N 4000418-02
15 ft.
P/N 4000418-03
20 ft.
P/N 4000418-04
25 ft.
P/N 4000418-05
30 ft.
P/N 4000418-06
35 ft.
P/N 4000418-07
40 ft.
P/N 4000418-08
50 ft.
P/N 4000418-09
F
9
30
30
Slave
Connection
Blue
To Display
To Sender
SL Tester
P/N 3030589
SL Tester
System Hook-ups
To SL
Sender Unit
N
P/
To SL Level
Display
30
-
9
34
30
-
Voltmeter VDC Hook-ups
Red(+) Black(-)
Display
Voltage Output
+
Innovative Controls SL Series
Tank Level Monitor System
Display Voltage
Output
Sender Signal
Output
Sender
Signal Output
+
1 Slave Display
WATER
F
3/4
1/2
1/4
E
Display (Deutsch 6 socket)
1 - White (Signal)
2 - Bare (Shield)
3 - Green
4 - Blue
5 - Red (+)
6 - Black (-)
To 12 Volt Supply
6
5
4
1
2
3
2 Slave Displays
1/2
1/4
E
Y-Connector
P/N 3030374
WATER
Plug
installed when no
slaves are used
F
WATER
F
3/4
WATER
F
3/4
1/2
1/4
E
3/4
3 Slave Displays
WATER
F
1/2
3/4
1/2
1/4
E
1/4
WATER
Systems with a single slave
display plug directly into the
master display. Systems with
multiple slave displays,
including mini displays and/or
monster lights, utilize one or
more Y-connectors to wire the
network.
6 Pin
Slave
Receptacle
E
F
3/4
1/2
1/4
E
WATER
F
3/4
1/2
Monster Lights
10-LED Master Display
P/N-3030358
+12 VDC
Supply
Ground
Sensor (Deutsch 6 pin)
1 - White (Signal)
2 - Bare (Shield)
3 - Vent
4 - Vent
5 - Red (+)
6 - Black (-)
1
2
3
6
5
4
Monster Light
Driver Module
Ground
Gray
+12 VDC
Red
Lamps: each
5 Amps Max
@ 12 VDC
Orange
Slave
Connection
F
Blue
3/4
White
1/2
Green
Brown
1/4
E
Ground
Gray
P/N
2
36
30
30
Base-Mount
Tank Sender
P/N 3030376-01
Innovative Controls SL Series
Tank Level Monitor System
Monster Lights
Driver Module
P/N 3030362
Ground
1/4
E
Note:
This calibration procedure must be performed to ensure that the indicated fluid levels on the display accurately match the actual levels in the tank. The tank can
be full or empty to begin calibration, but must be filled before beginning Step 4. To ensure proper calibration, do not have water in the fill tower.
Step 1: Install Tank Sender Unit
Step 2: Initiate Calibration
Step 3: Calibrating The Probe
Step 4: Tank Selection Mode
To ensure proper drainage,
it is highly recommended
that the sender unit is
mounted vertically on the
side of the tank by using a
90 degree 1/4" NPT fitting.
Connect sender unit to
the display and
the display to a
12 or 24 volt
power source.
Go to Step 2.
Within 1 min. of powering up the unit, place the
magnet over the master display between the 1/2
and 3/4 levels.
With the 1/4, 1/2, 3/4 and FULL lights all flashing, fill
tank - if not yet full. For a level-by-level calibration,
do not fill tank and go to alt. instructions on page 2.
Place the magnet over the display between 1/2 and
3/4 levels. The level lights will flash in sequence
upward beginning the tank selection mode.
FULL
TANK
F
F
3/4
3/4
1/2
1/2
1/4
1/4
E
The 1/4,1/2, 3/4 and FULL
lights will flash in succession
and then they will flash
together - at the same time.
E
You will now select the tank
shape. For a rectangular
tank, go to Step 5. For a T
tank, go to Step 6. For an
elliptical tank go to Step 7.
Step 5: Rectangular Tank
Step 6: T-Shaped Tank
Step 7: Elliptical Tank
Notes:
When the 1/4 level light begins to flash, place the
magnet back onto the master display before the
lights flash for the fifth time.
When the 1/2 level lights begin to flash, place the
magnet back onto the master display before the
lights flash for the fifth time.
When the 3/4 level lights begin to flash, place the
magnet back onto the master display before the
lights flash for the fifth time.
If the magnet is not placed in front of the display to
select a tank shape, the tank selection sequence will
continue and the FULL light will flash 5 times. After the
FULL light flashes 5 times the tank shape selection
sequence will begin again. (Step 5) The tank shape
selection sequence will repeat 3 times. If no tank shape
selection is made in this time, the display will default to
a rectangular tank.
F
3/4
1/2
1/4
E
F
F
3/4
3/4
Remove the magnet.
Calibration for a rectangular
tank is now complete. If the
magnet is not placed in
time, wait until tank shape
sequence begins again.
Innovative Controls SL Series
Tank Level Monitor System
Calibration Instructions
1/2
1/4
E
Remove the magnet.
Calibration for a T-shaped
tank is now complete. If the
magnet is not placed in
time, wait until tank shape
sequence begins again.
1/2
1/4
E
Remove the magnet.
Calibration for an elliptical
tank is now complete. If the
magnet is not placed in
time, wait until tank shape
sequence begins again.
If the display was calibrated incorrectly, remove power
from the display and repeat the process. Recalibration
can not occur without cycling power.
Note:
If none of the 3 calibration modes described on the previous page is acceptable, use this special calibration mode to set each of the water or foam levels
independently. Perform Steps 1, 2, and 3 on previous page before starting Alt. Step 4.
Alt. Step 4
Alt. Step 5
Alt. Step 6
Alt. Step 7
Alt. Step 8
With the tank empty and the 1/4, 1/2, 3/4 and FULL
lights flashing, place the magnet over the master
display between the 1/2 and 3/4 levels.
Wait until the FULL level is flashing and place the
magnet over the display.
Fill the tank to the desired 25% level. Check level
visually or by measuring depth.
Place the magnet over the display. The 1/4 lights will
stay on while the 1/2 lights begin to flash.
Fill the tank to the desired 50% level. Check level
visually or by measuring depth.
F
F
F
3/4
3/4
3/4
1/2
1/2
1/2
1/4
E
1/4
The 1/4,1/2,3/4, and FULL
lights will flash in succession.
E
50%
1/4
25%
The 1/4 and EMPTY lights will
alternate flashing.
E
Alt. Step 9
Alt. Step 10
Alt. Step 11
Alt. Step 12
Alt. Step 13
Place the magnet over the display. The 1/4 and 1/2
lights will be on while the 3/4 lights begin to flash.
Fill the tank to the desired 50% level. Check level
visually or by measuring depth.
Place the magnet over the display. The 1/4, 1/2 and
3/4 lights will be on while the FULL lights begin
to flash.
Fill the tank to the desired FULL level.
Place the magnet over the display to complete the
alternate calibration process.
F
F
100%
F
75%
3/4
3/4
3/4
1/2
1/2
1/2
1/4
1/4
1/4
E
Innovative Controls SL Series
Tank Level Monitor System
Calibration Instructions
E
E


