Version 3
Te c h n i c a l D a t a
Rohmann GmbH
User-Interface ELOTEST M2
• Pictograph-based, one-hand operation via key pad with key-click
• 6 languages: English, German, French, Italian, Swedish and Spanish
• Direct-function keys for offset- and liftoff-compensation
• Programmable function key
• Intuitive operation using only one submenu-level
Probe Connection
• 11-pin Fischer socket, compatible with the 8-pin Rohmann connector
• BNC connector for parametric probes (resonant probes)
• OEM probes to be connected via an adapter or directly to the BNC
connector
• Speed control for rotor (torque compensated) in 10 steps
(corresponds to approx. 900 rpm to 2700 rpm using Rohmann standard
rotors)
Active Probe Compensation
• Compensation of the probe response signal for optimum signal dynamics
• Automatic test frequency selection using the probe characteristics
• Automatic balancing of single-coil probes using finely graduated,
internal compensating loads (no external elements required)
Frequency Range
• 10 Hz to 12 MHz, continuously adjustable, display in Hz, kHz, MHz
• Adjustable driver current, from 0 % to 100 % in 2 % steps
• Frequency variation from nominal less than 1 %; frequency stability
50 ppm
• Dual-frequency operation in multiplex-mode
Gain
• Preamplification 0 to 60 dB in 0.5 dB steps (0 to 40 dB in 100 kHz
range)
• Gain 0 to 60 dB in 0.5 dB steps
• Axis spread 0 to 20 dB in 1 dB steps
• Automatic selection of preamplification and gain
Phase
• 0-359.5° in 0.5° steps; step size adjustable
Filter
• Low-pass filter 1.3 Hz to 10 kHz in 40 steps
• High-pass filter 0 Hz to 10 kHz in 40 steps
• Band-pass filter 0 Hz to 10 kHz; combination of HP and LP
• Selectable automatic filter for rotor operation
LCD–Display
• LCD featuring long-life LED backlight, 80 x 60 mm (3.15” x 2.36”)
• Temperature-compensated contrast setting
• Resolution 320 x 240 Pixel; refresh rate 75 Hz,
• 220,000 data samples/second, no signal delay
• Signal display covering 100 % of the screen; over 89 % with menu
displayed
• 80° viewing angle
Display Modes
• Impedance plane / spot display (X/Y), available for all probes
• Time-base/sweep display (Y/t), 5 ms to 60 s in 17 steps; synchronized
• Simultaneous X/Y- and Y/t-display (dual-screen mode)
• Reference signal may be displayed in the background
• 2 screen grid sizes with adjustable intensity
• Selectable display range:
X/Y center – X/Y center bottom – X/Y bottom right
• Freely positionable zero/null point
• Automatic trigger during rotor operation
• Selectable waterfall display during rotary inspection
• Simultaneous multi-signal display during multi-frequency operation
• Persistence: 0.1 s to 70 s adjustable in 12 steps
• On-screen signal storage; cleared manually or via auto-erase (2 - 80 s)
Gates/Alarm
• Alarm: optical and acoustic
• Active in all display modes; may be inverted
• Adjustable gates: +Y-gate, Box-gate, Circle-gate with adjustable flat in
the Y-direction
Parameter Settings/Image Memory
• 99 user settings may be programmed, stored and recalled
• 50 application-related factory default settings (cannot be overwritten)
• 32 signal memories incl. parameter settings for documentation
• Parameter setups and images may be named using alphanumerical
characters
• Image and parameter data may be printed and transmitted to personal
computer
• Long-term recording (strip chart) of X- and Y-signals, from 20 s to
24 hours; 90,000 min/max-values (envelope, without data-loss)
• Data storage maintained (backup-battery)
Conductivity Measurement
• Measurement in % IACS or MS/m from 1 % IACS to 110 % IACS.
• Measuring frequencies: 60 kHz, 120 kHz, 240 kHz or 480 kHz
• Calibration using 2 individually adjustable calibration points
Coating Thickness Measurement
• Measurement of non-conductive layers on conductive non-ferromagnetic
materials
• Measurement range up to 1000 µm or 40 mils
Multi-Frequency Operation
• 2-frequency multiplex
• Multiplex rate up to 1 kHz
• Both frequencies fully adjustable, independent of each other
• Signal mix-function to suppress unwanted effects
Rohmann GmbH
Version 3
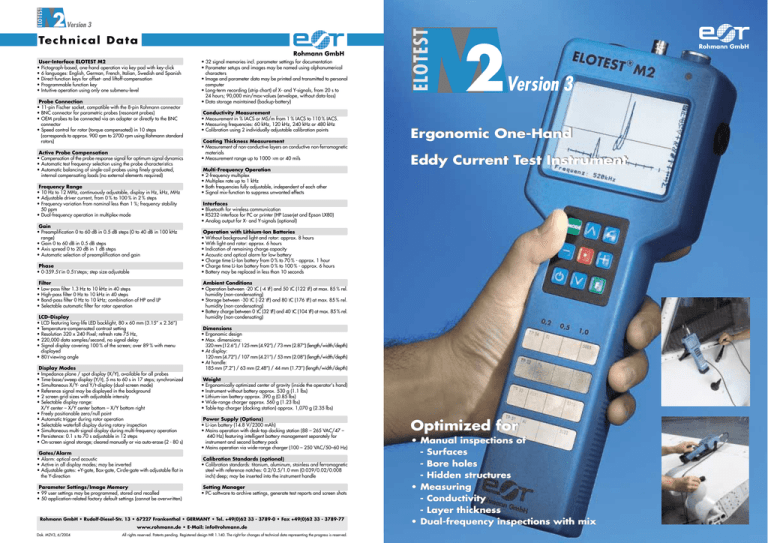
Ergonomic One-Hand
Eddy Current Test Instrument
Interfaces
• Bluetooth for wireless communication
• RS232-interface for PC or printer (HP Laserjet and Epson LX80)
• Analog output for X- and Y-signals (optional)
Operation with Lithium-Ion Batteries
• Without background light and rotor: approx. 8 hours
• With light and rotor: approx. 6 hours
• Indication of remaining charge capacity
• Acoustic and optical alarm for low battery
• Charge time Li-Ion battery from 0 % to 70 % - approx. 1 hour
• Charge time Li-Ion battery from 0 % to 100 % - approx. 6 hours
• Battery may be replaced in less than 10 seconds
Ambient Conditions
• Operation between -20 °C (-4 °F) and 50 °C (122 °F) at max. 85 % rel.
humidity (non-condensating)
• Storage between -30 °C (-22 °F) and 80 °C (176 °F) at max. 85 % rel.
humidity (non-condensating)
• Battery charge between 0 °C (32 °F) and 40 °C (104 °F) at max. 85 % rel.
humidity (non-condensating)
Dimensions
• Ergonomic design
• Max. dimensions:
320 mm (12.6“) / 125 mm (4.92“) / 73 mm (2.87“) (length/width/depth)
• At display:
120 mm (4.72”) / 107 mm (4.21”) / 53 mm (2.08”) (length/width/depth)
• At handle:
185 mm (7.2”) / 63 mm (2.48”) / 44 mm (1.73”) (length/width/depth)
Weight
• Ergonomically optimized center of gravity (inside the operator's hand)
• Instrument without battery approx. 530 g (1.1 lbs)
• Lithium-ion battery approx. 390 g (0.85 lbs)
• Wide-range charger approx. 560 g (1.23 lbs)
• Table-top charger (docking station) approx. 1,070 g (2.35 lbs)
Power Supply (Options)
• Li-ion battery (14.8 V/2300 mAh)
• Mains operation with desk-top docking station (88 – 265 VAC/47 –
440 Hz) featuring intelligent battery management separately for
instrument and second battery pack
• Mains operation via wide-range charger (100 – 250 VAC/50–60 Hz)
Calibration Standards (optional)
• Calibration standards: titanium, aluminum, stainless and ferromagnetic
steel with reference notches: 0.2/0.5/1.0 mm (0.039/0.02/0.008
inch) deep; may be inserted into the instrument handle
Setting Manager
• PC-software to archive settings, generate test reports and screen shots
Rohmann GmbH • Rudolf-Diesel-Str. 13 • 67227 Frankenthal • GERMANY • Tel. +49(0)62 33 - 3789-0 • Fax +49(0)62 33 - 3789-77
www.rohmann.de • E-Mail: info@rohmann.de
Dok. M2V3, 6/2004
ELOTEST
ELOTEST
2
All rights reserved. Patents pending. Registered design MR 1.140. The right for changes of technical data representing the progress is reserved.
Optimized for
• Manual inspections of
- Surfaces
- Bore holes
- Hidden structures
• Measuring
- Conductivity
- Layer thickness
• Dual-frequency inspections with mix
ELOTEST
2
Rohmann GmbH
Version 3
• The “one-hand” generation with full
eddy current functionality
• Dual frequency operation,
independently adjustable
• Full frequency range from 10 Hz to
12 MHz. All filter functions (LP, HP,
BP) to optimize the signal for
static and dynamic testing.
• High-definition LCD-display with
LED-backlight. Full contrast in any
kind of light.
ELOTEST M2 V3 - designed as a “one-hand
instrument” based on ergonomic industrial-medicine
recommendations. The center of gravity rests in the
palm to provide long fatigue-free work.
The ELOTEST M2 V3 allows all types of manual
inspection beginning with the high-frequency crack
detection of high-alloy components to mediumfrequency crack and corrosion tests to low-frequency
tests of multi-layer structures for stress cracks.
• Integrated reference standards to
promptly verify signals.
• Pictograph-guided unambiguous
“one-hand operation” via 9 keys
for all selected functions via the
set-up menu.
Conductivity and layer thickness measurement with the ELOTEST M2 V3
Standard Screen Mode
Display either as impedance plane or timebase; a task bar of pictographs is used to set
the parameters.
Dual Frequency Mix Mode
Simultaneous display of both channels and the
mix channel.
Dual Screen Rotor Mode
Impedance display with circumferential
presentation.
Testing for surface defects and hidden structural
defects
Measuring corrosion and conductivity
Typical Applications
Manual inspection with differential and absolute
probes
Multi-layer rotary inspection of bore holes
Strip Chart Mode
Long-term recording of the X- and Y-signal
components with a reconstruction feature for
the impedance display.
The docking station converts the one-hand instrument
into a table-top instrument with a connector for PC
or printer. By simply plugging it in, the intelligent
charger electronics is activated and keeps the battery
pack that is integrated in the instrument at its optimum
load level.
Defect analysis of built-in tubes with co-axial and
rotating internal tubes probes
Material properties/ hardness sorting


