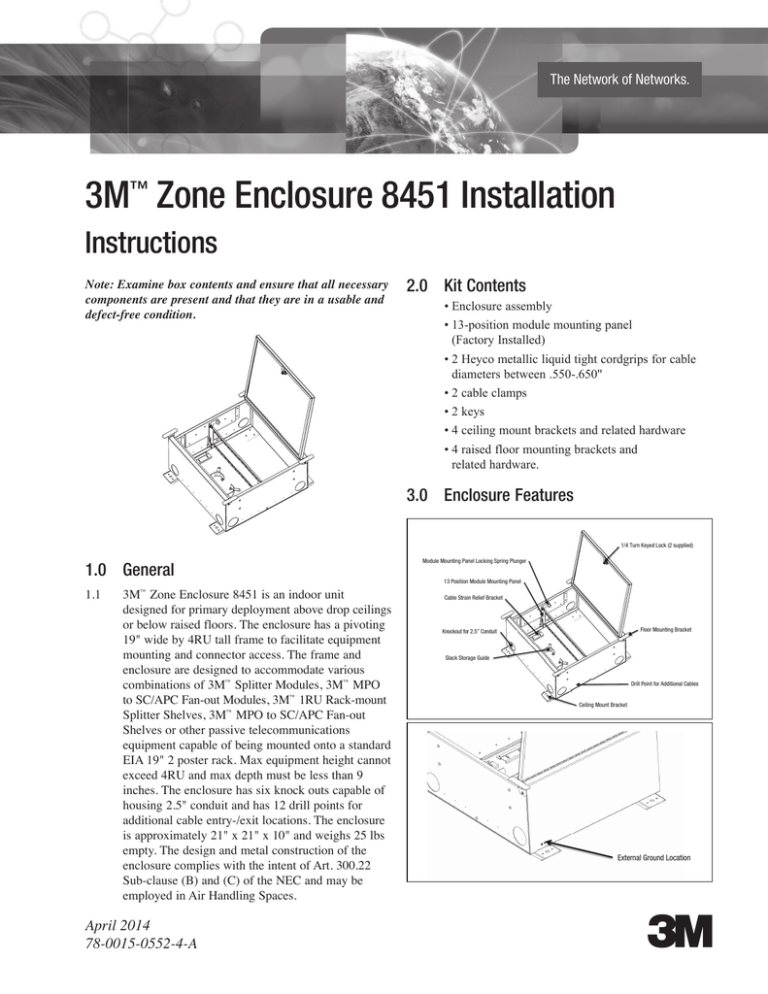
3M™ Zone Enclosure 8451 Installation
Instructions
Note: Examine box contents and ensure that all necessary
components are present and that they are in a usable and
defect-free condition.
2.0 Kit Contents
• Enclosure assembly
• 13-position module mounting panel
(Factory Installed)
• 2 Heyco metallic liquid tight cordgrips for cable
diameters between .550-.650"
• 2 cable clamps
• 2 keys
• 4 ceiling mount brackets and related hardware
• 4 raised floor mounting brackets and
related hardware.
3.0 Enclosure Features
1/4 Turn Keyed Lock (2 supplied)
1.0 General
1.1
3M™ Zone Enclosure 8451 is an indoor unit
designed for primary deployment above drop ceilings
or below raised floors. The enclosure has a pivoting
19" wide by 4RU tall frame to facilitate equipment
mounting and connector access. The frame and
enclosure are designed to accommodate various
combinations of 3M™ Splitter Modules, 3M™ MPO
to SC/APC Fan-out Modules, 3M™ 1RU Rack-mount
Splitter Shelves, 3M™ MPO to SC/APC Fan-out
Shelves or other passive telecommunications
equipment capable of being mounted onto a standard
EIA 19" 2 poster rack. Max equipment height cannot
exceed 4RU and max depth must be less than 9
inches. The enclosure has six knock outs capable of
housing 2.5" conduit and has 12 drill points for
additional cable entry-/exit locations. The enclosure
is approximately 21" x 21" x 10" and weighs 25 lbs
empty. The design and metal construction of the
enclosure complies with the intent of Art. 300.22
Sub-clause (B) and (C) of the NEC and may be
employed in Air Handling Spaces.
April 2014
78-0015-0552-4-A
Module Mounting Panel Locking Spring Plunger
13 Position Module Mounting Panel
Cable Strain Relief Bracket
Floor Mounting Bracket
Knockout for 2.5” Conduit
Slack Storage Guide
Drill Point for Additional Cables
Ceiling Mount Bracket
External Ground Location
3.1
Note: A minimum of one tile location away from walls
or other obstructions is recommended for proper door
operation.
3M™ Zone Enclosure 8451 Access
3.1.1. Insert supplied key and unlock door by
rotating key 1/4 turn counterclockwise to
unlock the enclosure.
Note: If necessary, the enclosure may be installed with
minimal tile removal, removal of adjacent tiles ensures
ease of access and inspection.
3.1.2. Grasp side of the door to open enclosure.
4.1.3. Install the four floor mount brackets as shown
in section 3.0 using the supplied 10-32 screws
and lockwashers. Torque screws to 40-45
in-lbs.
Note: DO NOT use the key to lift door. Doing so may bend
or break key into lock and render the enclosure unusable.
3.1.3 Slowly close door when access is no
longer required.
Floor Mount Brackets
3.1.4. Lock the door using the supplied key by
turning 1/4 turn clockwise.
3.2
Module Mounting Panel Access
3.2.1. To pivot the mounting bracket, pull the spring
plungers on both sides of bracket.
3.2.2. Pivot the bracket to desired location and
release the spring plungers to lock in place.
Note: There are six possible bracket positions indicated
by the holes in the side panel.
4.1.4. Lower enclosure into desired tile location.
Note: Door will not close with Module Mounting Panel
pivoted forward toward the slack storage area. These
locations are for connector access only.
Note: Opening the enclosure door and using the inside
ledge as a handle may make installation easier.
Note: Ability to pivot back will depend on type and size
of equipment mounted into the enclosure.
mWARNING
Do not use door as an installation handle.
3.2.3. The Module Mounting Panel is secured to
the pivot brackets using four 12-24 UNC X
0.5" screws and 12-24 Cage Nuts.
Note: Floor mount brackets should rest on the floor
system posts and not the joists.
4.1.5. Re-install floor tile over enclosure and ensure
that the tile lays flat and that the enclosure
body is not supporting the tile in any way.
Note: Additional hardware will be required to mount
different types of equipment.
3.3
Enclosure Grounding
Note: Variations in raised floor system may result in the
enclosure body supporting the floor tile. The enclosure
is NOT designed to support the weight of individuals or
equipment positioned on the floor for any amount of time.
3.3.1. Enclosure grounding location at rear of box
is designed to accommodate #10-32 UNC
x 0.25" long screws. They are spaced .625"
apart to fit a standard 2 lug ground connector.
Note: If the covering tile does not lay flat or is in
contact with the enclosure, the floor mounting brackets
may be removed and the closure allowed to rest directly
on the subfloor.
4.0 Enclosure Installation
4.1.6. Route and install cables (see section 5
for details) and replace remaining tiles.
To maintain compliance with Art. 300.22, all external cable
must be plenum rated with metal external fittings attached
to the closure, and the enclosure must be fully shut to
protect internal components. You must determine, based on
your use and the components you incorporate, whether the
final system complies with Art. 300.22
4.1
Under a Raised Floor
4.1.1. Select desired installation location.
4.1.2. Remove tile covering location and tiles
adjacent to desired location.
2
78-0015-0552-4-A
4.2.
Suspended Above a Drop Ceiling
Note: The 3M Zone Enclosure 8451 is designed to be
completely hidden behind a ceiling tile for optimal
security and safety.
™
Note: Mounting hardware and supports are not supplied.
Use support struts or NEC compliant support wires.
Support wires must be capable of supporting enclosure
weight, plus populated items. (Total not to exceed 50lbs.)
4.2.1 I nstall the four ceiling mount brackets as
shown in section 3.0 using the supplied
10-32 screws and lockwashers. Torque
screws to 40-45 in-lbs.
Note: Use of Loctite or other thread locking compound
is acceptable. Lock washers MUST still be used.
mWARNING
Warning: Failure to use lock washers and to properly torque bracket
mounting screws may create a safety hazard.
4.2.2. Determine mounting location for the
3M™ Zone Enclosure 8451 and remove
ceiling tiles to aid in installation.
Note: A minimum of two tiles should be removed; however,
the installation process can be simplified with the removal
of the tiles adjacent to the desired location.
Insure all support elements are attached in accordance with applicable
NEC standards and local ordinances.
4.2.4. P
ass the enclosure through the ceiling opening
and rest on suspended ceiling
cross members.
4.2.5. P
ass supporting wires or threaded rod through
mounting bracket holes to support enclosure.
Note: When using support wires pass the wire through
the mounting bracket holes, loop back and make several
wraps around the wire.
mWARNING
Insure all support elements are attached in accordance with applicable
NEC standards and local ordinances.
5.1
4.2. 6. A
djust support elements such that the weight
of the enclosure is evenly supported by all
four units.
Note: Ensure that the enclosure is level and completely
above the suspended ceiling.
4.2.7. E
nsure that the enclosure door can be
accessed and operated safely. Adjust enclosure
position as needed.
4.2.8. Re-install ceiling panels.
4.2.9. N
ote enclosure location per company
standard.
78-0015-0552-4-A3
Using Conduit
mWARNING
Ensure conduit being used is appropriate for use above ceilings or below
raised flooring and is in accordance with all building and fire codes.
Note: In order to maintain a high level of ingress
protection the knock outs are half shear in construction
and may be difficult to remove.
5.1.1. U
sing a hammer or punch remove desired
knockout location.
Note: Knockout locations are designed to accommodate
2.5" conduit and related fittings. Drill point locations can
be used to create openings in the enclosure for conduits
up to 1" in diameter.
Note: DO NOT drill holes larger than 1" in diameter at
drill point locations. Doing so will void UL Certification
as it may create a safety hazard.
Note: For ease of access only use cable entry locations
in front of module locations.
5.1.2. I nstall conduit collars and conduit per
manufacturer’s instructions.
mWARNING
4.2.3. A
ttach the support wires or threaded rod
to the supporting element of ceiling.
mWARNING
5.0 Cable Installation
Insure conduit being used is appropriate for use above ceilings or below
raised flooring is in accordance with all building and fire codes.
5.1.3. P
ull cable through conduit and into enclosure
per company practice.
5.2
Using Liquid Tight Fitting
5.2.1. Drill a 1" hole at the desired cable location.
5.2.2. I nstall liquid tight fitting with knurled nut
toward the outside of the enclosure.
5.2.3. S
ecure to enclosure wall using the supplied
nut.
5.2.4. P
ass plenum rated cable through fitting and
tighten nuts.
5.2.5. S
train relieve cable using the supplied hose
clamp.
Note: Additional fittings and hose clamps must be
purchased separately.
6.0 Grounding
6.1
Using Conduit
mWARNING
Insure all support elements are attached in accordance with applicable
NEC standards and local ordinances.
7.0 Cable Management
7.1
The area in front of the module mounting panel is
intended for slack storage.
Module Mounting Panel
Fiber Guide and Radius Control
External Ground Location
6.2.
Attach grounding hardware to cable armor
according to manufacturer’s instructions.
6.3.
Attach #14 AWG ground wire or equivalent ground
braid to cable grounding hardware and route to
internal ground stud of enclosure. Tighten supplied
locknut to 40 in-lbs.
Cable Strain Relief Bracket
(4 ea)
7.2
To avoid patch cord congestion and aid in
installation the amount of slack stored inside
the zone enclosure should be minimized.
7.2.1. Use of 3M factory-terminated cabling is
recommended.
Internal Ground
Location, 1 each side
7.2.2. When using field-terminated or bulk cabling
slack should be stored outside the enclosure
or inside the closet cabinet.
7.3
Route cabling per company practice.
Note: Do not violate cable minimum bend radius
specified by cable manufacturer.
Note: There are two internal locations for grounding
cables. Consolidate multiple cable grounds as needed.
3M is a trademark of 3M Company. All other trademarks herein are the property of their respective owners.
Important Notice
All statements, technical information, and recommendations related to 3M’s products are based on information believed to be reliable, but the accuracy or
completeness is not guaranteed. Before using this product, you must evaluate it and determine if it is suitable for your intended application. You assume
all risks and liability associated with such use. Any statements related to the product which are not contained in 3M’s current publications, or any contrary
statements contained on your purchase order shall have no force or effect unless expressly agreed upon, in writing, by an authorized officer of 3M.
Warranty; Limited Remedy; Limited Liability.
This product will be free from defects in material and manufacture for a period of one (1) year from the time of purchase. 3M MAKES NO OTHER
WARRANTIES INCLUDING, BUT NOT LIMITED TO, ANY IMPLIED WARRANTY OF MERCHANTABILITY OR FITNESS FOR A PARTICULAR PURPOSE.
If this product is defective within the warranty period stated above, your exclusive remedy shall be, at 3M’s option, to replace or repair the 3M product
or refund the purchase price of the 3M product. Except where prohibited by law, 3M will not be liable for any indirect, special, incidental or
consequential loss or damage arising from this 3M product, regardless of the legal theory asserted.
Communication Markets Division
6801 River Place Blvd.
Austin, TX 78726-9000
1-800-426-8688
www.3M.com/Telecom
Please Recycle. Printed in USA.
© 3M 2014. All Rights Reserved.
78-0015-0552-4-A


