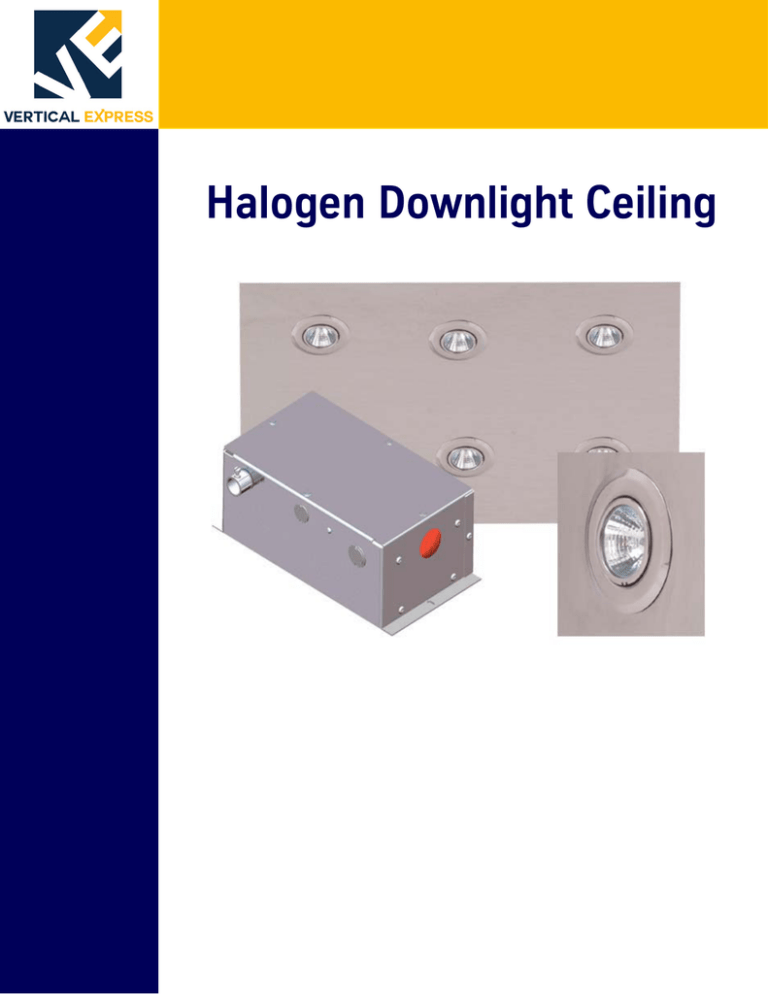
Halogen Downlight Ceiling
Every attempt has been made to ensure that this documentation is as accurate and up-to-date as possible.
However, Vertical Express assumes no liability for consequences, directly or indirectly, resulting from any error or
omission. The material contained herein is subject to revision. Please report any problems with this manual to
Vertical Express, P.O. Box 2019, Memphis, Tennessee 38101.
Vertical Express • P.O. Box 2019 • Memphis, Tennessee 38101
© 2011, 2012 Vertical Express. All rights reserved.
Published August, 2012
Second Edition
Printed in the United States of America
Manual Number: 89149 v.1.2
Halogen Downlight Ceiling
Contents
Contents
Safety Precautions . . . . . . . . . . . . . . . . . . . . . . . . . . . . . . . . . . . . . . . . . . . . . . . . . . . . . . . . . . . . . . . . 3
Terms in This Manual . . . . . . . . . . . . . . . . . . . . . . . . . . . . . . . . . . . . . . . . . . . . . . . . . . . . . . . . 3
General Safety . . . . . . . . . . . . . . . . . . . . . . . . . . . . . . . . . . . . . . . . . . . . . . . . . . . . . . . . . . . . . 3
Electrical Safety . . . . . . . . . . . . . . . . . . . . . . . . . . . . . . . . . . . . . . . . . . . . . . . . . . . . . . . . . . . . 3
Mechanical Safety . . . . . . . . . . . . . . . . . . . . . . . . . . . . . . . . . . . . . . . . . . . . . . . . . . . . . . . . . . 4
Handling . . . . . . . . . . . . . . . . . . . . . . . . . . . . . . . . . . . . . . . . . . . . . . . . . . . . . . . . . . . . . . . . . 5
Shipping . . . . . . . . . . . . . . . . . . . . . . . . . . . . . . . . . . . . . . . . . . . . . . . . . . . . . . . . . . . . . . . . . 5
Arrival of Equipment . . . . . . . . . . . . . . . . . . . . . . . . . . . . . . . . . . . . . . . . . . . . . . . . . . . . . . . . . 5
Specifications . . . . . . . . . . . . . . . . . . . . . . . . . . . . . . . . . . . . . . . . . . . . . . . . . . . . . . . . . . . . . . . . . . . . 7
Power Supply . . . . . . . . . . . . . . . . . . . . . . . . . . . . . . . . . . . . . . . . . . . . . . . . . . . . . . . . . . . . . . 7
Power Supply Harness . . . . . . . . . . . . . . . . . . . . . . . . . . . . . . . . . . . . . . . . . . . . . . . . . . . . . . . 7
Light Fixture (6 or 9) . . . . . . . . . . . . . . . . . . . . . . . . . . . . . . . . . . . . . . . . . . . . . . . . . . . . . . . . . 7
Car Top Light Fixture Harness (2) . . . . . . . . . . . . . . . . . . . . . . . . . . . . . . . . . . . . . . . . . . . . . . . 7
Fuses. . . . . . . . . . . . . . . . . . . . . . . . . . . . . . . . . . . . . . . . . . . . . . . . . . . . . . . . . . . . . . . . . . . . 7
Assembly. . . . . . . . . . . . . . . . . . . . . . . . . . . . . . . . . . . . . . . . . . . . . . . . . . . . . . . . . . . . . . . . . 7
Installation . . . . . . . . . . . . . . . . . . . . . . . . . . . . . . . . . . . . . . . . . . . . . . . . . . . . . . . . . . . . . . . . . . . . . . 8
Car Top Assembly . . . . . . . . . . . . . . . . . . . . . . . . . . . . . . . . . . . . . . . . . . . . . . . . . . . . . . . . . . 8
Power Supply with Harness. . . . . . . . . . . . . . . . . . . . . . . . . . . . . . . . . . . . . . . . . . . . . . . . . . . . 8
Adjustment . . . . . . . . . . . . . . . . . . . . . . . . . . . . . . . . . . . . . . . . . . . . . . . . . . . . . . . . . . . . . . . . . . . . . . 9
Wiring . . . . . . . . . . . . . . . . . . . . . . . . . . . . . . . . . . . . . . . . . . . . . . . . . . . . . . . . . . . . . . . . . . . . . . . . . 10
Maintenance . . . . . . . . . . . . . . . . . . . . . . . . . . . . . . . . . . . . . . . . . . . . . . . . . . . . . . . . . . . . . . . . . . . . 12
Replace Bulb . . . . . . . . . . . . . . . . . . . . . . . . . . . . . . . . . . . . . . . . . . . . . . . . . . . . . . . . . . . . . 12
Replace Lamp Housing. . . . . . . . . . . . . . . . . . . . . . . . . . . . . . . . . . . . . . . . . . . . . . . . . . . . . . 13
Troubleshooting . . . . . . . . . . . . . . . . . . . . . . . . . . . . . . . . . . . . . . . . . . . . . . . . . . . . . . . . . . . . . . . . . 13
Replacement Parts . . . . . . . . . . . . . . . . . . . . . . . . . . . . . . . . . . . . . . . . . . . . . . . . . . . . . . . . . . . . . . . 14
Printed in USA August, 2012
1
Contents
Halogen Downlight Ceiling
This page
intentionally
left blank.
2
Vertical Express
Halogen Downlight Ceiling
Safety Precautions
Safety Precautions
IMPORTANT!
Read this page before any work is performed on elevator equipment. The
procedures contained in this manual are intended for the use of qualified
elevator personnel. In the interest of your personal safety and the safety of
others, do not attempt any procedure that you are not qualified to perform.
All procedures must be accomplished in accordance with the applicable rules in the latest edition of
the National Electrical Code, the latest edition of ASME A17.1, and any governing local codes.
Terms in This Manual
CAUTION statements identify conditions that may result in damage to the
equipment or other property if improper procedures are followed.
WARNING statements identify conditions that may result in personal injury if
improper procedures are followed.
General Safety
Before applying power to the controller, check that all factory wire connections
are tight on relays, contactors, fuse blocks, resistors, and terminals on cards and
DIN rail terminals. Connections loosened during shipment may cause damage or
intermittent operation.
Other specific warnings and cautions are found where applicable and do not appear in this summary. See the Elevator Industry Field Employees’ Safety Handbook for electrical equipment
safety information on installation and service.
Electrical Safety
All wiring must be in accordance with the National Electrical Code and be consistent with all state
and local codes.
Use the Proper Fuse
To avoid fire hazards, use only a fuse of the correct type, voltage, and current rating. See the job
specific drawings sheet (Power Supplies) for fusing information.
Electric shocks can cause personal injury or loss of life. Circuit breakers, switches, and fuses may
not disconnect all power to the equipment. Always refer to the wiring diagrams. Whether the AC
supply is grounded or not, high voltage will be present at many points.
Printed Circuit Cards
Printed circuit boards may be damaged if removed or installed in the circuit while applying power.
Before installation and/or removing printed circuit boards, secure all power.
Always store and ship printed circuit cards in separate static bags.
Printed in USA August, 2012
3
Safety Precautions
Electrical Safety
Halogen Downlight Ceiling
Mainline Disconnect
(continued)
Unless otherwise directed, always Turn OFF, Lock, and Tag out the mainline disconnect to remove
power from elevator equipment. Before proceeding, confirm that the equipment is de-energized
with a volt meter. Refer to the Vertical Express Employees’ Safety and Accident Prevention Program
Manual for the required procedure.
Test Equipment Safety
Always refer to manufacturers’ instruction book for proper test equipment operation and adjustments.
Megger or buzzer-type continuity testers can damage electronic components. Connection of
devices such as voltmeters on certain low level analog circuits may degrade electronic system performance. Always use a voltmeter with a minimum impedance of 1M Ohm/Volt. A digital voltmeter
is recommended.
When Power Is On
To avoid personal injury, do not touch exposed electrical connections or components while power is
ON.
Mechanical Safety
4
See the Elevator Industry Field Employees’ Safety Handbook for mechanical equipment safety
information on installation and service.
Vertical Express
Halogen Downlight Ceiling
Safety Precautions
Static Protection Guidelines
IMPORTANT!
Read this page before working with electronic circuit boards.
Elevator control systems use a number of electronic cards to control various functions of the
elevator. These cards have components that are extremely sensitive to static electricity and are
susceptible to damage by static discharge.
Immediate and long-term operation of an electronic-based system depends upon the proper
handling and shipping of its cards. For this reason, the factory bases warranty decisions on the
guidelines below.
Handling
Shipping
•
Cards shipped from the factory in separate static bags must remain in the bags until time for
installation.
•
Anti-static protection devices, such as wrist straps with ground wire, are required when
handling circuit boards.
•
Cards must not be placed on any surface without adequate static protection.
•
Only handle circuit cards by their edges, and only after discharging personal static electricity to
a grounding source. DO NOT touch the components or traces on the circuit card.
•
Extra care must be taken when handling individual, discrete components such as EPROMS
(which do not have circuit card traces and components for suppression).
•
Complete the included board discrepancy sheet.
•
Any card returned to the factory must be packaged in a static bag designed for the card.
•
Any card returned to the factory must be packaged in a shipping carton designed for the card.
•
“Peanuts” and styrofoam are unacceptable packing materials.
Note:
Refer to the Vertical Express Replacement Parts Catalog to order extra static bags and
shipping cartons for each card.
Failure to adhere to the above guidelines will VOID the card warranty!
Arrival of Equipment
Receiving
Upon arrival of the equipment, inspect it for damage. Promptly report all visible damage to the
carrier. All shipping damage claims must be filed with the carrier.
Storing
During storage in a warehouse or on the elevator job site, precautions should be taken to protect
the equipment from dust, dirt, moisture, and temperature extremes.
Revision Change Bars
Each revised page included in this manual will have a vertical line (change bar) to the left of the
text that has been added or changed. The example at the left of this paragraph shows the size
and position of the revision change bar.
Printed in USA August, 2012
5
Safety Precautions
Halogen Downlight Ceiling
This page
intentionally
left blank.
6
Vertical Express
Halogen Downlight Ceiling
Specifications
Specifications
• Single-phase low voltage with dimmer
Power Supply
• Input voltage: 120VAC 0.8A sec.
• Output voltage: 12VAC, Max. 10 Amps (9 lamps)
• Auto reset: Soft start, short circuit and overload protection
• Conduit: flexible, .500 diameter, 3.5 ft. length
Power Supply Harness
• Two (2) wires (one black, one white) 36" length, (stripped on one end)
• Two (2) cables, 36" length, (male connector on one end)
• Stainless steel or black
Light Fixture (6 or 9)
• 20W 12V halogen lamp
• 12" lamp harness
Car Top Light Fixture Harness (2)
• Harness total length 228"
• Five (5) connectors spaced 48" apart
• Two (2) female connectors spaced 36" from the first lamp
• 2A, 250V, ABC-2 Type 1 (F1)
Fuses
• 10A, 250V, ABC Type (F2, F3)
Assembly
12V Lamp
Light Assembly
Solid State Transformer
(with dimmer controller)
Figure 1 - Downlight Ceiling Assembly
Printed in USA August, 2012
7
Installation
Halogen Downlight Ceiling
Installation
Car Top Assembly
The car top assembly is shipped with installed halogen light fixtures.
1. Install the car top assembly on the cab.
2. Locate the two (2) plugs on the end of the lamp fixture wiring harness (which are
already connected to the halogen lamps).
3. Route these wires to the harness coming from the power supply. See Figure 2 on
page 9 for this and all steps in the following procedure.
Power Supply with Harness
1. Locate the power supply, the two (2) #8 self-tapping screws, and the flexible conduit.
Note:
In the event of a component failure, two (2) transformers are provided to prevent
a total loss of light.
2. Use the #8 self- tapping screws to attach the power supply to the car top.
3. Drill or punch a .875" diameter hole in the car top.
4. Attach one end of the flexible conduit coming from the power supply.
5. Turn OFF, Lock, and Tag out the disconnect that is supplying power to the L10 and
L20 supply.
6. Attach the two stripped wires (L10 Black - L20 White) coming from the power supply,
to the L10 and L20 terminals in the swing return.
7. Route the two cables from the transformers to the halogen lamp fixtures.
8. Connect the male connector of the cable to the female connector of the lamp fixture wiring
harness.
9. Turn ON the disconnect supplying power to the L10 and L20 supply.
8
Vertical Express
Halogen Downlight Ceiling
Adjustment
Power Supply with Harness
(continued)
Power Supply
Dimmer Switch
Self-Tapping
Screws (2)
From Lamp Fixture
Wiring Harness
Attach to Lamp
Fixture Wiring
Harness
Car Ceiling
Attach to L10 and
L20 Connections
L10 and L20
Connections
Terminal Strip
Swing Return
Figure 2 - Power Supply with Harness
Adjustment
1. Turn the dimmer switch to the full ON position, and verify that all of the lamps are on full
brightness. See Figure 3.
2. Turn the dimmer switch until the desired lighting is acquired.
Dimmer Switch
Figure 3 - Dimmer Switch
Printed in USA August, 2012
9
Wiring
Halogen Downlight Ceiling
Wiring
Example: Two (2) sets of three
(3) fixtures shown
Fuses
Dimmer
Switch
Power Supply
48
(typical length of wire
between lamps)
L10
(Black)
36 wire (from male connector
to power supply)
L20
(White)
Plug 1
Plug 2
24 wire (from power
supply to
stripped end)
Female Locking
Connector
Male Locking
Connector
36 wire (914mm)
(from female connector to
first light receptacle connector)
2
1
Plug 1
12 wire
Male Locking
Connector
Female Locking
Connector
2
1
Plug 2
10
Lamp Harness
Vertical Express
Halogen Downlight Ceiling
Wiring
Wiring
(continued)
Light 9
Light 4
Light 8
Light 3
Light 7
Light 2
Light 6
Light 1
Plug 1-2
Light 5
Plug 1-1
Plug 2-2
Plug 2-1
FU2
10 AMP
2
10 AMP
2
FU3
1
X2
X1
1
X2
10 VAC
X1
10 VAC
T1
L20
115 VAC
L10
T2
L20
115 VAC
L10
2
3
DIMMER SWITCH
L20
1
FU1
L10
1
2
2 AMP
Printed in USA August, 2012
11
Maintenance
Halogen Downlight Ceiling
Maintenance
Replace Bulb
1. While holding the bulb in place, use a small, flathead screwdriver to gently pry open the
retaining ring at the pry slot. See Figure 4.
Note:
Take care when using metal tools with stainless steel surfaces as not to scratch the
stainless material. It is recommended to wrap the end of the screwdriver with a soft cloth
to protect the stainless surface.
Pry Slot
Retaining Ring
Spring Retainer
Lamp Housing
Connect to Lamp
Connect to Lamp Fixture
Wiring Harness
Lamp Harness
Figure 4 - Halogen Lamp Fixture Assembly
2. Pull the bulb down a few inches and expose the lamp harness.
3. Disconnect the bulb from the lamp harness.
4. Connect the new bulb to the lamp harness.
5. Push the new bulb up into the fixture until it is against the spring retainer.
6. Snap the retaining ring back into place.
Note:
12
Make certain that the bulb is in front of the spring retainer. The spring retainer holds the
bulb snug against the retaining ring and prevents rattling.
Vertical Express
Halogen Downlight Ceiling
Troubleshooting
Replace Lamp Housing
1. Remove the bulb.
2. Gently pull the lamp housing away from the cab top, pushing back the clips which hold the
housing in place. See Figure 5.
Clip
Figure 5 - Back Side of Halogen Lamp Assembly
3. To prevent the clips from striking fingers, restrain the spring clips before pulling the assembly
completely through the hole.
4. Pull the housing down until the spring clips come through the ceiling.
5. Disconnect the lamp harness.
6. Hold the clips back on the new lamp housing, and place the spring clips on the housing
through the hole.
7. Release the clips and push the housing against the ceiling (to hold the lamp housing in place).
8. Install the bulb.
Troubleshooting
Problem
Cause
Solution
Lamp is rattling.
Excessive movement of bulb.
Make sure the bulb is mounted in the lamp housing in
front of the spring retainer, and the retaining ring is
securely fastened.
Lamp not illuminating.
No power to bulb.
Make sure that the bulb is securely connected to the
harness, and all connectors are plugged together.
Bad bulb.
Replace the bulb.
The set of lamps not illuminating. Dimmer switch setting.
Turn the dimmer switch to full ON, and adjust from there.
All lamps not illuminating.
No power on L10 - L20 terminals. Check the L10 - L20 terminals for connection problems.
Printed in USA August, 2012
Blown fuse.
Check fuses F1, F2, or F3 (replace as needed).
Defective dimmer switch.
Test the dimmer switch.
Defective transformer.
Test the transformer for 12V output.
13
Replacement Parts
Halogen Downlight Ceiling
Replacement Parts
Halogen Lighting
1
14
2
3
4
5
ITEM
PART NO.
PRINT NO.
DESCRIPTION
1
9815041
1503AK1
2
9815004
200YP1
Lamp Fixture, Stainless Steel, with 12" Harness
3
9815016
200YP2
Lamp Fixture, Stainless Steel, Black, with 12" Harness
4
9815030
462KJ1
Harness, Car Top Light Fixture with 5 Lamp Connections
5
9815028
175AH1
Lamp, Halogen
6
9816096
141095
Fuse, 2A, 250V, ABC-2 Type (F1) (not shown)
132277
Fuse, 10A, 250V, ABC Type (F2, F3) (not shown)
Power Supply, Light, Halogen
Vertical Express
Vertical Express
P.O. Box 2019 Memphis, TN 38101 Tel: (866) 448-3789 (toll-free) Fax: (901) 261-1807 www.verticalxpress.com
All illustrations and specifications are based on information in effect at the time of publication approval. Vertical Express reserves the right to change
specification or designs and to discontinue items without prior notification or obligation. v.Y.m. Copyright © 2012 Vertical Express Elevator


