Page Numbering in Word 2003
advertisement

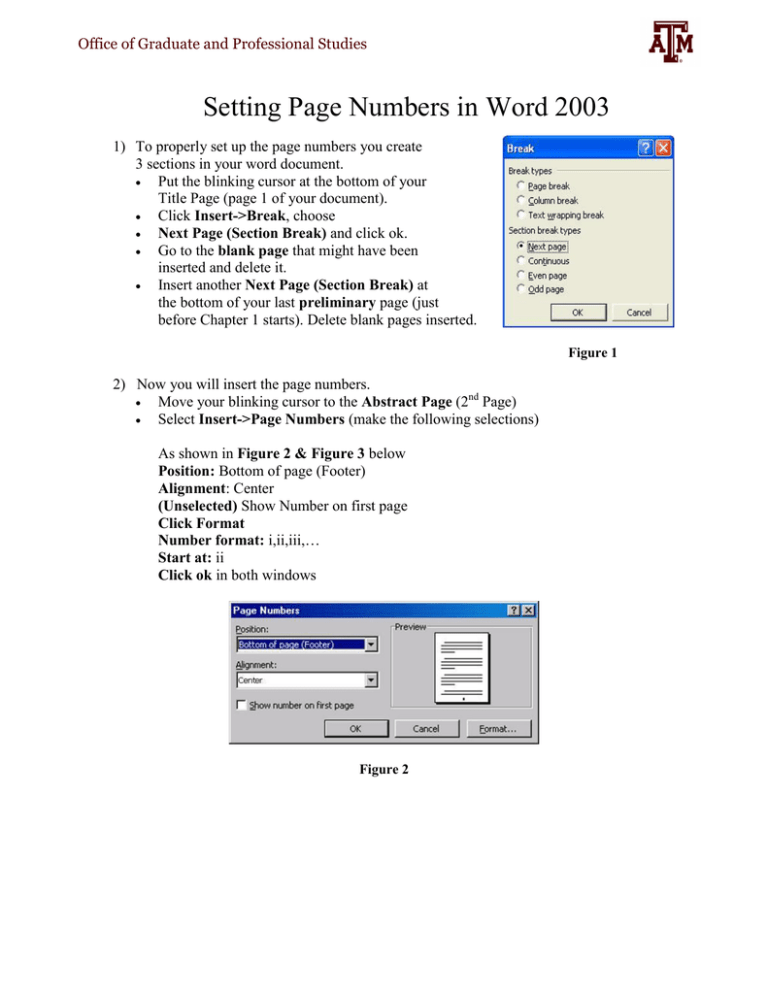
Office of Graduate and Professional Studies Setting Page Numbers in Word 2003 1) To properly set up the page numbers you create 3 sections in your word document. Put the blinking cursor at the bottom of your Title Page (page 1 of your document). Click Insert->Break, choose Next Page (Section Break) and click ok. Go to the blank page that might have been inserted and delete it. Insert another Next Page (Section Break) at the bottom of your last preliminary page (just before Chapter 1 starts). Delete blank pages inserted. Figure 1 2) Now you will insert the page numbers. Move your blinking cursor to the Abstract Page (2nd Page) Select Insert->Page Numbers (make the following selections) As shown in Figure 2 & Figure 3 below Position: Bottom of page (Footer) Alignment: Center (Unselected) Show Number on first page Click Format Number format: i,ii,iii,… Start at: ii Click ok in both windows Figure 2 Office of Graduate and Professional Studies Figure 3 • Go to Page 2 (Abstract). Turn the “Same as Previous” option off. To do this, double click on the header and the following toolbar shows up. “Link to Previous” button Figure 4 Click on the “Link to Previous” toggle button on the toolbar. You will know when “Same as Previous” is turned off when these words no longer appear below the dotted line in the header and footer space. • • • Delete the page number (if any) that appears on your title page. Now, move your blinking cursor to the first page of your chapters. Select Insert->Page Numbers (make the following selections) As shown in Figure 4 & 5 Position: Bottom of page (Footer) Alignment: Center (Select) Show Number on first page Click Format Number format: 1,2,3,… Start at: 1 Click ok in both windows. Office of Graduate and Professional Studies Figure 5 Figure 6 3) You should be done with adding page numbers to your document.


