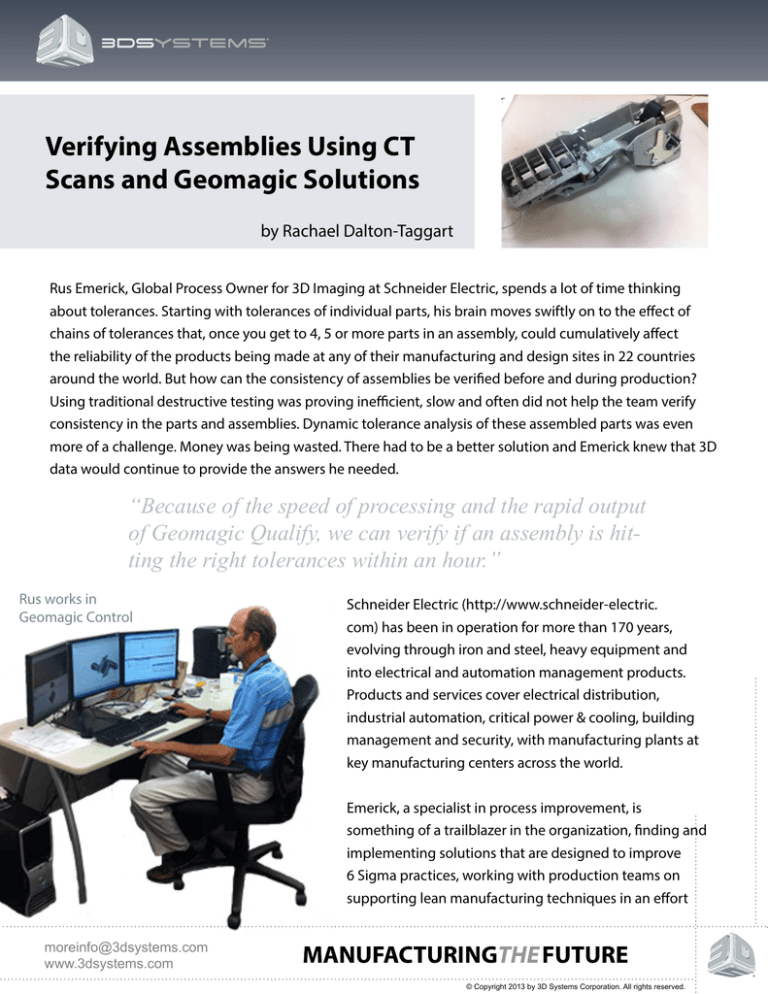
Verifying Assemblies Using CT
Scans and Geomagic Solutions
by Rachael Dalton-Taggart
Rus Emerick, Global Process Owner for 3D Imaging at Schneider Electric, spends a lot of time thinking
about tolerances. Starting with tolerances of individual parts, his brain moves swiftly on to the effect of
chains of tolerances that, once you get to 4, 5 or more parts in an assembly, could cumulatively affect
the reliability of the products being made at any of their manufacturing and design sites in 22 countries
around the world. But how can the consistency of assemblies be verified before and during production?
Using traditional destructive testing was proving inefficient, slow and often did not help the team verify
consistency in the parts and assemblies. Dynamic tolerance analysis of these assembled parts was even
more of a challenge. Money was being wasted. There had to be a better solution and Emerick knew that 3D
data would continue to provide the answers he needed.
“Because of the speed of processing and the rapid output
of Geomagic Qualify, we can verify if an assembly is hitting the right tolerances within an hour.”
Rus works in
Geomagic Control
Schneider Electric (http://www.schneider-electric.
com) has been in operation for more than 170 years,
evolving through iron and steel, heavy equipment and
into electrical and automation management products.
Products and services cover electrical distribution,
industrial automation, critical power & cooling, building
management and security, with manufacturing plants at
key manufacturing centers across the world.
Emerick, a specialist in process improvement, is
something of a trailblazer in the organization, finding and
implementing solutions that are designed to improve
6 Sigma practices, working with production teams on
supporting lean manufacturing techniques in an effort
moreinfo@3dsystems.com
www.3dsystems.com
© Copyright 2013 by 3D Systems Corporation. All rights reserved.
to reduce costs and waste in the engineering-to-production workflow. His work is to design processes that
can be methodically implemented across each of the manufacturing
plants, allowing best practices to become standard at each site.
His focus is on verification of products using 3D data. For 10 years,
he has worked very successfully with automated inspection in the
production lines, using Laser Designs’ Surveyor 3D scanners and
Geomagic® Control™ (formerly Geomagic Qualify®) to measure,
inspect and report on products. Since the demand for better, more
efficient manufacturing never lets up, so Emerick keeps the pressure
on his team, some 125 strong, to find new, faster and better ways for
3D data to improve product quality.
Rus with the Metrotom CT scanner
“It is a requirement of our products that they have to work
unattended for a period of years. That means we have to guarantee
quality,” he says. “How can we assure that the circuit breakers in that
server farm will be perfect when that power surge hits? What about
a transformer, out in the middle of nowhere in hostile weather
conditions, that has to work up to and beyond its guaranteed life?
The products have little room for failure, peoples lives can depend on
them, and it’s up to us to ensure something close to perfection before the products are released.”
In pursuit of this mission, Emerick started experimenting with CT scan data about 3 years ago.
“Laser scanners see what’s on the outside –a single part or a housing. In those terms we had the process
perfected,” he says. “The interaction of parts in an assembly, however, could only be verified through
destructive testing – you know, the old way: take the first 100 products, open them, look at them, test
them, destroy them.”
The team tried to add analysis software into the process but it didn’t help much with dynamic forces when
applied to the assembly.
“When force is applied it may bend or warp the parts,” says Emerick. “Under dynamic force in the real world
something can happen to a key part, but you can spend all day in analysis software and you can’t predict
the reason. You have to be testing on the real assembly to verify how they will work.”
moreinfo@3dsystems.com
www.3dsystems.com
© Copyright 2013 by 3D Systems Corporation. All rights reserved.
Emerick knew that he had to analyze the root cause of any problems as a product came off the production
line.
Scan data from one of
Schneider Electric’s
housings.
“We can’t sell a product if it has a flaw. So every day saved is
an extra day’s profit. If we reduce time-to-market by 50%
then we reach our customers in half the time, which
means the company realizes earlier profitability.”
But the tradition of destructive testing remained: “The
problem is that with this process you just destroyed your
sample, and during that time you proved that 65 out of
100 were perfect. But you just don’t know that you will get the
same result with the next 100... it is a total leap of statistics and faith.”
CT scanning became de rigueur in medical procedures many years ago, but
in recent years has become of interest in industrial processes. Emerick was
also interested. He checked out and tested multiple systems, eliminating the
older-style fan beam system that delivered a horizontal beam through an assembly
with minute increases in height, which delivered thousands of stacks and took forever to
scan and process. He found some systems that were faster but used magnification in the scan
which made the results subject to error and thereby suspect.
After 3 years of testing and learning, Emerick finally found the state-of-the-art version he was looking for:
a Zeiss METROTOM 1500 CT scanner provided through Laser Design Inc. “Schneider Electric understands
the importance of analysis in their fabrication and qualification processes,” explained C. Martin Schuster,
President and CEO of Laser Design. “Our ultra-precise CT scanning system from Zeiss provides the
Schneider plant with assurance of their parts’ and assemblies’ geometry, including internal features. All
dimensions of parts are accessible and measurement accuracies are unparalleled.”
Laser Design provides ultra-precise 3D scanning systems and 3D measurement services, helping customers
successfully complete complex inspection, analysis, and reverse engineering projects for more than 30
years. The company has various 3D systems installed worldwide in demanding applications throughout
many different industries, government agencies, universities and museums.
moreinfo@3dsystems.com
www.3dsystems.com
© Copyright 2013 by 3D Systems Corporation. All rights reserved.
The Zeiss Metrotom 1500 CT scanner captures all surfaces, both external and internal, of complex free-form
parts and assemblies without harming the object. Parts made of plastic, ceramics or composite materials,
as well as magnesium, aluminum and steel, can be measured and efficiently evaluated. A very long service
life is enabled by the open X-ray tube technology and it has a measurement range of 11.8” x 13.8” (300 mm
x 350 mm). The CT system can also be equipped with a higher resolution detector to make very fine part
structures visible, and the enlarged detailed view can be measured with extremely high accuracy.
Left
3D model of housing
Right
Color map comparing
scan data to 3D model
BUT COULD IT ACHIEVE WHAT EMERICK REQUIRED?
“Using the CT scan, no surface does not turn up,” he says. “With an accuracy of 11 microns, with a scan
completed in about an hour, we suddenly found that we could see, measure, compare and report on a
product very quickly – without having to destroy it in the process.”
Processing the CT scan data through Volume Graphics, the 3D model is then loaded into Geomagic Control
where the assembly is compared to either original CAD design data or to scan data of another known
working product. Geomagic Control quickly and automatically measures and assesses deviations between
the new scan data and the comparison assembly model, making measurement on known tolerances,
identifying deviations in the assembly based on unanticipated forces between parts. Geomagic Control
then automatically produces a custom report for the production engineers in PDF, so it can be viewed by
all concerned parties.
Each scan of an assembly takes less than an hour, and the images from the CT scan are already
compressing and processing even while the scan continues.
moreinfo@3dsystems.com
www.3dsystems.com
© Copyright 2013 by 3D Systems Corporation. All rights reserved.
“Because of the speed of processing and the rapid output of Geomagic Control, we can verify if an
assembly is hitting the right tolerances within an hour. This is breathtakingly fast for a process that would
have taken days using destructive practices” says Emerick.
This kind of rapid turnaround is key to the entire organization: if there is a problem on the production line,
production has to stop until it is resolved. A typical circuit breaker line will produce 80,000 circuit breakers
per day in optimal conditions. Every hour, indeed every minute spent resolving a problem costs the
company money.
“In the space of an hour I solved a problem that would normally have cost 21 days of production in
downtime. That’s an easy $480,000 saved in a single hour of 3D scanning and verifying the problem inside
of Geomagic Control,” he says.
BEYOND THE BASIC CT SCAN
According to Emerick, CT scanning is able to take their processes way beyond the simple need to measure
and verify: It is helping them reduce scrap, errors, verify assemblies and even has the level of detail to
allow them to see and identify cracks and bubbles inside materials that could reduce the life span of the
products.
“This is a key part of significantly improving our testing,” says Emerick. “Traditional verification usually
involves dimensions. With certain materials manufacturing, measurement cannot tell you if the production
is running too hot, or with enough glass – variables that destructive testing might be able to verify but
then we are back to square one in terms of ongoing, consistent verification of parts.”
Rus Emerick is excited about the success with the industrial CT scanning, enough so that he hopes one day
to introduce this across the company’s worldwide operations. But in between production line verification,
he is also using the device to create a virtual 3D warehouse of data – a store in the company’s MRP system
that archives known working assemblies for later use as a reference for ongoing production challenges.
And in the meantime, he will continue to think about tolerances. Just like he always has.
moreinfo@3dsystems.com
www.3dsystems.com
© Copyright 2013 by 3D Systems Corporation. All rights reserved.


