WHITEPAPER
Understanding Digital Raw
Capture
TABLE OF CONTENTS
1
Grayscale to color
3
How JPEG differs from raw
By now, you’ve probably heard some talk about digital raw capture, but finding a coherent explanation of just what a digital raw capture actually is can be a bit more challenging. Part of the challenge is that raw isn’t one single thing. Rather, it’s a general term
for a variety of proprietary file formats—such as Canon’s .CRW and .CR2, Minolta’s
.MRW, Olympus’ .ORF, and the various flavors of Nikon’s .NEF, for example—that
share important common features. To understand the nature of digital raw captures,
you first need to know a bit about how those cameras that shoot raw actually capture
images.
A raw file is a record of the data captured by the sensor. While there are many different
ways of encoding this raw sensor data into a raw image file, in each case the file records
the unprocessed sensor data. So let’s consider what the sensor in a digital camera
actually captures. A number of different technologies are included in the category of
“digital camera,” but nearly all of those that shoot raw are of the type known as “mosaic
sensor” or “color filter array” (CFA) cameras.
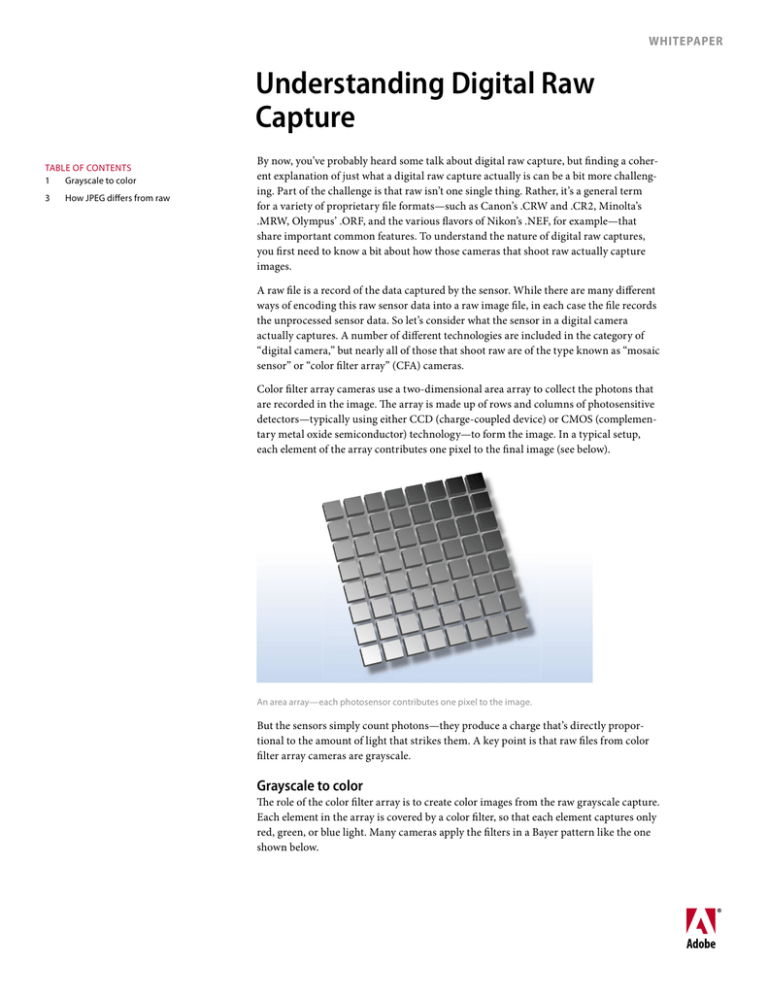
Color filter array cameras use a two-dimensional area array to collect the photons that
are recorded in the image. The array is made up of rows and columns of photosensitive
detectors—typically using either CCD (charge-coupled device) or CMOS (complementary metal oxide semiconductor) technology—to form the image. In a typical setup,
each element of the array contributes one pixel to the final image (see below).
An area array—each photosensor contributes one pixel to the image.
But the sensors simply count photons—they produce a charge that’s directly proportional to the amount of light that strikes them. A key point is that raw files from color
filter array cameras are grayscale.
Grayscale to color
The role of the color filter array is to create color images from the raw grayscale capture.
Each element in the array is covered by a color filter, so that each element captures only
red, green, or blue light. Many cameras apply the filters in a Bayer pattern like the one
shown below.
In a Bayer pattern color filter array, each photosensor is filtered so that it captures only a single color of light: red,
green, or blue. Twice as many green filters are used as red or blue because our eyes are most sensitive to green light.
Other filter patterns are possible. Some cameras use CMY rather than RGB filters because they
transmit more light, while still others may add a fourth color to the mix. The common factor in all
color filter array cameras is that, no matter what color filter arrangement is used, each element in
the sensor captures only one color. The red-filtered elements produce a grayscale value proportional
to the amount of red light reaching the sensor, the green-filtered elements produce a grayscale value
proportional to the amount of green light reaching the sensor, and the blue-filtered elements produce a grayscale value proportional to the amount of blue light reaching the sensor.
Raw files contain two different types of information: the image pixels themselves, and the image
metadata. Metadata, which literally means “data about data,” is generated in the camera for each
capture. Both raw and JPEG captures, for example, contain EXIF (Exchangeable Image Format)
metadata that records shooting data such as the camera model and serial number, the shutter speed
and aperture, the focal length, and whether or not the flash fired. Raw files also include some additional metadata that raw converters need in order to process the raw capture into an RGB image.
In addition to the grayscale values for each pixel, most raw formats include a “decoder ring” in
metadata that conveys the arrangement of the color filters on the sensor, so it tells raw converters
which color each pixel represents. The raw converter then uses this metadata to convert the grayscale raw capture into a color image by interpolating the “missing” color information for each pixel
from its neighbors.
���
�����
����
���������������������
����������������
����������������
��������
����
���������
��������������
The raw capture is demosaiced and interpreted by a raw converter, using portions of the metadata embedded into
the file at the time of capture, as well as algorithms in the conversion software.
Understanding Digital Raw Capture
2
This process, known as demosaicing, is one of the key roles a raw converter plays, but it’s not the
only one. Raw conversion involves the following steps in addition to demosaicing.
• White balance. The white balance setting on the camera has no effect whatsoever on the
captured pixels when you shoot raw—it’s simply recorded as a metadata tag in the raw file.
Some raw converters can read this tag and apply it as the default white balance (which the user
can then override if desired), while others may ignore it completely and analyze the image to
determine white balance.
• Colorimetric interpretation. Each pixel in the raw file records a luminance value for either red,
green, or blue. But red, green, and blue are pretty vague terms—if you take a hundred people
and ask them to visualize “red,” you’d almost certainly see a hundred different shades of red if
you could read their minds.
Many different filter sets are in use with digital cameras. So the raw converter has to assign the
correct, specific color meanings to the “red,” “green,” and “blue” pixels, usually in a colorimetrically defined color space such as CIE XYZ, which is based directly on human color perception.
• Gamma correction. Digital raw captures have linear gamma (gamma 1.0), a very different tonal
response from that of either film or the human eye. So the raw converter applies gamma correction to redistribute the tonal information so that it corresponds more closely to the way our
eyes see light and shade. (This property of digital capture has important implications for exposure settings when shooting, which I discuss in a paper called “Raw Capture, Linear Gamma
and Exposure”.)
• Noise reduction, antialiasing, and sharpening. Problems can arise with very small details in an
image. If the detail is only captured on a red-sensing pixel or a blue-sensing pixel, the raw converter may have a hard time figuring out what color that pixel should really be. Simple demosaicing methods also don’t do a great job of maintaining edge detail, so most raw converters also
perform some combination of edge-detection and antialiasing to avoid color artifacts, noise
reduction, and sharpening.
All raw converters perform all of these tasks, but they may use very different algorithms to do
so, which is why the same image may look quite different when processed through different raw
converters. Some converters will map the tones flatter to provide editing headroom while others
will try to achieve a more film-like look by increasing the contrast of the curve.
Generally, there is no one single “correct” interpretation of a given raw format. Vendors make a
relatively subjective determination of what the best “look” is, and then adjust their converter to
produce that result.
How JPEG differs from raw
When you shoot JPEG, a raw converter built into the camera carries out all the tasks listed earlier
to turn the raw capture into a color image, then compresses it using JPEG compression. Some
cameras let you set parameters for this conversion—typically, a choice of sRGB or Adobe RGB as
color space, a sharpness value, and perhaps a tone curve or contrast setting. Unless your shooting schedule is atypically leisurely, it’s difficult to adjust these parameters on an image-by-image
basis, so you’re locked into the camera’s interpretation of the scene.
JPEGs offer fairly limited editing headroom—large moves to tone and color tend to exaggerate
the 8-by-8-pixel blocks that form the foundation of JPEG compression—and while JPEG does a
decent job of preserving luminance data, it applies heavy compression to the color data, which
can lead to issues with skin tones and gentle gradations when you try to edit the JPEG.
When you shoot raw, however, you get unparalleled control over the interpretation of the image
through all the aforementioned aspects of the conversion. When you shoot raw, the only on-camera settings that have an effect on the captured pixels are the ISO speed, the shutter speed, and
the aperture setting. Everything else is under your control when you convert the raw file—you
can reinterpret the white balance, the colorimetric rendering, the tonal response, and the detail
rendition (sharpening and noise reduction) with a great deal of freedom. Within limits (which
vary from one raw converter to another), you can even reinterpret the exposure compensation.
Understanding Digital Raw Capture
3
Almost all cameras that shoot raw capture at least 12 bits, or 4096 shades, of tonal
information per pixel. The JPEG format, however, is limited to 8 bits per channel per
pixel, so when you shoot JPEG, you’re trusting the camera’s built-in raw converter to
throw away a large amount of the captured data in a way that will hopefully do the
image justice. This is exacerbated by the tendency of most camera vendors to impose
a fairly steep contrast curve in the raw-to-JPEG conversion in an effort to produce a
JPEG that resembles a transparency. In the process, they throw away about a stop of
usable dynamic range, and you have essentially no control over what gets discarded.
In some ways, it’s tempting to draw the analogy that shooting JPEG is like shooting
transparency film while shooting raw is more like shooting negative film. With JPEG,
as with transparency film, you need to get everything right in the camera, because
there’s very little you can do to change it later. Shooting raw provides considerable
latitude in determining the tonal rendition, like negatives, and also offers great freedom in interpreting the color balance and saturation. The fact that raw also lets you
control detail rendition—noise reduction and sharpening—breaks the analogy but
offers a further advantage.
Raw offers one more potential advantage that may be hard to demonstrate but is, I
believe, real nevertheless. If you shoot raw, you’ll be able to take advantage of future
improvements in raw converters. Digital photography may no longer be in its infancy,
but it hasn’t yet reached adolescence, let alone maturity, and anyone who has spent
more than a couple of years working with digital imaging knows that digital imaging
software improves with each iteration. JPEGs are relatively inflexible files—we may
see improvements in their handling, but any such improvements are likely to be modest. Raw converters, however, have undergone radical improvements in the 10 years or
so that color filter array cameras have been around, and there’s little reason to think
that the next 10 years won’t see similar improvements. Shooting raw will allow you to
exploit these improvements as and when they happen.
Bruce Fraser
Bruce emigrated from Edinburgh, Scotland
where he escaped the dreary Scottish climes
only to discover San Francisco’s equally challenging weather. Rumor has it this was the
inspiration of Bruce’s lifelong fascination with all
things relating to color. Bruce has made a study
of human vision and how it relates to reproducible color in photography and photomechanical
reproduction.
Adobe Systems Incorporated • 345 Park Avenue, San Jose, CA
95110-2704 USA • www.adobe.com
Adobe and the Adobe logo are either registered trademarks or
trademarks of Adobe Systems Incorporated in the United States
and/or other countries. All other trademarks are the property of
their respective owners.
© 2004 Bruce Fraser. All rights reserved. Printed in the USA. 9/04

