QUICK REFERENCE
E-Gel® Go! Base
Cat. no. G4400
Rev. A
Pub. Part no. 25-1059 Pub. no. MAN0004501
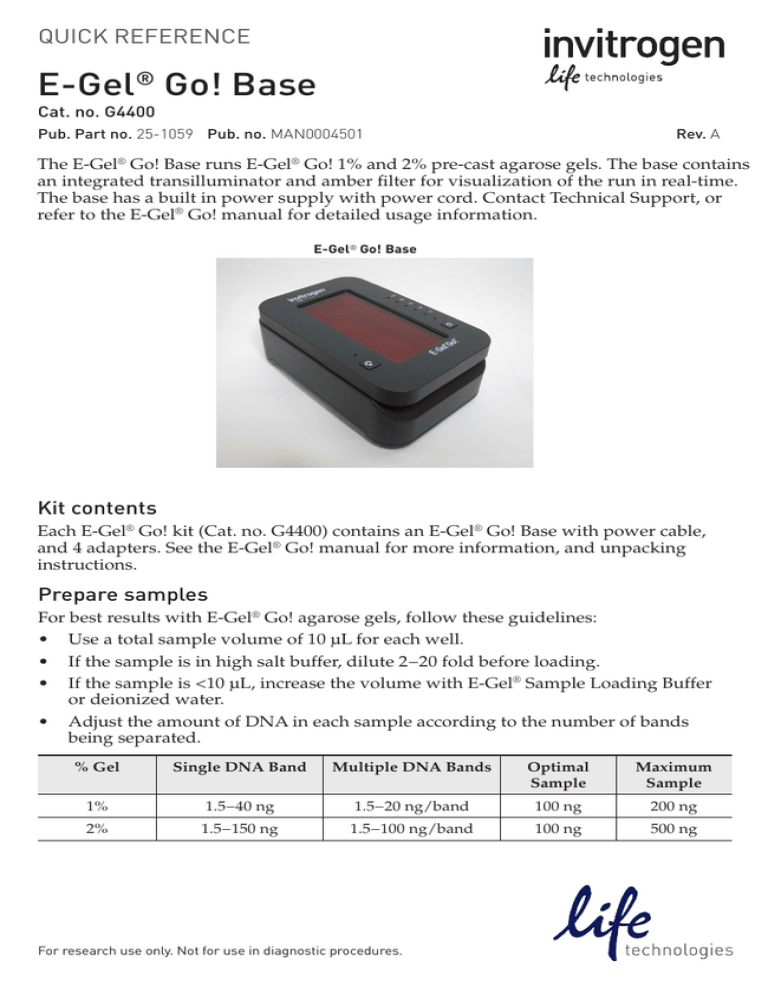
The E-Gel® Go! Base runs E-Gel® Go! 1% and 2% pre-cast agarose gels. The base contains
an integrated transilluminator and amber filter for visualization of the run in real-time.
The base has a built in power supply with power cord. Contact Technical Support, or
refer to the E-Gel® Go! manual for detailed usage information.
E-Gel® Go! Base
Kit contents
Each E-Gel® Go! kit (Cat. no. G4400) contains an E-Gel® Go! Base with power cable,
and 4 adapters. See the E-Gel® Go! manual for more information, and unpacking
instructions.
Prepare samples
For best results with E-Gel® Go! agarose gels, follow these guidelines:
• Use a total sample volume of 10 µL for each well.
• If the sample is in high salt buffer, dilute 2−20 fold before loading.
• If the sample is <10 µL, increase the volume with E-Gel® Sample Loading Buffer
or deionized water.
• Adjust the amount of DNA in each sample according to the number of bands
being separated.
% Gel
Single DNA Band
Multiple DNA Bands
Optimal
Sample
Maximum
Sample
1%
1.5−40 ng
1.5−20 ng/band
100 ng
200 ng
2%
1.5−150 ng
1.5−100 ng/band
100 ng
500 ng
For research use only. Not for use in diagnostic procedures.
Procedure
Running the E-Gel® Go! agarose gel
1. Insert the adapter plug on the E-Gel® Go! Base into an
electrical outlet.
Press the Start button to activate the E-Gel® Go! Base
after it is plugged in (or if it goes into standby mode).
2. Press and hold the Start button until the amber light
next to the desired run time is illuminated. The
recommended (default) run time is 15 minutes. A
“HR” (30 minute) setting is available to separate
bands that are similar in size.
1
To outlet
2
3. Remove the gel cassette from the package and gently
remove the comb.
4. Insert the gel cassette into the E-Gel® Go! Base and
close the cover. The status indicator LED produces a
steady red light if the cassette is correctly inserted.
3
5. Open the cover and load the gel as follows:
• 10 µL DNA Ladder (100–250 ng)*
• 10 µL of sample into each well
• 10 µL deionized water into any empty wells
*For E-Gel® Go! 2% agarose gels, use the
E-Gel® 50 bp DNA Ladder or E-Gel® 1 Kb Plus DNA
Ladder. For E-Gel® Go! 1% agarose gels use the
E-Gel® 1 Kb Plus DNA Ladder.
6. Close the cover of the E-Gel® Go! Base.
4
5
7. Press the Start button to start the run. The red light
turns to a steady green light indicating the start of the
run.
Note: Do not wait more than 2 minutes between loading the gel and starting electrophoresis.
6–8
8. To view the bands, press the Light button. The
transilluminator turns off automatically after
2 minutes.
9. The run stops automatically after the programmed
time has elapsed. The end of the run is signaled by a
flashing red light and rapid beeping.
10. Turn the blue light off using the Light button before
opening the cover and removing the gel.
Light
9
Start
Running the E-Gel® Go! agarose gel, continued
11. Results can be documented using any standard
imaging device. Best results are achieved using a blue light source with imaging settings for “SYBR” dyes.
Example
1% gel
100 ng of E-Gel® 1Kb Plus DNA Ladder run
on 1% and 2% E-Gel® Go! agarose gel for
15 minutes using an E-Gel® Go! Base. The
ladder contains twelve bands ranging in
size from 1000 bp to 12,000 bp in 1000-bp
increments and eight bands ranging in size
from 100 to 1650 bp. In addition, the ladder
contains the dyes Xylene Cyanol FF (XCFF)
and Tartrazine. These dyes allow you to
visually track DNA migration
during electrophoresis, and indicate when
maximum resolution is achieved.
2% gel
4000
3000
2000
1650
2000
1650
1000
850
650
500
400
300
1000
850
650
500
400
300
200
100
200
100
Additional products
Item
Amount
Cat. no.
E-Gel Sample Loading Buffer
1.25 mL
10482055
E-Gel Go! 1% Agarose Gels
10-pak
G4410-01
E-Gel Go! 1% Agarose Gels
20-pak
G4420-01
E-Gel® Go! 2% Agarose Gels
10-pak
G4410-02
E-Gel® Go! 2% Agarose Gels
20-pak
G4420-02
E-Gel® 1 Kb Plus DNA Ladder
500 µL
10488090
E-Gel 50 bp DNA Ladder
500 µL
10488099
E-Gel Go! Car Adapter
1 adapter
G4444
®
®
®
®
®
Troubleshooting
Observation
Cause
Solution
No current
Cassette improperly
inserted or is defective
Remove the gel cassette and re-insert the cassette
correctly. Use a fresh cassette.
Poor
resolution or
smearing of
bands
Sample overloaded
Refer to Prepare Samples for appropriate loads.
High salt samples
Dilute your samples 2- to 20-fold as described in the
E-Gel® Technical Guide.
Sample not loaded
properly or sample
volume too low
Do not introduce bubbles while loading samples. For
proper resolution, keep all sample volumes uniform
and load water into empty wells.
Delay in starting
electrophoresis
Start the run within 2 minutes of loading the gel
Melted gel
Run time too long,
resulting in increased
current
Do not run the gel longer than 20 minutes, or
30 minutes for “HR”.
Sample
leaking from
wells
Wells damaged during
comb removal or gel
loading
Be sure to remove the comb gently without damaging
the wells.
Sample volume too
large
Load the recommended sample volume in each well.
No filters or wrong
filter set.
See E-Gel® Technical Guide to determine the optimal
filter sets to use, or contact the instrument
manufacturer for advice.
Photographic settings
not optimal
Optimize settings of your system for E-Gel® with SYBR
Safe™ empirically. You may need to increase the
exposure time or gain setting.
High
background,
suboptimal,
or no image
Disposal
The proprietary stain in E-Gel® Go! products is a potential mutagen. Follow state and
local guidelines for disposal of these materials.
Important licensing information
This product may be covered by one or more Limited Use Label Licenses. By use of this product,
you accept the terms and conditions of all applicable Limited Use Label Licenses.
Limited product warranty
Life Technologies Corporation and/or its affiliate(s) warrant their products as set forth in the
Life Technologies’ General Terms and Conditions of Sale found on Life Technologies’ website at
www.lifetechnologies.com/termsandconditions. If you have any questions, please contact Life
Technologies at www.lifetechnologies.com/support.
DISCLAIMER: LIFE TECHNOLOGIES AND/OR ITS AFFILIATE(S) DISCLAIM ALL WARRANTIES WITH RESPECT TO THIS DOCUMENT, EXPRESSED OR IMPLIED, INCLUDING BUT NOT LIMITED TO THOSE OF MERCHANTABILITY, FITNESS FOR A PARTICULAR
PURPOSE, OR NON-INFRINGEMENT. TO THE EXTENT ALLOWED BY LAW, IN NO EVENT SHALL LIFE TECHNOLOGIES AND/OR
ITS AFFILIATE(S) BE LIABLE, WHETHER IN CONTRACT, TORT, WARRANTY, OR UNDER ANY STATUTE OR ON ANY OTHER BASIS
FOR SPECIAL, INCIDENTAL, INDIRECT, PUNITIVE, MULTIPLE OR CONSEQUENTIAL DAMAGES IN CONNECTION WITH OR ARISING FROM THIS DOCUMENT, INCLUDING BUT NOT LIMITED TO THE USE THEREOF.
© 2014 Thermo Fisher Scientific Inc. All rights reserved. All trademarks are the property of Thermo Fisher
Scientific and its subsidiaries unless otherwise specified.
For support visit www.appliedbiosystems.com/support
www.lifetechnologies.com
25 August 2014


