SELF-INSTALLATION INSTRUCTIONS
BEFORE YOU BEGIN, DISCONNECT ALL OF THE
EXISTING TV EQUIPMENT THROUGHOUT YOUR HOME
THEN, INSTALL TODAY
AND ENJOY FiOS RIGHT AWAY!
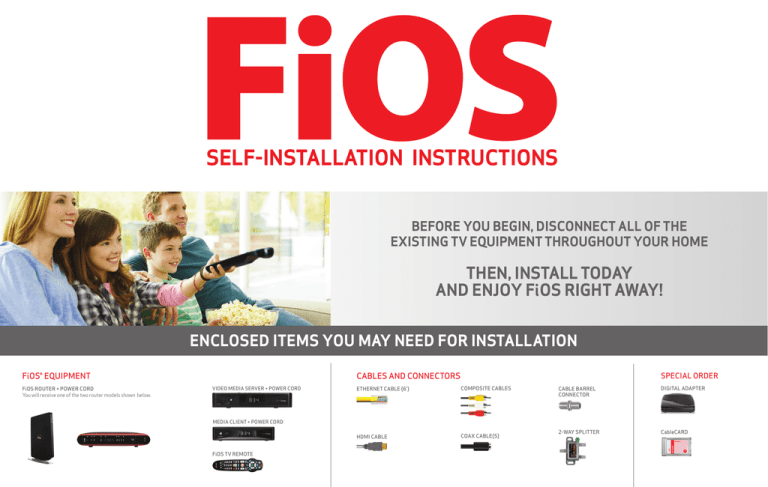
ENCLOSED ITEMS YOU MAY NEED FOR INSTALLATION
FiOS® EQUIPMENT
FiOS ROUTER + POWER CORD
You will receive one of the two router models shown below.
CABLES AND CONNECTORS
VIDEO MEDIA SERVER + POWER CORD
SPECIAL ORDER
ETHERNET CABLE (6')
COMPOSITE CABLES
HDMI CABLE
COAX CABLE(S)
CABLE BARREL
CONNECTOR
DIGITAL ADAPTER
2-WAY SPLITTER
CableCARD
MEDIA CLIENT + POWER CORD
FiOS TV REMOTE
BEFORE YOU BEGIN, DISCONNECT ALL OF THE EXISTING TV EQUIPMENT THROUGHOUT YOUR HOME
STEP 1
FiOS ROUTER SETUP
NOTE
Models vary, but connections
are the same on all models.
STEP 1A: FiOS ROUTER SETUP
1
Connect the
Coax Cable
2
Connect the
Power Cord
Coax Cable
to FiOS Router
OPTIONAL: If a TV will be
connected to the same
coax wall outlet as your
router, connect a 2-way
splitter as shown.
OPTIONAL: For a WIRED Internet setup, connect the
Ethernet cable from the router to your computer.
3
Lights on the FiOS™ Quantum Gateway will turn white
once activated. (This may take up to 6 minutes).
If you have a different router model, turn the router ON
to begin activation.
NOTE: Details about router placement and Wi-Fi signal strength
are available at verizon.com/fioshomenetwork.
STEP 1B: WIRELESS SETUP
1. On the FiOS Router, locate the Wi-Fi label for your Wireless Network Name (ESSID) and Wireless Password (WPA2).
2. Launch your device’s wireless application. Select Wireless Network Name (ESSID) and then Connect.
3. When prompted, enter the Wireless Password (WPA2), as it appears on your router’s label (case sensitive).
Then select Connect.
STEP 1C: INTERNET SETUP
1. Open an Internet browser and go to activatemyfios.verizon.net.
2. Follow the Setup Web Site to activate your Verizon account.
STEP 2
VIDEO MEDIA SERVER SETUP
NOTE
We recommend connecting
this to your main TV.
STEP 2A: CONNECT YOUR VIDEO MEDIA SERVER
3
Connect the Power Cord
Coax Cable
to Router
Back of TV
OPTIONAL
1
Connect the Coax Cable
STEP 2B: ACTIVATE YOUR VIDEO MEDIA SERVER
Turn on your Video Media Server and your TV. Then, using your FiOS TV Remote, follow the instructions shown on your TV screen.
2
Connect the
HDMI Cable
STEP 3
MEDIA CLIENT SETUP
STEP 3A: CONNECT YOUR MEDIA CLIENT USING HDMI CABLE (PREFERRED)
3
Connect the Power Cord
Back of TV
1
Connect the Coax Cable
2
Connect the HDMI Cable
IMPORTANT
DO NOT install Media Clients until after you’ve installed and activated your Video Media Server(s).
ALTERNATE OPTION: USING COMPOSITE CABLES
3
Connect the Power Cord
2
Connect the
Composite Cables
1
Connect the Coax Cable
Back of TV
STEP 3B: ACTIVATE YOUR MEDIA CLIENT
Turn on your Media Client and your TV. Then, using your FiOS TV Remote, follow the instructions shown on your TV screen.
STEP 4
DIGITAL ADAPTER AND CABLECARD SETUP
STEP 4A: CONNECT YOUR DIGITAL ADAPTER
3
Connect the Power Cord
Back of TV
1
Connect the
Coax Cable
Digital Adapter
2
Connect the Coax Cable
STEP 4B: ACTIVATE YOUR DIGITAL ADAPTER
1. Turn on the Digital Adapter by pressing the Set Top Box button on the FiOS TV Remote Control.
2. Turn on your TV and tune to Channel 3, either manually or with the remote control that came with your TV.
3. To complete activation, call the Verizon Support Center at 1.855.372.2181 and provide the Digital Adapter serial numbers.
INSTALLING YOUR CABLECARD
1. Read through the instructions for your CableCARD-ready device and complete any setup.
2. When the CableCARD is inserted, follow the on-screen instructions.
3. When prompted, enter the activation code on your Verizon Customer Receipt.
4. Select which method of activation you prefer and follow the instructions.
a. Visit verizon.com/fiostv/selfinstall
b. By phone at 1.888.897.7499
CableCARD
(If special ordered)
VISIT activatemyfios.verizon.net to access the Self-Install Wizard
CALL 1.800.VERIZON (1.800.837.4966)
To order extra remotes or cables, visit verizon.com/fiosaccessories
11320451
VMSNCMG0415
©2015 Verizon. All Rights Reserved.
FiOS VMS
NEW MINI SI POST


