Configuring your iOS device to use the UMassD
advertisement
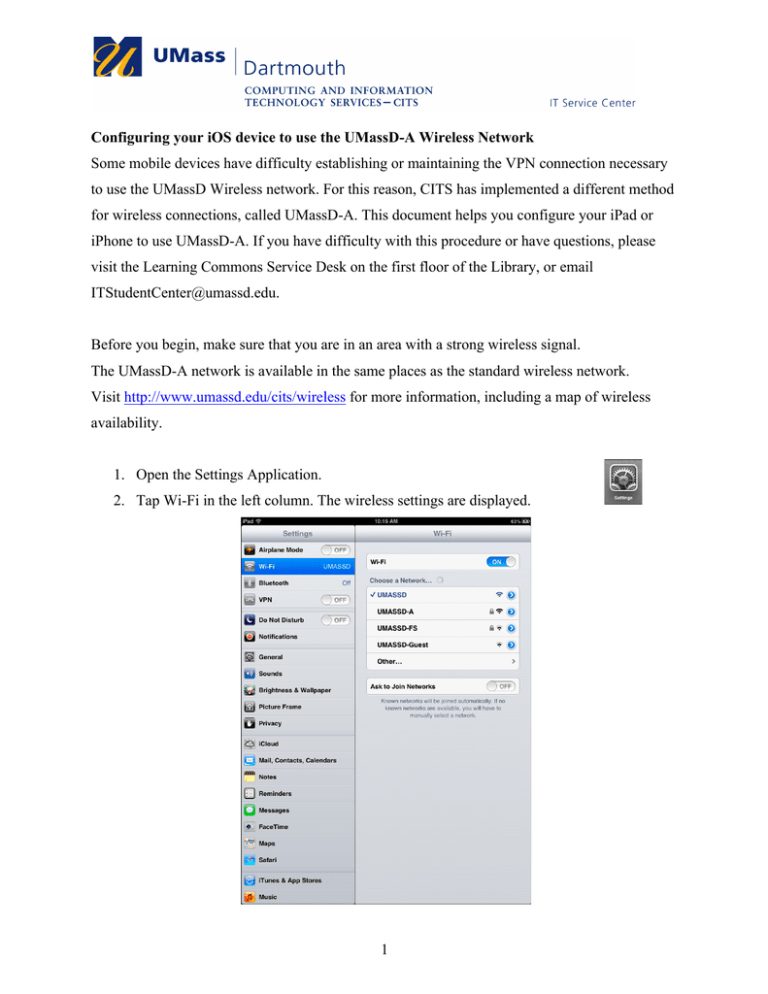
Configuring your iOS device to use the UMassD-A Wireless Network Some mobile devices have difficulty establishing or maintaining the VPN connection necessary to use the UMassD Wireless network. For this reason, CITS has implemented a different method for wireless connections, called UMassD-A. This document helps you configure your iPad or iPhone to use UMassD-A. If you have difficulty with this procedure or have questions, please visit the Learning Commons Service Desk on the first floor of the Library, or email ITStudentCenter@umassd.edu. Before you begin, make sure that you are in an area with a strong wireless signal. The UMassD-A network is available in the same places as the standard wireless network. Visit http://www.umassd.edu/cits/wireless for more information, including a map of wireless availability. 1. Open the Settings Application. 2. Tap Wi-Fi in the left column. The wireless settings are displayed. 1 3. Tap to select UMASSD-A. A password dialog box is displayed. 4. Enter your UMassD Logon Username and Password, then tap the Join button. 2 A Certificate dialog box is displayed. 5. Verify that the server at the top is either nps1.umdar.umassd.edu or nps2.umdar.umassd.edu. If it is not, seek assistance. Students should contact the Learning Commons at ITStudentCenter@umassd.edu for help. Faculty and staff should contact the IT Service Center at ITSCenter@umassd.edu for help. 6. Tap the Accept button. 3 The UMassD-A wireless network is selected, as shown here. Next, you must register your device. 7. Click the Home button to close the Settings application. 8. Tap to open a Web Browser such as Safari or Chrome. 9. Into the Address / Location bar, enter the address: http://netreg.umassd.edu. 4 The DHCP Registration page is displayed. 10. Enter your UMassD Logon information into the fields provided, then tap the Login button. 5 The Responsible / Acceptable Use Policy is displayed. 11. Read through the policy information. 12. At the bottom of the page, click the AGREE AND REGISTER link. 6 The Confirmation screen is displayed. 13. Turn off your device, wait five minutes, then turn it back on. 14. Test the UMassD-A connection by opening a web browser and visiting a few sites. The setup process is complete. Your iOS device will use the UMassD-A network automatically when it is available. If you had previously set your device to automatically connect to the UMassD network, you may wish to remove that from your trusted networks list. To do that: Go to Settings. Tap to select Wi-Fi in the left column. Tap to select the UMASSD-A wireless network Tap the Forget this Network button. Tap the Forget button. 7
