FeatherWing Proto and Doubler
advertisement
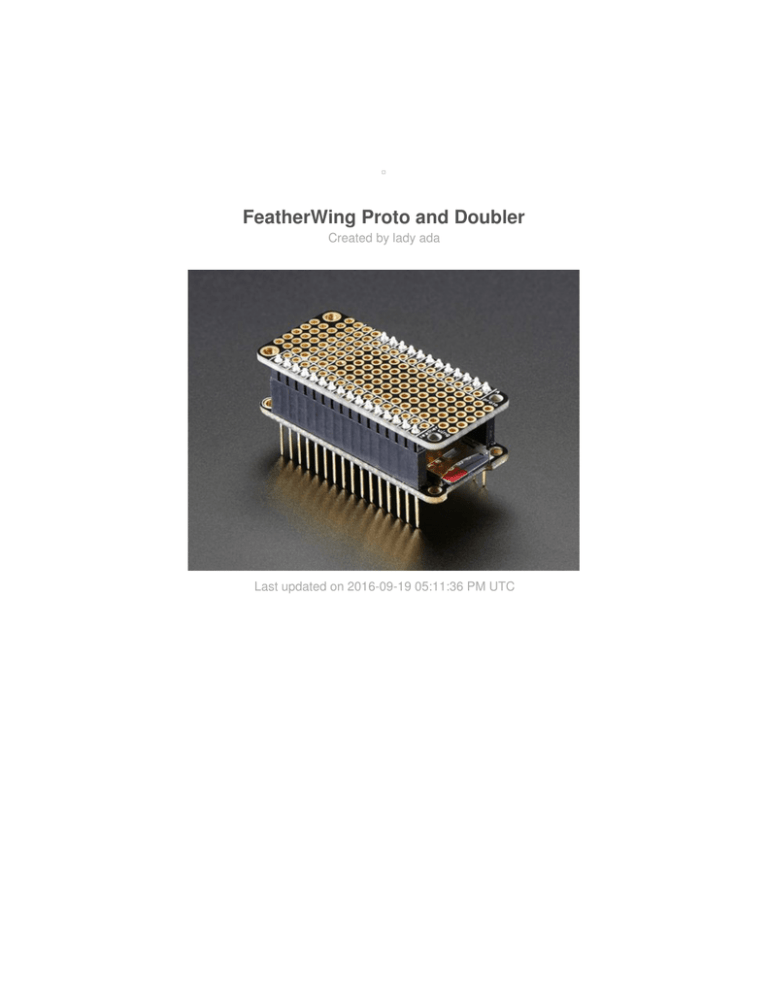
FeatherWing Proto and Doubler Created by lady ada Last updated on 2016-09-19 05:11:36 PM UTC Guide Contents Guide Contents Overview FeatherWing Proto FeatherWing Doubler Proto Pinout Proto Pinout Duplicated IO Pins Power Rails Proto Grid Doubler Pinout Doubler Pinout Duplicated IO Pins Power Rails Proto Grid Assembly Downloads Fabrication prints © Adafruit Industries https://learn.adafruit.com/featherwing-proto-and-doubler 2 3 3 4 6 6 6 7 8 10 10 11 12 14 16 20 20 Page 2 of 22 Overview Once you've got your Feather board up and running you probably want to have some custom circuiry attached. Of course, you can start with a breadboard setup and that will work just fine for prototyping. But, once you know what you want, a proto feather can keep the components compact and secure. We have two options for prototyping, both are "FeatherWings" - add on boards that can be plugged right into any Feather. FeatherWing Proto First is the FeatherWing Proto - a prototyping add-on for all Feather boards. Using our Feather Stacking Headers (http://adafru.it/2830) or Feather Female © Adafruit Industries https://learn.adafruit.com/featherwing-proto-and-doubler Page 3 of 22 Headers (http://adafru.it/2886) you can connect a FeatherWing on top or bottom of your Feather board. This has a duplicate breakout for each pin on a Feather, as well as a bunch of plain grid proto holes. For GND and 3.3V, we give you a strip of connected pads. There's plenty of room for buttons (http://adafru.it/dSh), indicator LEDs (http://adafru.it/dLA), or anything for your portable project. The FeatherWing Proto makes an ideal partner for any of our Feather boards. FeatherWing Doubler If you need even more space, or maybe you want to have two wings plugged in at once, you can double your prototyping space with a FeatherWing Doubler. Using our Feather Stacking Headers (http://adafru.it/2830) or Feather Female Headers (http://adafru.it/2886) you can connect a FeatherWing on top or bottom of your Feather board. This design also has duplicate breakout for each pin on a Feather, as well as a bunch of © Adafruit Industries https://learn.adafruit.com/featherwing-proto-and-doubler Page 4 of 22 plain grid proto holes. For GND and 3.3V, we give you a strip of connected pads. The I/O pins are 'connected through' between the two sides with skinny 10mil thick traces that pass through the 0.1" grid holes so you can plug a Feather into one side and you get a fully connected set of headers on the other side © Adafruit Industries https://learn.adafruit.com/featherwing-proto-and-doubler Page 5 of 22 Proto Pinout Proto Pinout The Proto Featherwing is fairly simple. It's 2.0" x 0.9" so it fits right over a feather. Duplicated IO Pins On the outer edge are all the pins you'd want to solder in to connect to the Feather. The inner set of pins are boxed and have small text or dots to indicate they are connected. The above shows the outer and inner set of pins. They are tied together so you have access to each I/O pin! © Adafruit Industries https://learn.adafruit.com/featherwing-proto-and-doubler Page 6 of 22 Power Rails You also have two strips of holes that are all connected for 3.3V (left strip) and GND (right strip). This way you have plenty of power/ground connections available. The holes are 0.047" diameter and are connected with 24mil traces. © Adafruit Industries https://learn.adafruit.com/featherwing-proto-and-doubler Page 7 of 22 Proto Grid Finally, there's a full set of prototyping grid, each hole is 0.047" diameter © Adafruit Industries https://learn.adafruit.com/featherwing-proto-and-doubler Page 8 of 22 © Adafruit Industries https://learn.adafruit.com/featherwing-proto-and-doubler Page 9 of 22 Doubler Pinout Doubler Pinout The Doubler Featherwing is fairly simple. It's 2.0" x 1.9" - the same as two proto Featherwings side by side with a 0.1" spacing in between (since there's slight variations on PCB routes, you dont want to have no spacing between them or plugged-in-feathers might jam) © Adafruit Industries https://learn.adafruit.com/featherwing-proto-and-doubler Page 10 of 22 Duplicated IO Pins On the outer edges are all the pins you'd want to solder in to connect to the Feather. The inner set of pins are boxed and have small text or dots to indicate they are connected. They are tied together so you have access to each I/O pin! Also, both sets of IO pins are connected together © Adafruit Industries https://learn.adafruit.com/featherwing-proto-and-doubler Page 11 of 22 Power Rails You also have two strips of holes that are all connected for 3.3V (left strip) and GND (right strip). This way you have plenty of power/ground connections available. The holes are 0.047" diameter and are connected with 32mil traces. Note there's a thin strip of proto holes in between the 3V and GND rails © Adafruit Industries https://learn.adafruit.com/featherwing-proto-and-doubler Page 12 of 22 © Adafruit Industries https://learn.adafruit.com/featherwing-proto-and-doubler Page 13 of 22 Proto Grid Finally, there's a full set of prototyping grid, each hole is 0.047" diameter Note there's a thin strip of proto holes in between the 3V and GND rails © Adafruit Industries https://learn.adafruit.com/featherwing-proto-and-doubler Page 14 of 22 © Adafruit Industries https://learn.adafruit.com/featherwing-proto-and-doubler Page 15 of 22 Assembly When putting together your Proto or Doubler Featherwings, think about how you want it to connect, you can use stacking headers: Or plain female socket headers: © Adafruit Industries https://learn.adafruit.com/featherwing-proto-and-doubler Page 16 of 22 The most common method of attachment for the Proto is putting stacking or female headers on the Featherwing and then putting the Proto on top: © Adafruit Industries https://learn.adafruit.com/featherwing-proto-and-doubler Page 17 of 22 But don't forget, you can also put the stacking headers on the Proto wing and stack the Feather on top of it! For the Doubler, you can use it side-by-side © Adafruit Industries https://learn.adafruit.com/featherwing-proto-and-doubler Page 18 of 22 By soldering female or stacking headers onto the doubler, but you could also have mulitple stacking wings. © Adafruit Industries https://learn.adafruit.com/featherwing-proto-and-doubler Page 19 of 22 Downloads Original EagleCAD files can be found here, if you want to make your own custom featherwings, simply remove the prototyping holes you dont need (http://adafru.it/kC0) Fritzing object available in the Adafruit Fritzing Library(http://adafru.it/aP3) Fabrication prints Dimensions in inches © Adafruit Industries https://learn.adafruit.com/featherwing-proto-and-doubler Page 20 of 22 © Adafruit Industries https://learn.adafruit.com/featherwing-proto-and-doubler Page 21 of 22 © Adafruit Industries Last Updated: 2016-09-19 05:11:35 PM UTC Page 22 of 22
