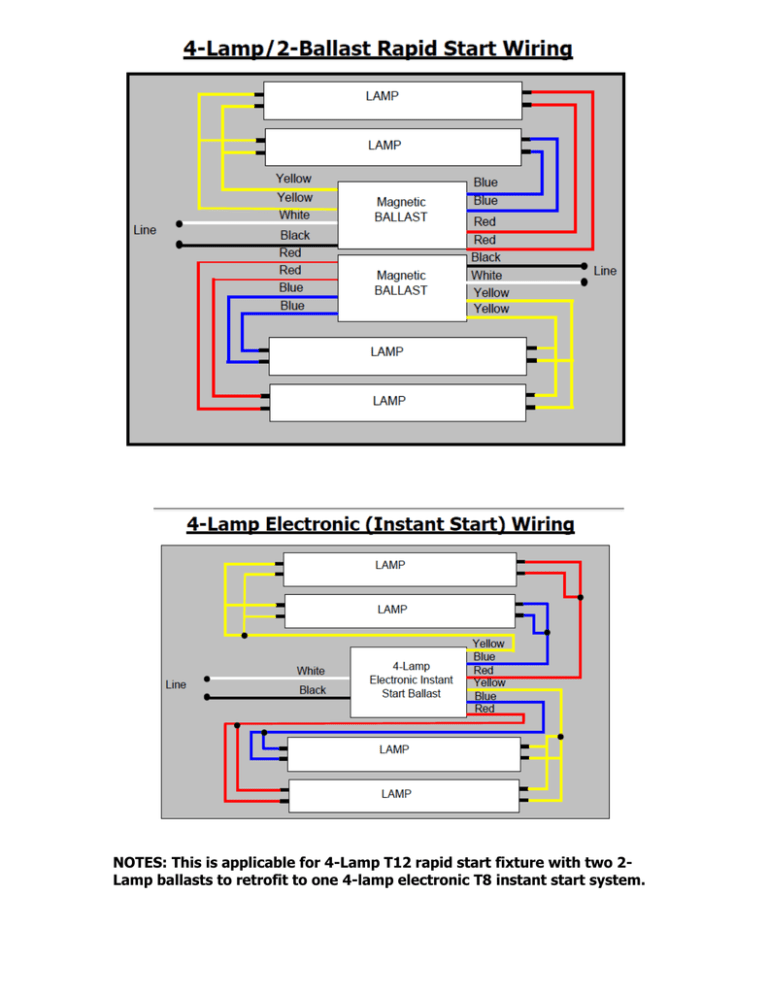
T12 to T8 Fluorescent Fixture Retrofit Wiring Diagram
advertisement

NOTES: This is applicable for 4-Lamp T12 rapid start fixture with two 2Lamp ballasts to retrofit to one 4-lamp electronic T8 instant start system. 1. Turn off power to the fixture 2. Remove lamps and ballast channel cover 3. Clip ALL lead wires about 2” from the magnetic ballast and strip them about ½”. This is necessary to have the appropriate lead length available for installation. 4. Remove the magnetic ballast and replace it with the electronic ballast…if the electronic ballast is considerably smaller than the magnetic ballast, use a self-tapping screwdriver at one end to mount it. 5. Identify the power leads into the fixture and disconnect them from the lamp holder leads. 6. Connect the RED ballast lead to both the RED and BLUE leads from the lamp holders. 7. Connect one of the BLUE ballast leads to both WHITE leads from one of the lamp holders. 8. Connect the other BLUE ballast leads to both BLACK or BROWN leads from the other lamp holder. 9. Confirm that the new wiring matches the appropriate wiring diagram show above. 10. Connect the power wires directly to the input (BLACK & WHITE) leads of the ballast BLACK and WHITE lead wires from the ballast 11. Replace the ballast channel cover and install the lamps. 12. Turn on the power to the fixture. With electronic ballasts, the input voltage leads connect directly to the ballast. This is different than magnetic ballasts where the input voltage leads are connected to the lamps. The difference is due to a fundamental difference in circuit topology. The electronic ballast has many benefits over the magnetic and is well worth the extra effort that it takes to learn how to connect it.


