!
!
!
teel - Wren
Sku
code 60493
VELLA,
stainless
steel -
!
!
!
!
Technical)Specifications!
Installation))Guide!
Wren Sku code 60493
Rowton is all about clean lines, precise
VELLA
VELLA is all about clean lines,
precise
engineering and aesthetic practicality. It looks
lounges, hallways and bedrooms.
engineering and aesthetic practicality.fantastic
It inlooks
With towel hooks specifically designed for it,
antastic in lounges, hallways and bedrooms.
VRowton
ELLA is the perfect complement to
contemporary
interiors with its minimal great
With towel hooks specifically designed for it,
aesthetic. Available in textured black, grey or
V E L L A i s t h e p e r f e c t c o m p l ewhite
m efinishes.
nt to
contemporary interiors with its minimal great
aesthetic. Available in textured black,
grey or
! Maximum
working pressure: 7 bar
!
M
aximum
working temperature: 120˚C
white finishes.
! Test pressure: 15 bar
! Material: Polished stainless steel
Collectors: ø 42 mm
Elements: 30x40 mm
pressure: 7 bar
! Mounting position: Vertical or horizontal
mounted
temperature:wall120˚C
! Working system: Hot water
! Maximum working
! Maximum working
! Test pressure: 15 bar
!
! Material: Polished stainless steel
Collectors: ø 42 mm
VELLA stainless steel– mounting instructions
!
Elements: 30x40 mm
! Mounting position: Vertical or horizontal
wall mounted
! Working system: Hot water
aint– mounting instructions
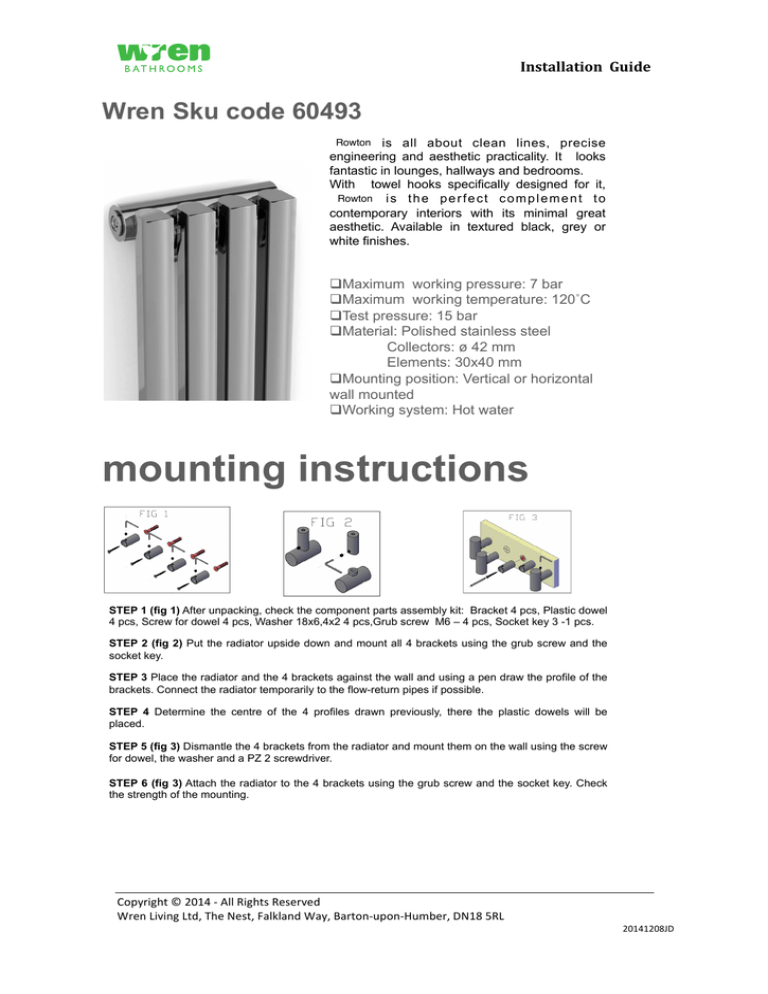
STEP 1 (fig 1) After unpacking, check the component parts assembly kit: Bracket 4 pcs, Plastic dowel
4 pcs, Screw for dowel 4 pcs, Washer 18x6,4x2 4 pcs,Grub screw M6 – 4 pcs, Socket key 3 -1 pcs.
STEP 2 (fig 2) Put the radiator upside down and mount all 4 brackets using the grub screw and the
socket key.
STEP 3 Place the radiator and the 4 brackets against the wall and using a pen draw the profile of the
brackets. Connect the radiator temporarily to the flow-return pipes if possible.
STEP 4 the
Determine
the centre of the
4 profiles
drawn previously,
there
the plastic
dowels will2be
npacking, check
component
parts
assembly
kit:
Right
bracket
placed.
s, Plastic dowel
3 pcs, Screw for dowel 3 pcs.
STEP 5 (fig 3) Dismantle the 4 brackets from the radiator and mount them on the wall using the screw
for dowel, the washer and a PZ 2 screwdriver.
STEP 6 (fig 3)H
Attach
the radiator to
the 4 brackets
usingLthe(radiator
grub screw andlength)
the socket key.
Check
ure the dimensions
(radiator
height)
and
using
the strength of the mounting.
5)
wall where the! radiator will be placed the two dimensions: H -42 and
!
!
!
Copyright!©!2014!0!All!Rights!Reserved!!
Copyright!©!2014!0!All!Rights!Reserved!!
!
(3 holes) and
mount the plastic dowels (fig! 3).
Wren!Living!Ltd,!The!Nest,!Falkland!Way,!Barton0upon0Humber,!DN18!5RL!!
!
all 3
!
brackets!
!
as shown in fig 4 using the screw for dowel.
20141208JD!
20141208JD!
!
!
!
Installation))Guide!
!
Rowton )
•
•
•
•
•
•
•
•
•
•
•
•
these
!
!
Copyright!©!2014!0!All!Rights!Reserved!!
Wren!Living!Ltd,!The!Nest,!Falkland!Way,!Barton0upon0Humber,!DN18!5RL!!
!
!
!
20141208JD!
!
!
!
Installation))Guide!
4
3
MOUNTING SCHEME
2
5
1. BRACKET
2. SCREW
3. PLASTIC DOWEL
4. ALLEN KEY
5. GRUB SCREW
6. WASHER
3
1
2
3
2
4
5
1
1
3
2
4
4
3
5
1
6
2
5
1
!
!
!
Copyright!©!2014!0!All!Rights!Reserved!!
Wren!Living!Ltd,!The!Nest,!Falkland!Way,!Barton0upon0Humber,!DN18!5RL!!
!
!
!
20141208JD!

