Zimmer MotionLoc Screw Surgical Technique Guide
advertisement

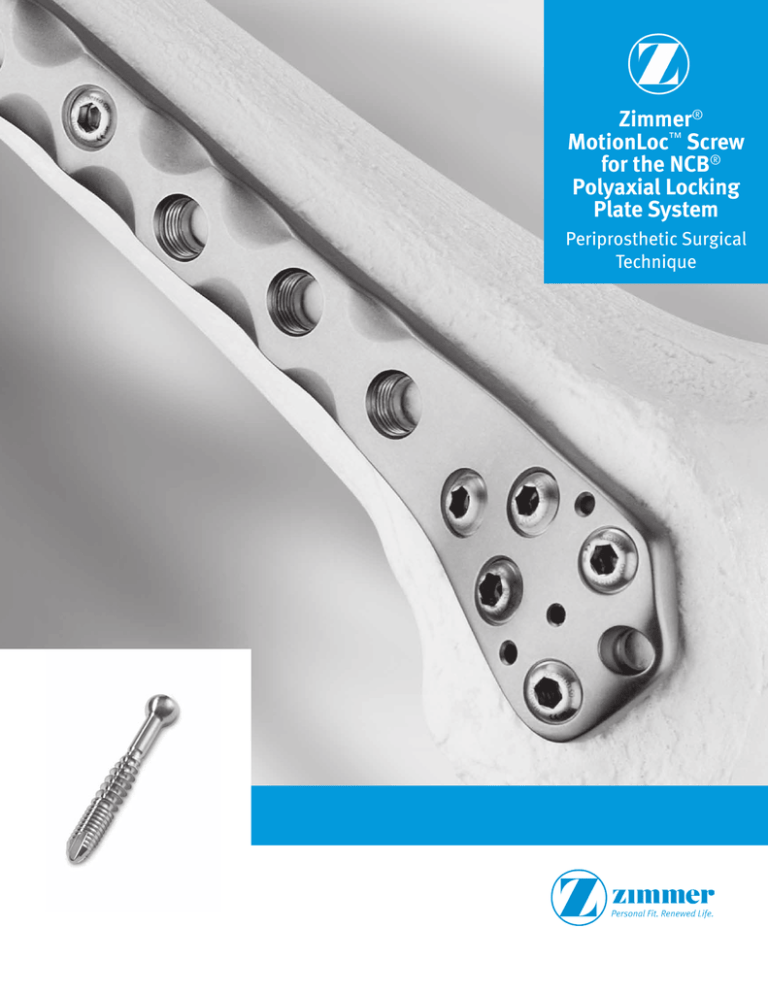
Zimmer® MotionLoc™ Screw for the NCB® Polyaxial Locking Plate System - Periprosthetic Surgical Technique 1 Zimmer® MotionLoc™ Screw for the NCB® Polyaxial Locking Plate System Periprosthetic Surgical Technique Zimmer® MotionLoc™ Screw for the NCB® Polyaxial Locking Plate System - Periprosthetic Surgical Technique Background Three recent studies examining supracondylar femur fractures show concern for the high degree of stiffness of locked plating constructs and report nonunion rates as high as 23%.1,2,3 A plating construct needs to be strong enough to support the damaged bone while the fracture heals, but too much stiffness forces the body to heal through osteonal or primary/direct healing. Primary healing requires nearly-perfect anatomic reduction and rigid compression for absolute stability and has proven to be a very complex and unforgiving procedure.4 In animal studies, Far Cortical Locking Technology provides controlled axial flexibility to promote fracture healing through callus formation, or secondary healing, by stressing the fracture with micromotion at the fracture site.5 The idea of Far Cortical Locking Technology motivated Zimmer to create Zimmer® MotionLoc™ Screws. Zimmer MotionLoc Screw Design MotionLoc Screws look different than most cortical screws. The picture below outlines the different design aspects (Fig. 1) The following pages explain each labeled element of the screw. A. Spherical Head B. Working Length of the Screw D. Cortical Screw Threads C. Reverse Cutting Threads Fig. 1 Citations 1. Boulton C, Chacko A, Appleton P, Rodriguez E: Factors for Increased failure rate of locked plating in the treatment of distal femoral fractures. Poster presented at the 78th Annual Meeting of the American Academy of Orthopaedic Surgeons, February 15-19, 2011, San Diego, CA. 2. Gross J, Serna F, Lybrand K, Qui X, Humphrey C, Gorczyca J: Surgical approach does not affect union of supracondylar femur fractures treated with plate fixation. Poster presented at the 78th Annual Meeting of the American Academy of Orthopaedic Surgeons, February 15-19, 2011, San Diego, CA. 3. Henderson CE, Lujan TJ, Kuhl LL, Bottlang M, Fitzpatrick DC, Marsh JL: Healing complications are common after locked plating for distal femur fractures. Clin Orthop Relat Res 2011;469(6):1757-1765. 4. Skirving AP, Day R, Macdonald W, McLaren R: Carbon fiber reinforced plastic (CFRP) plates versus stainless steel dynamic compression plates in the treatment of fractures of the tibiae in dogs. Clin Orthop Relat Res 1987; 224:117-124. 5. Bottlang M, Feist F: Biomechanics of far cortical locking. J Orthop Trauma 2011;25(suppl 1):S21-S28. 1 2 Zimmer® MotionLoc™ Screw for the NCB® Polyaxial Locking Plate System - Periprosthetic Surgical Technique A. Spherical Head This part of the screw interfaces with the plate. Since the MotionLoc Screw was designed to work with the NCB® and NCB Periprosthetic plating systems, a spherical head is locked to the plate through the use of locking caps that are threaded into the plate holes. This design permits a range of 0° – 15° off-axis, or a 30° cone of polyaxiality (Fig. 2). 15o 30o Fig. 2 This picture shows how much the screws can be angled with the NCB Plating System. B.Working Length of the Screw This is the portion of the MotionLoc Screw that makes it unique. The diameter of this portion has been reduced in comparison to the distal end of the screw. This allows the screw within the drilled hole to flex through elastic deformation without deforming the screw. This is called the working length of the screw because this is the area that essentially does all of the work and flexes a controlled amount to create micromotion at the fracture site (Fig. 3). Near Cortex Locked Plate High Load Far Cortex Fig. 3 This picture shows how the screw flexes as the load is applied. Zimmer® MotionLoc™ Screw for the NCB® Polyaxial Locking Plate System - Periprosthetic Surgical Technique It is important to maximize the working length of the screw, so centering the screw in the bone is key. The figure to the right will show how the screw is affected when placed off-center. (Fig. 4) shows the working length when the MotionLoc Screw is centered in the bone. (Fig. 5) shows how the working length shrinks when the screw is placed off-center. This is the portion of the screw that does all of the work. As the working length increases, so does screw flexibility. Fig. 4 Fig. 5 C. Reverse Cutting Threads The reverse cutting threads on the working length of the screw are necessary for screw removal (Fig. 6). The reverse cutting threads are designed to engage with the near cortex before the threads on the tip of the screw disengage with the far cortex, so the screw can be backed out. This picture shows how the reverse cutting threads engage the near cortex as the cortical threads disengage from the far cortex when the screw is backed out. Fig. 6 3 4 Zimmer® MotionLoc™ Screw for the NCB® Polyaxial Locking Plate System - Periprosthetic Surgical Technique D. Cortical Screw Threads This is what makes the MotionLoc Screw a standard screw with a standard surgical procedure. As this screw advances through the drilled hole, it carves out a flexibility envelope for the reduced shaft portion of the screw. This is also the portion that fixes into the cortical bone for hold. Since MotionLoc Screws are only fixed in the far cortex, radiographs must be inspected to confirm the screw tip has completely engaged that cortex (Fig. 7 and Fig. 8). Screw Length Increased flexibility of the screw is directly proportional to the length of the screw (Fig. 9). Mechanically, MotionLoc Screws behave in a manner similar to a cantilever beam. As the length of the beam/ screw increases so does the beam/ screw flexibility. This makes it very important to keep the MotionLoc Screw completely perpendicular to the bone to maximize the working length of the screw. Reducing Stiffness of Locked Plating Constructs MotionLoc Screws reduce the locked plating construct stiffness by more than 64% while retaining construct strength. This stiffness reduction through the screws creates nearlyparallel micromotion at the fracture site. Due to precise engineering, these screws have been designed to flex 0.4mm reducing the construct stiffness to create the necessary controlled micromotion. Fig. 7 Screw Length Fig. 8 Working Length Cortical Length 46 44 42 This picture shows as the screw length increases, the working length increases, and so does the screw flexibility. Fig. 9 Zimmer® MotionLoc™ Screw for the NCB® Polyaxial Locking Plate System - Periprosthetic Surgical Technique NCB Polyaxial Locking Plate Concept Technique • MotionLoc Screws reduce the stiffness of a locked plating construct. WARNING: The MotionLoc Screws are only intended for use in the diaphyseal side of a fracture where screw purchase in the far cortex opposite the plate can be obtained. Do not use them in the metaphysis or epiphysis of the bone. • MotionLoc Screws reduce construct stiffness by elastic flexion of the MotionLoc Screw shaft within a controlled motion envelope in the near cortex • To enable elastic flexion of the MotionLoc Screws, the plate segment containing the MotionLoc Screws should not be compressed onto the bone surface. WARNING: The MotionLoc Screws should not be used with NCB Plates in a condition where the gap between the plate and the bone is greater than 3mm as this may place undue stress on the screw and cause failure. WARNING: Do not use standard NCB Screws in the same fracture segment as the MotionLoc Screws since this may lead to a stress riser and potential failure. end of the plate (Fig. 10). Fix the epiphyseal and metaphyseal segments of the fracture as described in the surgical techniques for the NCB Distal Femoral, Proximal Tibial, Proximal Humeral, Large Fragment or NCB Periprosthetic Femur plates (Fig. 11). Fig. 10 WARNING: Do not use 4.0mm MotionLoc Screws for femur fractures. 5.0mm MotionLoc Screws must be used. NOTE: To maximize the effectiveness of the MotionLoc Screw, the plate should not be compressed to the bone. Use NCB Spacers in the diaphysis to elevate the plate off the bone surface. NCB Spacers are available in 1mm, 2mm, and 3mm sizes. Two spacers may be inserted into the plate before plate application. Insert the NCB Plate and temporarily fix it to the bone with a 2.0mm K-wire at each Fig. 11 5 6 Zimmer® MotionLoc™ Screw for the NCB® Polyaxial Locking Plate System - Periprosthetic Surgical Technique For NCB Femoral and Tibial Plate Fixation with 5.0mm Screws WARNING: A MINIMUM of three (3) MotionLoc Screws are required to be placed in the shaft of the bone: 1) distal to the fracture in proximal tibial fractures; and 2) proximal to the fracture for distal femur fractures (Fig. 12 and 13). WARNING: Do not use 4.0mm MotionLoc Screws for femur fractures. 5.0mm MotionLoc Screws must be used. To insert the 5.0mm MotionLoc Screws use the 4.3mm Drill Guide. Fully seat the Drill Guide into the plate hole perpendicular to the plate surface, and then tilt it as necessary to achieve the desired screw angle. For maximum stiffness reduction, screws should be placed as perpendicular to the plate as possible. Avoid angling the drill in the axial direction to ensure perpendicular screw placement in the plate (Fig. 14). Screws can be angled in transverse plane Screws should not be angled in frontal plane Fig. 12 Flexible fixation with MotionLoc screws in diaphysis -15 o +15o Bridging without lag screws to allow fracture motion -15 o NOTE: The Drill Guide must remain fully seated in the plate hole to limit the amount of angulation to within the 30° cone allowed by the NCB System (Fig. 15). Drill using the 4.3mm drill bit. If drilling in hard cortical bone, remove the Drill Guide and tap the far cortex with the 5.0mm Tap. Use the NCB Depth Gauge to determine the appropriate screw length (Fig. 16). Be sure the drill has completely cut through the far cortex without damaging soft tissue because MotionLoc Screws should fully engage the far cortex. Select the appropriate MotionLoc Screw from the MotionLoc Screw Caddy. Insert the screw until it is gently seated in the plate hole. WARNING: To prevent screw stripping in poor quality bone, do not over-tighten the screw. +15o Fig. 14 Compression and anatomic reduction of articular fractures Fig. 15 Fig. 13 25 Fig. 16 30 35 40 45 50 Zimmer® MotionLoc™ Screw for the NCB® Polyaxial Locking Plate System - Periprosthetic Surgical Technique NOTE: The plate may be gently lagged to the bone, but do not compress plate to bone. NOTE: If NCB Spacers are not used, and the plate is directly adjacent to the bone, the MotionLoc Screws should be backed out ½ turn to provide a 1mm gap between the plate and the bone (Fig. 17). WARNING: After insertion, the reverse cutting threads (for screw removal) of the MotionLoc Screw should not be engaged in the near cortex as this will reduce the effectiveness of the construct and may cause failure of the screw. Verify using x-ray that the threads of the MotionLoc Screw are not engaged in the near cortex. To lock the screw to the plate, insert a Locking Cap and tighten it using the NCB 6Nm Torque-Limiting Screwdriver until a CLICK is heard from the handle of the Screwdriver. The CLICK indicates that enough torque has been applied to effectively lock the Cap (Fig. 18). Fig. 17 CAUTION: All MotionLoc Screws must be locked into the plate. Repeat this procedure as necessary to insert a MINIMUM of three (3) MotionLoc Screws and Locking Caps into the shaft of the bone (Fig. 19). NCB Spacers may be removed after all screws have been locked with Locking Caps. Fig. 18 Fig. 19 7 8 Zimmer® MotionLoc™ Screw for the NCB® Polyaxial Locking Plate System - Periprosthetic Surgical Technique For NCB Periprosthetic Femur Fixation with 5.0mm Screws WARNING: A MINIMUM of three (3) MotionLoc Screws are required to be placed in the shaft of the bone: 1) Distal to the fracture around a prosthesis in a proximal femur (Fig. 20) and 2) Proximal to the fracture around a prosthesis for a distal femur fracture (Fig. 21). For maximum stiffness reduction, screws should be placed as perpendicular to the plate as possible. Avoid angling the drill in the axial direction to ensure true perpendicular screw placement in the plate (Fig 22). Screws can be angled in transverse plane WARNING: Do not use 4.0mm MotionLoc Screws for femur fractures. 5.0mm MotionLoc Screw must be used. Screws should not be angled in frontal plane -15 o +15o -15 o +15o Fig. 22 NOTE: The Drill Guide must remain fully seated in the plate hole to limit the amount of angulation to within the 30° cone allowed by the NCB Periprosthetic System. Fig. 20 Drill using the 4.3mm drill bit. If drilling in hard cortical bone, remove the Drill Guide and tap the far cortex with the 5.0mm Tap. Use the NCB Depth Gauge to determine the appropriate screw length. MotionLoc Screws should fully engage the far cortex. Select the appropriate MotionLoc Screw from the MotionLoc Screw Caddy. Insert the screw until it is gently seated in the plate hole. Be sure the drill has completely cut Fig. 21 To insert the 5.0mm MotionLoc Screws use the 4.3mm Drill Guide. Fully seat the Drill Guide into the plate hole perpendicular to the plate surface, and then tilt as necessary to achieve the desired screw angle. Fig. 23 through the far cortex without damaging soft tissue because MotionLoc Screws should fully engage the far cortex. WARNING: To prevent screw stripping in poor quality bone, do not over-tighten the screw. NOTE: The plate may be gently lagged to the bone, but do not compress plate to bone. NOTE: If NCB Spacers are not used, and the plate is directly adjacent to the bone, the MotionLoc Screws should be backed out ½ turn to provide a 1mm gap between the plate and the bone (Fig 23). WARNING: After insertion, the reverse cutting threads (for screw removal) of the MotionLoc Screw should not be engaged in the near cortex as this will reduce the effectiveness of the construct and may cause failure of the screw. Verify using x-ray that the threads of the MotionLoc Screw are not engaged in the near cortex. To lock the screw to the plate, insert a Locking Cap and tighten it using the NCB 6Nm TorqueLimiting Screwdriver until a CLICK is heard from the handle of the screwdriver. The CLICK indicates that enough torque has been applied to effectively lock the Cap. CAUTION: All MotionLoc Screws must be locked into the plate. Repeat this procedure as necessary to insert a MINIMUM of three (3) MotionLoc Screws and Locking Caps into the shaft of the bone. NCB Spacers may be removed after all screws have been locked with Locking Caps. Zimmer® MotionLoc™ Screw for the NCB® Polyaxial Locking Plate System - Periprosthetic Surgical Technique For NCB Tibial and Humeral Plate shaft fixation with 4.0mm Screws WARNING: A MINIMUM of three (3) MotionLoc Screws on the diaphyseal side of the fracture are required to be placed in the shaft of the bone distal to the fracture in proximal humerus and proximal tibial fractures (Fig. 24). NOTE: The Drill Guide must remain fully seated in the plate hole to limit the amount of angulation to within the 30° cone allowed by the NCB system. Drill using the 3.3mm drill bit. If drilling in hard cortical bone, remove the Drill Guide and tap the far cortex with the 4.0mm Tap. Use the NCB Depth Gauge to determine the appropriate screw length. MotionLoc Screws should fully engage the far cortex. Be sure the drill has completely cut through the far cortex without damaging soft tissue because MotionLoc Screws should fully engage the far cortex. Select the appropriate MotionLoc Screw from the MotionLoc Screw Caddy. Insert the screw until it is gently seated in the plate hole. NOTE: The plate may be gently lagged to the bone, but do not compress plate to bone. To insert the 4.0mm MotionLoc Screws use the 3.3mm Drill Guide. Fully Seat the Drill Guide into the plate hole perpendicular to the plate surface, and then tilt it as necessary to achieve the desired screw angle. To lock the screw to the plate, insert a Locking Cap and tighten it using the NCB 6Nm Torque-Limiting Screwdriver until a CLICK is heard from the handle of the Screwdriver. The CLICK indicates that enough torque has been applied to effectively lock the Cap. NOTE: If using the NCB Proximal Humeral Plate, the use of the NCB 4Nm Torque Limiting Screwdriver is also acceptable. WARNING: To prevent screw stripping in poor quality bone, do not over-tighten the screw. Fig. 24 WARNING: After insertion, the reverse cutting threads (for screw removal) of the MotionLoc Screw should not be engaged in the near cortex as this will reduce the effectiveness of the construct and may cause failure of the screw. Verify using x-ray that the threads of the MotionLoc Screw are not engaged in the near cortex. NOTE: If NCB Spacers are not used, and the plate is directly adjacent to the bone, the MotionLoc Screws should be backed out ½ turn to provide a 1mm gap between the plate and the bone (Fig. 26). CAUTION: All MotionLoc Screws must be locked into the plate. Repeat this procedure as necessary to insert a MINIMUM of three (3) MotionLoc Screws and Locking Caps into the shaft of the bone. NCB Spacers may be removed after all screws have been locked with Locking Caps. For maximum stiffness reduction, screws should be placed as perpendicular to the plate as possible. Avoid angling the drill in the axial direction to ensure perpendicular screw placement in the plate (Fig. 25). Screws can be angled in transverse plane Screws should not be angled in frontal plane -15 o +15 o Fig. 26 -15 o +15o Fig. 25 9 10 Zimmer® MotionLoc™ Screw for the NCB® Polyaxial Locking Plate System - Periprosthetic Surgical Technique For Fixation Using the NCB Straight Narrow Shaft Plate WARNING: A MINIMUM of three (3) MotionLoc Screws are required to be placed in the shaft of the bone (Fig. 27). NOTE: The Drill Guide must remain fully seated in the plate hole to limit the amount of angulation to within the 30° cone allowed by the NCB System. Drill using the 3.3mm drill bit. If drilling in hard cortical bone, remove the Drill Guide and tap the far cortex with the 4.0mm Tap. Use the NCB Depth Gauge to determine the appropriate screw length. MotionLoc Screws should fully engage the far cortex. Be sure the drill has completely cut through the far cortex without damaging soft tissue because MotionLoc Screws should fully engage the far cortex. Select the appropriate MotionLoc Screw from the MotionLoc Screw Caddy. Insert the screw until it is gently seated in the plate hole. Fig. 27 To insert the 4.0mm MotionLoc Screws use the 3.3mm Drill Guide. Fully seat the Drill Guide into the plate hole perpendicular to the plate surface, and then tilt as necessary to achieve the desired screw angle. WARNING: After insertion, the reverse cutting threads (for screw removal) of the MotionLoc Screw should not be engaged in the near cortex as this will reduce the effectiveness of the construct and may cause failure of the screw. Verify using x-ray that the threads of the MotionLoc Screw are not engaged in the near cortex. To lock the screw to the plate, insert a Locking Cap and tighten it using the NCB 6Nm Torque-Limiting Screwdriver until a CLICK is heard from the handle of the Screwdriver. The CLICK indicates that enough torque has been applied to effectively lock the Cap. NOTE: If using the NCB Straight Narrow Shaft Plate for humerus fractures the use of the NCB 4Nm Torque Limiting Screwdriver is also acceptable. WARNING: To prevent screw stripping in poor quality bone, do not over-tighten the screw. CAUTION: All MotionLoc Screws must be locked into the plate. NOTE: The plate may be gently lagged to the bone, but do not compress plate to bone. Repeat this procedure as necessary to insert a MINIMUM of three (3) MotionLoc Screws and Locking Caps into the shaft of the bone. NOTE: If NCB Spacers are not used, and the plate is directly adjacent to the bone, the MotionLoc Screws should be backed out ½ turn to provide a 1mm gap between the plate and the bone (Fig. 29). NCB Spacers may be removed after all screws have been locked with Locking Caps. For maximum stiffness reduction, screws should be placed as perpendicular to the plate as possible. Avoid angling the drill in the axial direction to ensure perpendicular screw placement in the plate (Fig. 28). Screws can be angled in transverse plane Screws should not be angled in frontal plane -15 o +15 o -15 o +15o Fig. 28 Fig. 29 Zimmer® MotionLoc™ Screw for the NCB® Polyaxial Locking Plate System - Periprosthetic Surgical Technique Implant Removal To remove the NCB Plate, first remove all the Locking Caps. Then loosen all the bone screws without completely removing them (this prevents rotation of the bone plate when removing the last screw). Then completely remove all bone screws. NOTE: Make sure that the tip of the NCB Screwdriver is correctly placed in the hex drive of the Locking Caps and/or MotionLoc Screws. Failure to do so could damage the hex drive and complicate the extraction of the implant. NOTE: In case of difficulties in loosening the MotionLoc Screws, tighten the screws slightly before loosening them. Technical Pearls Minimizing stress in the fixation construct: • Elevation of the plate over the bone surface is defined by the first two locked screws. • Additional screws should be gently seated into plate holes before application of Locking Caps. If an additional screw is not fully seated, application of the Locking Cap may induce stress by forcing the screw into the bone. Conversely, if an additional screw is excessively tightened against an elevated plate, the plate may be bent. 11 This documentation is intended exclusively for physicians and is not intended for laypersons. Information on the products and procedures contained in this document is of a general nature and does not represent and does not constitute medical advice or recommendations. Because this information does not purport to constitute any diagnostic or therapeutic statement with regard to any individual medical case, each patient must be examined and advised individually, and this document does not replace the need for such examination and/or advice in whole or in part. Please refer to the package inserts for important product information, including, but not limited to, indications, contraindications, warnings, precautions, and adverse effects. Contact your Zimmer representative or visit us at www.zimmer.com The CE mark is valid only if it is also printed on the product label. 97-3161-004-00 Printed in USA ©2013 Zimmer, Inc.


