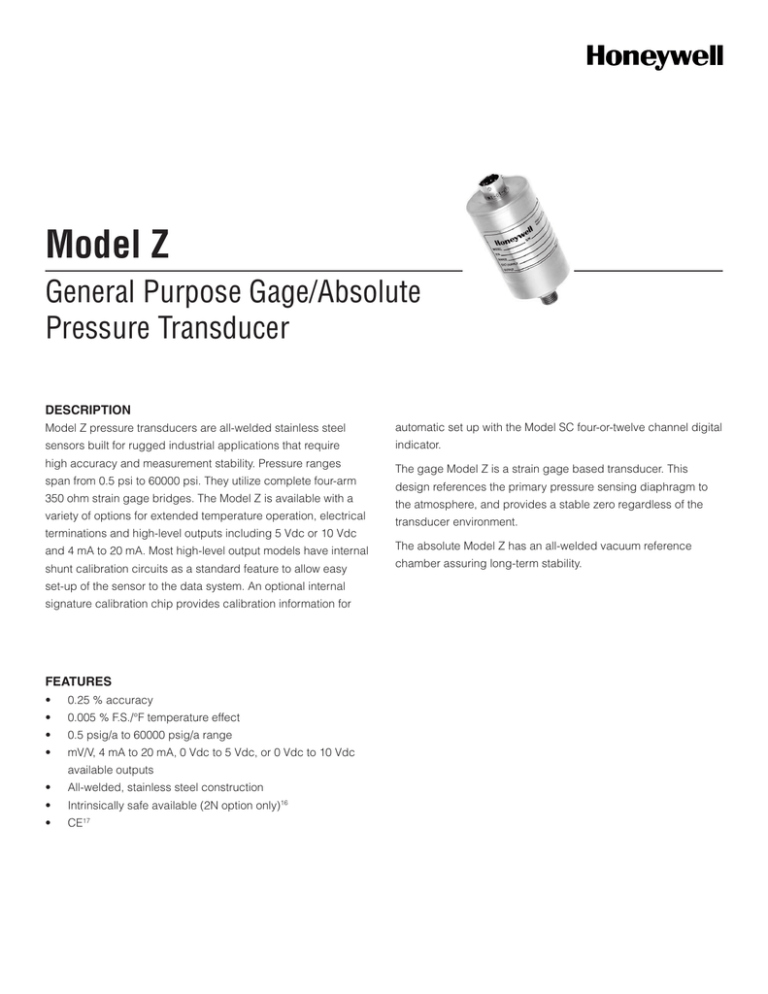
Model Z
General Purpose Gage/Absolute
Pressure Transducer
DESCRIPTION
Model Z pressure transducers are all-welded stainless steel
automatic set up with the Model SC four-or-twelve channel digital
sensors built for rugged industrial applications that require
indicator.
high accuracy and measurement stability. Pressure ranges
span from 0.5 psi to 60000 psi. They utilize complete four-arm
350 ohm strain gage bridges. The Model Z is available with a
variety of options for extended temperature operation, electrical
terminations and high-level outputs including 5 Vdc or 10 Vdc
and 4 mA to 20 mA. Most high-level output models have internal
shunt calibration circuits as a standard feature to allow easy
set-up of the sensor to the data system. An optional internal
signature calibration chip provides calibration information for
FEATURES
•
0.25 % accuracy
•
0.005 % F.S./°F temperature effect
•
0.5 psig/a to 60000 psig/a range
•
mV/V, 4 mA to 20 mA, 0 Vdc to 5 Vdc, or 0 Vdc to 10 Vdc
available outputs
•
All-welded, stainless steel construction
•
Intrinsically safe available (2N option only)16
•
CE17
The gage Model Z is a strain gage based transducer. This
design references the primary pressure sensing diaphragm to
the atmosphere, and provides a stable zero regardless of the
transducer environment.
The absolute Model Z has an all-welded vacuum reference
chamber assuring long-term stability.
Model Z
PERFORMANCE SPECIFICATIONS
Characteristic
Measure
Accuracy
±0.25 % full scale
Linearity
±0.15 % full scale
Hysteresis
±0.10 % full scale
Media
All gases/liquids compatible with wetted
parts
Resolution
Infinite
Calibration
5 point calibration: 0 %, 50 %, and 100
% of full scale
1
Mounting diagram and characteristics
ENVIRONMENTAL SPECIFICATIONS
Characteristic
Measure
Temperature compensated
15 °C to 71 °C [60 °F to 160 °F]
Temperature effect, zero
0.005 % full scale/°F
Temperature effect, span
0.005 % reading/°F
Sealing
Hermetically sealed IP68/NEMA 6P
(AP132)
For reference only
Typical system diagram
ELECTRICAL SPECIFICATIONS
Characteristic
Measure
Strain gage type
Bonded foil
Insulation resistance
5000 mOhm @ 50 Vdc
Bridge resistance
350 ohm
Shunt calibration data
Included
Electrical termination (std)
PTIH-10-6P or equiv. (hermetic stainless)
Mating connector (not incl)
PT06A-10-6S or equiv. (AA111)
MECHANICAL SPECIFICATIONS
Characteristic
Measure
Wetted parts material
< 2000 psig/a
17-4 PH stainless steel
> 2000 psig/a
15-5 PH stainless steel
Weight
10 oz
Case material
304 stainless steel
Marking
Permanent metal name plate MILSTD130F 4.3; Individual sequential
serial number per sensor; Country of
origin and date of manufacture
2 Honeywell • Sensing and Control
Special requirements (consult factory)
Have a special requirement? New case pressure, different cable lengths,
electrical connectors, or materials? Consult our factory by calling +1
614-850-5000 (800-848-6564). Customization is key to our test and
measurement business. Special outputs, wiring codes, and calibrations
are all standard to us.
General Purpose Gage/Absolute Pressure Transducer
RANGE CODES
Pressure range
(psi)
0.5**
1
2
5
10
15
25
50
75
100
150
200
300
500
750
1000 1500
RANGE CODE
AN
AP
AR
AT
AV
BJ
BL
BN
BP
BR
CJ
CL
CP
CR
CT
CV
D mm [in] psia/g
57 [2.25]
38 [1.50]
L mm [in] psia
NA
65 [2.54]
60 [2.35]
L* mm [in] psia
NA
96 [3.79]
91 [3.60]
L mm [in] psig
61 [2.41]
60 [2.35]
54
[2.13]
L* mm [in] psig
93 [3.66]
91 [3.60]
86
[3.38]
Over pressure
(test) (psi)
150 % full scale
150 % full scale
Over pressure
(burst) (psi)
50
100
Port volume
cm3 [in3]
5,2 [0.32]
4,1 [0.25]
Natural
frequency (Hz)
500
500
550
1000
1.3 k
200
400
800
2k
3k
DJ
3.5k
4k
2,8 [0.17]
2.1 k
2.5 k
2.9 k
3.5 k
4.6 k
6k
7k
9k
9.5 k
12 k
17 k
20 k
Pressure range
(psi)
2000
3000
5000
7500
10000
15000
20000
30000
50000
60000
RANGE CODE
DL
DN
DR
DT
DV
EJ
EL
EN
EP
ES
D mm [in] psia
38 [1.50]
38 [1.50]
L mm [in] psia
48 [1.90]
56 [2.21]
L* mm [in] psia
80 [3.15]
89 [3.46]
Over pressure
(test) (psi)
150 % full scale
Consult factory
Over pressure
(burst) (psi)
8k
Port volume
cm3 [in3]
3,1 [0.12]
Natural
frequency (Hz)
35 k
12 k
20 k
25 k
25 k
40 k
45 k
60 k
80 k
80 k
>100 k
>100 k
>100 k
>100 k
1,5 [0.06]
40 k
54 k
60 k
80 k
100 k
* Length of pressure transducer with amplified option (see option codes)
** 0.5 psi is available for gage only
Honeywell • Sensing and Control 3
Model Z
OPTION CODES
Many range/option combinations are available in our quick-ship and fast-track manufacture programs. Please see http://sensing.
honeywell.com/TMsensor-ship for updated listings.
Pressure ranges
15, 25, 50, 100, 200, 500, 1000 psia
0.5, 200, 500, 1000, 5000 psig
1, 2, 5, 10, 15, 25, 50, 75, 100, 150, 300, 750, 1500, 2000, 3000, 7500, 10000, 15000, 20000, 30000, 50000, 60000
psig/a
Temperature
compensation
1a. 60 °F to 160 °F
1b. 30 °F to 130 °F
1c. 0 °F to 185 °F
1d. -20 °F to 130 °F
1e. -20 °F to 200 °F
1f. 70 °F to 250 °F11
1g. 70 °F to 325 °F11
1h. 70 °F to 400 °F11
1i. -65 °F to 250 °F11
Internal amplifiers
2a. 0 Vdc to 5 Vdc (four wire) output10
2c. 0 Vdc to 5 Vdc output10
2j. 4 mA to 20 mA (three wire) output10
2k. 4 mA to 20 mA (two wire) output8, 10, 15
2n. (2N) 4 mA to 20 mA (two wire) intrinsically safe8, 10, 15
2t. 0 Vdc to 10 Vdc output10
2u. Unamp., mV/V output
Internal amplifier
enhancements
3a. Input/output isolation18
3d. Remote buffered shunt calibration
Pressure ports9
5a. 1/4-18 NPT female (5000 psig only)
5b. 1/4-18 NPT male (200, 500 & 1000 psig)
5c. 7/16-UNF female (per MS33649-4)
5d. 7/16-20 UNF male
5g. G 1/4 male
Electrical termination
6a. Bendix PTIH-10-6P (or equiv), 6 pin (max 250 °F)
6b. MS type connector to mate with MS3106-14S 6S
(max 160 °F)13 6e. Integral cable: Teflon (0 °F to 180 °F)
6f. Integral cable: PVC (-20 °F to 160 °F)
6g. Integral cable: Neoprene (0 °F to 180 °F)
6h. Integral cable: Silicone (-65 °F to 300 °F)
6i. Integral underwater cable (max 180 °F)
6j. 1/2-14 conduit fitting with [1.83] 5 ft of four-conductor
PVC cable
6m. DIN 43650
6q. Molded integral cable: Polyurethane (max 180 °F)5
6t. Integral cable with Heyco spring strain relief (5 ft)
Shunt calibration
8a. Precision internal resistor11
Special calibration9
9a. 10 point (5 up/5 down) 20 % increments @ 70 °F (gage)
9b. 20 point (10 up/10 down) 10 % increments @ 70 °F (gage)
Wetted diaphragm9
10a. 316 stainless steel9
10b. Crucible A-286
Bridge resistance9
12a. 1000 ohm (foil) (max 250 °F)
12b. 5000 ohm (foil) (max 400 °F)
Zero and span
adjustment
14a. No access to pots
14b. Top access to pots
Shock and vibration
44a. Shock and vibration resistance
Interfaces
53e. Signature calibration11
53t. TEDS IEEE1451.4 module14
10
4 Honeywell • Sensing and Control
10c. Hastelloy-C
10d. Monel K-500
General Purpose Gage/Absolute Pressure Transducer
iNTERNAL AMPLIFIERS
Vehicle
voltage
output:
Option 2c4
Vehicle
voltage
output: Option
2t4
Current
three-wire:
Option 2j4
Current twowire: Option
2k4
Intrinsically
safe amp:
Option 2N
(2n)
0 Vdc to 5 Vdc
0-5 Vdc or ±5
Vdc @ 5 mA
0-10 Vdc or ±10
Vdc @ 5 mA
4 mA to 20 mA
4 mA to 20 mA
4 mA to 20 mA
10 Vdc
regulated
±15 Vdc or
26-32 Vdc
11 Vdc to 28
Vdc
15 Vdc to 28 Vdc
22 Vdc to 32
Vdc3
9 Vdc to 32
Vdc3
9 Vdc to 28
Vdc3
Input power
(current)
28.5 mA @ 10
Vdc
45 mA
40 mA
40 mA
65 mA
4 mA to 28 mA
4 mA to 24 mA
Freq. resp
(amp)
Natural
frequency
2000 Hz
3000 Hz
3000 Hz
2500 Hz
2500 Hz
2000 Hz
Power supply
rej.
NA
60 db
60 db
60 db
60 db
60 db
60 db
Operating
temp.
-73 °C to 121 °C
[-100 °F to 250 °F]
-28 °C to 85 °C
[-20 °F to 185 °F]
-40 °C to 93 °C
[-40 °F to 200 °F]
-40 °C to 85 °C
[-40 °F to 185 °F]
-40 °C to 85 °C
[-40 °F to 185 °F]
-40 °C to 85 °C
[-40 °F to 185 °F]
-28 °C to 85 °C
[-20 °F to 185 °F]
Reverse
voltage
protection
NA
Yes
Yes
Yes
Yes
Yes
Yes
Short cir.
protection
NA
Momentary
Momentary
Momentary
Yes
Yes
Yes
Wiring code:
connector
(std)5
A (+) Excitation
B (+) Excitation
C (-) Excitation
D (-) Excitation
E (-) Output
F (+) Output
A (+) Supply
B Output com.
C Supply ret.
D (+) Output
E Shunt Cal 1
F Shunt Cal 2
A (+) Supply
B Output com **
C Supply ret **
D (+) Output
E Shunt Cal 1
F Shunt Cal 2
A (+) Supply
B Output com **
C Supply ret **
D (+) Output
E Shunt Cal 1
F Shunt Cal 2
A (+) Supply
B Output com **
C Supply ret **
D (+) Output
E Shunt Cal 1
F Shunt Cal 2
A (+) Supply
B No conn.
C No conn.
D (+) Output
E Case ground
F No conn.
A (+) Supply
B No conn.
C No conn.
D (+) Output
E Case ground
F No conn.
Wiring code:
cable5,6,7
R (+) Excitation
Bl (-) Excitation
G (-) Output
W (+) Output
R (+) Supply
Bl Output com.
G Supply ret.
W (+) Output
B Shunt Cal 1
Br Shunt Cal 2
R (+) Supply
Bl Output com*
G Supply ret.*
W (+) Output
B Shunt Cal 1
Br Shunt Cal 2
R (+) Supply
Bl Output com*
G Supply ret.*
W (+) Output
B Shunt Cal 1
Br Shunt Cal 2
R (+) Supply
Bl Output com*
G Supply ret.*
W (+) Output
B Shunt Cal 1
Br Shunt Cal 2
R (+) Supply
Bl (+) Output
W Case ground
R (+) Supply
Bl (+) Output
W Case
ground
Reference
application
sheet
#008-0356-00
Reference
application
sheet
#008-0357-00
Reference
application sheet
#008-0360-00
Reference
application
sheet
#008-0361-00
Reference
application
sheet
#008-0361-60
See Honeywell
Web site
for info on
intrinsically
safe approvals.
#008-0547-00
Amplifier
mV/V output
specifications standard
Voltage
output:
Option 2a4
Output signal
3 mV/V 2
Input power
(voltage)
For current
information
* Black and green wires are internally connected.
** Pins B and C are internally connected.
Honeywell • Sensing and Control 5
Model Z
NOTES
1.
2.
3.
4.
5.
6.
7.
8.
9.
10.
11.
12.
13.
14.
15.
16.
17.
18.
General Purpose Gage/Absolute Pressure Transducer
Accuracies stated are expected for best fit straight line for all errors
including linearity, hysteresis & non-repeatability thru zero.
Output for 0.5 psig/a, 1 psig/a, 2 psig/a units is 1 mV/V to 2 mV/V.
Input power (voltage) for internal amplifier options 2j, 2k, 2n(2N)
depends on load resistance.
CE mark requires options 6a & 3d.
Interconnecting shunt cal. 1 with shunt cal. 2 terminal provides 50
% (unamplified units), 75% (4 mA to 20 mA three-wire units), or
80 % (voltage amp. units) of full scale output for quick calibration. Shunt calibration comes standard with internal amplifier options 2a,
2b, 2c, 2t and 2j.
G=Green; B=Blue; W=White; Bl=Black; Br=Brown; Y=Yellow;
R=Red; O=Orange. Color specifying cable and number or letter
specifying connector.
No mating connector necessary with cable option.
Options 2k, 2n(2N) only available with option 12b.
Availability varies according to range.
Not available with temperatures below -29 °C [-20 °F] or above 85
°C [185 °F].
Cannot be used with amplified option.
Gage pressure units greater than 200 psi are sealed at atmospheric
pressure.
No pot access available with MS type connector.
Consult factory for TEDS availability with amplified models.
5000 ohm bridge required.
Range dependent; consult factory. Termination dependent; consult
factory.
Internal amp and termination dependent; consult factory.
Input/output isolation only available with voltage output (2A, 2B, or
2C amplifiers).
Warranty. Honeywell warrants goods of its manufacture as
being free of defective materials and faulty workmanship.
Honeywell’s standard product warranty applies unless agreed
to otherwise by Honeywell in writing; please refer to your
order acknowledgement or consult your local sales office for
specific warranty details. If warranted goods are returned to
Honeywell during the period of coverage, Honeywell will repair
or replace, at its option, without charge those items it finds
defective. The foregoing is buyer’s sole remedy and is in lieu
of all warranties, expressed or implied, including those of
merchantability and fitness for a particular purpose. In no
event shall Honeywell be liable for consequential, special, or
indirect damages.
While we provide application assistance personally, through our
literature and the Honeywell web site, it is up to the customer to
determine the suitability of the product in the application.
Specifications may change without notice. The information we
supply is believed to be accurate and reliable as of this printing.
However, we assume no responsibility for its use.
For more information about Sensing and Control products, visit
www.honeywell.com/sensing or call +1-815-235-6847
Email inquiries to info.sc@honeywell.com
WARNING
PERSONAL INJURY
•DO NOT USE these products as safety or emergency
stop devices or in any other application where failure of
the product could result in personal injury.
Failure to comply with these instructions could result in
death or serious injury.
WARNING
MISUSE OF DOCUMENTATION
•The information presented in this catalogue is for
reference only. DO NOT USE this document as product
installation information.
•Complete installation, operation and maintenance
information is provided in the instructions supplied with
each product.
Failure to comply with these instructions could result in
death or serious injury.
Sensing and Control
Automation and Control Solutions
Honeywell
1985 Douglas Drive North
Golden Valley, MN 55422 USA
+1-815-235-6847
www.honeywell.com/sensing
008607-1-EN IL50 GLO May 2008
Copyright © 2008 Honeywell International Inc. All rights reserved.


