Tech Bulletin - Clip Spring Type Sizing Procedure.indd
advertisement

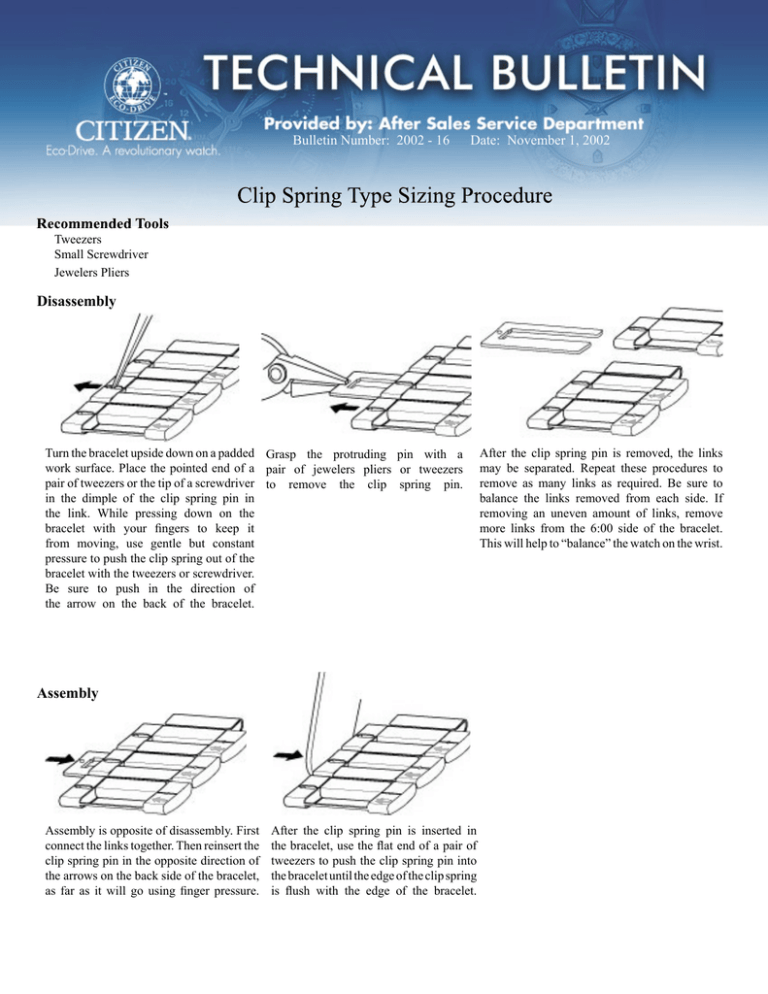
Bulletin Number: 2002 - 16 Date: November 1, 2002 Clip Spring Type Sizing Procedure Recommended Tools Tweezers Small Screwdriver Jewelers Pliers Disassembly Turn the bracelet upside down on a padded Grasp the protruding pin with a work surface. Place the pointed end of a pair of jewelers pliers or tweezers pair of tweezers or the tip of a screwdriver to remove the clip spring pin. in the dimple of the clip spring pin in the link. While pressing down on the bracelet with your fingers to keep it from moving, use gentle but constant pressure to push the clip spring out of the bracelet with the tweezers or screwdriver. Be sure to push in the direction of the arrow on the back of the bracelet. Assembly Assembly is opposite of disassembly. First connect the links together. Then reinsert the clip spring pin in the opposite direction of the arrows on the back side of the bracelet, as far as it will go using finger pressure. After the clip spring pin is inserted in the bracelet, use the flat end of a pair of tweezers to push the clip spring pin into the bracelet until the edge of the clip spring is flush with the edge of the bracelet. After the clip spring pin is removed, the links may be separated. Repeat these procedures to remove as many links as required. Be sure to balance the links removed from each side. If removing an uneven amount of links, remove more links from the 6:00 side of the bracelet. This will help to “balance” the watch on the wrist.

