Welding Drawings
advertisement

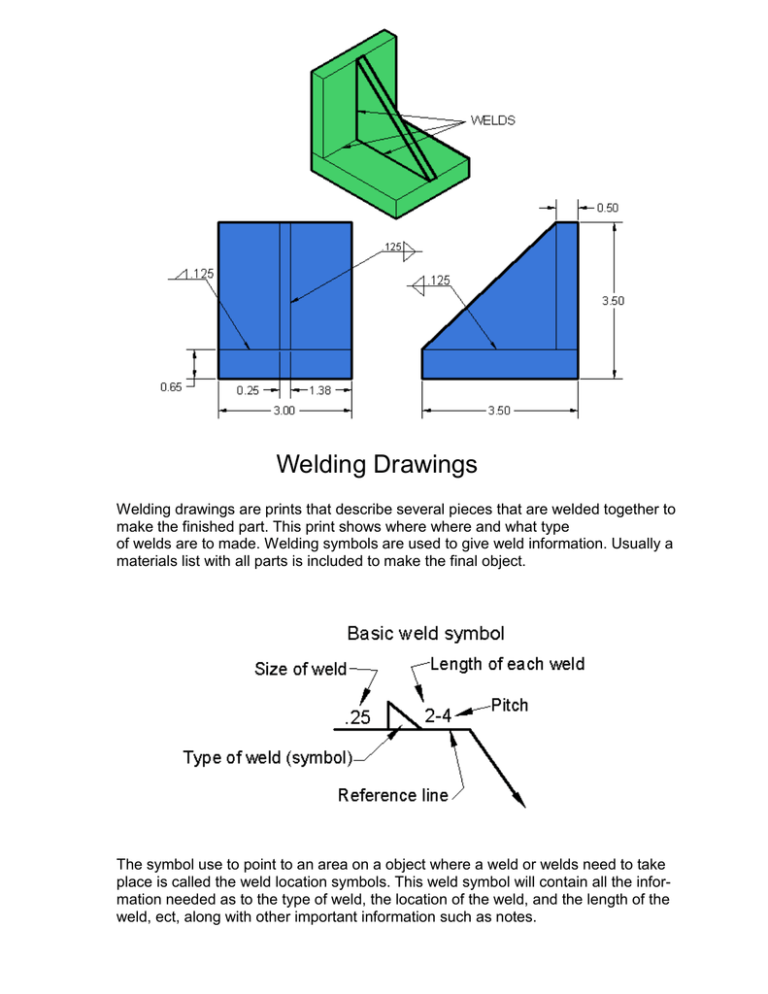
Welding Drawings Welding drawings are prints that describe several pieces that are welded together to make the finished part. This print shows where where and what type of welds are to made. Welding symbols are used to give weld information. Usually a materials list with all parts is included to make the final object. The symbol use to point to an area on a object where a weld or welds need to take place is called the weld location symbols. This weld symbol will contain all the information needed as to the type of weld, the location of the weld, and the length of the weld, ect, along with other important information such as notes. Graphic welding symbols refer to the shape of the and configuration of the weld. The graphic weld symbol resembling the shape of the weld is used on. The graphic weld symbol is normally attached to the reference line of the basic weld symbol. The shape of the finished surface of a weld is shown directly under the finish method symbol. A flat (flush) surface is indicated by a straight line. A rounded surface (concave) by a curved line. A depressed surface (convex) is shown by a curved line also. After the weld has been made, there may be a finishing process required. Some of the more common finishing processes are shown above. Above are examples of typical welding joints. At each joint a weld would take place. Here you are shown a sample weld drawing of a bracket with included weld symbols. Here you are shown a sample weld drawing of a holding ring complete with dimension and weld symbols


