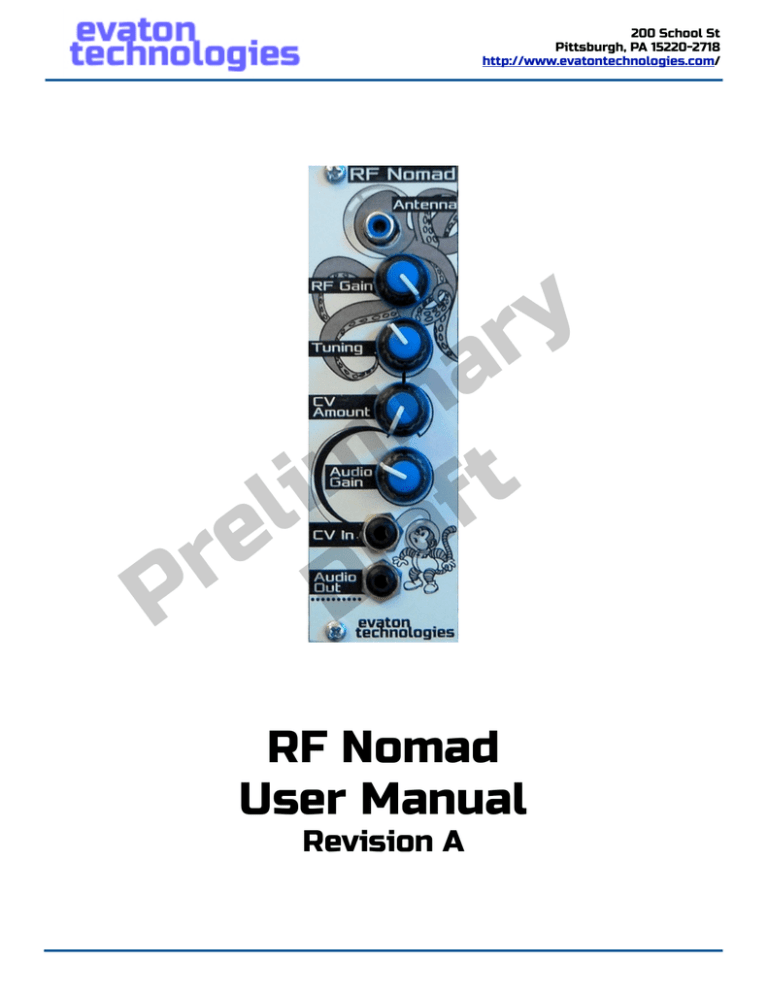
RF Nomad User Manual
advertisement

200 School St Pittsburgh, PA 15220-2718 http://www.evatontechnologies.com/ y r a in m t i f l a e r r P D RF Nomad User Manual Revision A RF Nomad User’s Manual Rev. A Table of Contents Introduction 3 Specifications 3 Precautions 3 y r a in m t i f l a e r r P D Installation 3 Signal Flow 4 Operation 5 Knob Description 5 Alternative Antennas 5 Patch Ideas 6 Heterodyne sweeps:! 6 RF Nomad as percussion:! 6 FM tones:! 6 Sequencer:! 6 As modulation source:! 6 Warranty Information 6 Acknowledgements 7 Page 2 http://www.evatontechnologies.com RF Nomad User’s Manual Rev. A Introduction Thanks for purchasing the RF Nomad Eurorack synthesizer module from Evaton Technologies! The RF Nomad module allows you to use radio frequency noise and signal sources as new sonic territory for exploration as audio sources for your modular synthesizer. The module is a direct-conversion radio receiver, which tunes to frequencies from approximately 13.4 to 14.0 MHz and decodes the audio as single sideband. Various RF noise generators, such as computers, appliances, etc., as well as shortwave broadcasts and ham radio stations, can be decoded and used as useful and interesting sound sources. The RF Nomad’s tuning can be varied under voltage control, allowing LFOs, envelopes, and even audio sources to modulate the tuning parameter in real time. In short, the RF Nomad puts those classic squelchy, squealy, hissy sounds of a shortwave radio into your modular! y r a in m t i f l a e r r P D Specifications • Width: 8 HP • Height: 3U • Depth: 42mm • Power: +12V @ 10.0 mA, -12V @ 10.0 mA • CV Input: +/- 10VDC • Audio Output: +/- 5VDC pk-pk • RF Tuning Range: 13.4 to 14.0 MHz (approx) • Format: Euro modular Precautions The RF Nomad is a radio receiver, and as such, employs an antenna input. Do not place the antenna near power lines or exposed wires. If an external antenna is used, be sure to safeguard against static discharge and lightning strikes. Also, be cautioned against placing the antenna near extremely powerful radio frequency sources (such as transmitters, microwave ovens, etc.). Evaton Technologies is not responsible for damage caused by failure to heed the precautions in this section. Installation Install the RF Nomad by first powering-down your modular synthesizer. Connect the supplied ribbon cable to the 16-pin dual-row header connector on the RF Nomad. Note that the red stripe on the cable faces the bottom of the module, and the board is marked “Stripe” next to the pin where the stripe should go. Be careful not to install the cable backwards, or off by one position, as this can cause damage to the RF Nomad or your synthesizer. Page 3 http://www.evatontechnologies.com RF Nomad User’s Manual Rev. A Connect the other end of the ribbon cable to your synthesizer’s power bus. The red stripe on the ribbon cable should face the -12VDC (negative) end of the power connector on the bus, typically also marked “Stripe”. Once you are certain the power cable is connected properly (Check twice!), install the module into your rack with the included screws. Note that, because the RF Nomad is a radio receiver, it may pick up electrical noise emanating from inside your synthesizer. Changing the location of the module within your rack may alleviate this issue (or, accentuate it, if that is what you are going for!) Attach the included antenna to the jack marked Antenna on the front of the RF Nomad. Connect a patch cable to the jack marked Audio Out to listen to the output of the RF Nomad. Optionally, connect a patch cable to the CV Input jack, and connect this to a source of control voltage. y r a in m t i f l a e r r P D Signal Flow The RF Nomad consists of a voltage-controlled direct-conversion sideband radio receiver with adjustable input RF gain, whose tuning is controlled via the Tuning knob. The tuning is then further affected by the incoming control voltage on the CV Input jack. The amount that the CV Input affects the tuning is controlled by the CV Amount knob. The level of the audio output is controlled by the Audio Gain knob. The decoded audio signal is then available on the Audio Out jack. Antenna SSB Decoder Audio Output CV Input RF Gain Tuning CV Amount Audio Gain CV Input is a bipolar control voltage signal, whose range is +/- 10VDC. When nothing is plugged into CV Input, 0V is applied to the tuning offset, i.e. the tuning is controlled strictly by the Tuning knob. Page 4 http://www.evatontechnologies.com RF Nomad User’s Manual Rev. A Operation Operation of the RF Nomad is fairly straightforward -- plug in the antenna, and slowly turn up the RF Gain knob and Audio Gain knob until you hear something, and tune around with the Tuning knob. The RF Nomad does not incorporate an AGC (automatic gain control) circuit, so it may be necessary to adjust RF Gain and Audio Gain according to the strength of the signal you are detecting. If no shortwave stations are strong enough, try placing the antenna near another piece of electrical equipment (such as a computer, video game, another radio, etc.), to listen to the internal “sounds” of the equipment! y r a in m t i f l a e r r P D By applying a control voltage signal to the CV Input jack and adjusting the CV Amount, it is possible to “automate” twisting of the tuning knob. In areas where there are strong shortwave broadcasts available, it’s possible to tune in those stations with the RF Nomad. Because the RF Nomad is a sideband receiver, tuning slightly off the center frequency of those stations will cause the audio to be frequency-shifted, somewhat like a ring modulator effect, or “duck talk”. Have fun exploring this interesting mode! If no RF signal is present, the RF Nomad can also be used as a sort of noise generator. Just turn up the RF Gain and Audio Gain knobs until noise is heard on the output! Knob Description The RF Gain knob is used to attenuate the incoming RF signal prior to the RF decoder. Turn it clockwise if the incoming signal is weak. Turn it counterclockwise if the incoming signal is overloading the RF input. The Tuning knob sets the base tuning of the module. It works just like the tuning knob on a radio. The CV Amount knob controls the amount by which the CV Input affects the base tuning. Turn clockwise to allow the CV Input to affect tuning more. The Audio Gain knob sets the gain of the output amplifier, after the radio decoder circuit. It is possible to go into overdrive (distortion) with this knob, which may be a desirable effect. Alternative Antennas If desired, an alternate (i.e. more sensitive) antenna can be connected to the Antenna input of the RF Nomad. This can be as simple as a very long insulated wire (several feet) soldered to the center conductor of a standard RCA jack. If an outdoor antenna is used, be certain to disconnect when not in use, and Page 5 http://www.evatontechnologies.com RF Nomad User’s Manual Rev. A especially during electrical storms. Evaton Technologies is not responsible for damages caused by electrostatic discharge or lightning strikes. Patch Ideas Heterodyne sweeps: Simply patch an LFO into the CV input on the RF Nomad, and slowly sweep the tuning via CV, to hear lots of heterodyne noises. y r a in m t i f l a e r r P D RF Nomad as percussion: Tune the RF Nomad between stations, so you hear static. Use this as a noise source for a percussion patch. For example, patch Audio Out to the input of a VCA. Then, patch an AR envelope generator to the CV input on the VCA. Now, when you strike the envelope generator, you hear a snare / cymbal sound from the output of the VCA. FM tones: Patch an audio rate LFO into a VCA. Control the VCA’s CV input with an envelope generator. Patch the output of the envelope generator to the CV Input on the RF Nomad. Tune the RF Nomad near a station. Now, as the envelope operates, get crazy FM tones from the RF Nomad. Sequencer: Use a sequencer to control tuning in steps. As modulation source: Patch the Audio Out of the RF Nomad into the CV Input of another module (filter, VCO, etc). Use the Audio Gain knob to adjust the level of control voltage being output. Warranty Information Every Evaton Technologies module is covered by a 1 year limited warranty. The product is warranted against defects in construction and materials during this period. Damage caused by incorrect power supply connection, incorrect power supply voltages, lightning discharge, or other causes determined by Evaton Technologies to be the result of abuse or improper application are not covered. Evaton Technologies assumes no liability for consequential damages cause by the use of this product. Page 6 http://www.evatontechnologies.com RF Nomad User’s Manual Rev. A During the warranty period, contact Evaton Technologies prior to returning equipment for repair. Repairs will be made at no cost, although shipping to Evaton Technologies will be the owner’s responsibility. Repairs required after the warranty period will be charged at the usual shop rate. Please contact russ@evatontechnologies.com with any questions, concerns, or comments... Acknowledgements Evaton Technologies would like to thank Rhonda Libbey1 for her excellent panel artwork, and Shawn Cleary2 for his feedback on the initial prototypes. We would also like to thank Hector, the space monkey, and his pals, for joining us on this trip through audio space. y r a in m t i f l a e r r P D 1 http://www.rhondalibbey.com/ 2 http://www.analoguehaven.com/ Page 7 http://www.evatontechnologies.com


