preparation basic installation wall installation ceiling
advertisement

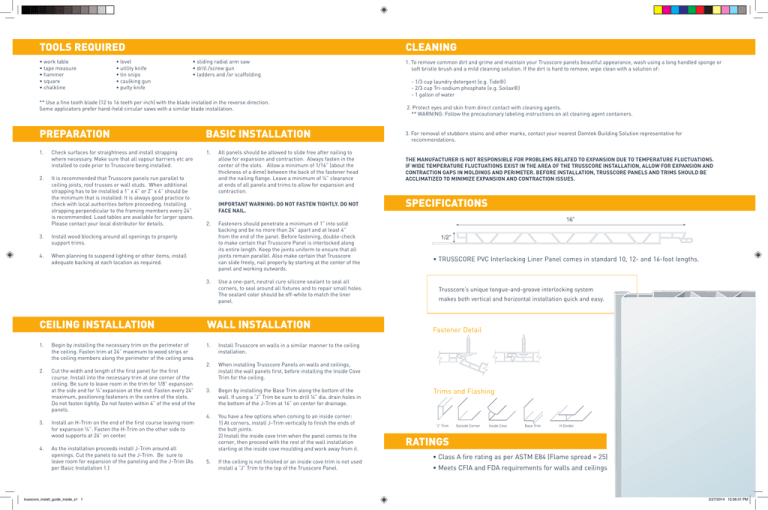
TOOLS REQUIRED • work table • tape measure • hammer • square • chalkline • level • utility knife • tin snips • caulking gun • putty knife CLEANING • sliding radial arm saw • drill /screw gun • ladders and /or scaffolding - 1/3 cup laundry detergent (e.g. Tide®) - 2/3 cup Tri-sodium phosphate (e.g. Soilax®) - 1 gallon of water ** Use a fine tooth blade (12 to 16 teeth per inch) with the blade installed in the reverse direction. Some applicators prefer hand-held circular saws with a similar blade installation. PREPARATION BASIC INSTALLATION 1. 1. 2. Check surfaces for straightness and install strapping where necessary. Make sure that all vapour barriers etc are installed to code prior to Trusscore being installed. It is recommended that Trusscore panels run parallel to ceiling joists, roof trusses or wall studs. When additional strapping has to be installed a 1” x 4” or 2” x 4” should be the minimum that is installed. It is always good practice to check with local authorities before proceeding. Installing strapping perpendicular to the framing members every 24” is recommended. Load tables are available for larger spans. Please contact your local distributor for details. 3. Install wood blocking around all openings to properly support trims. 4. When planning to suspend lighting or other items, install adequate backing at each location as required. All panels should be allowed to slide free after nailing to allow for expansion and contraction. Always fasten in the center of the slots. Allow a minimum of 1/16” (about the thickness of a dime) between the back of the fastener head and the nailing flange. Leave a minimum of ¼” clearance at ends of all panels and trims to allow for expansion and contraction. IMPORTANT WARNING: DO NOT FASTEN TIGHTLY. DO NOT FACE NAIL. 2. 3. Fasteners should penetrate a minimum of 1” into solid backing and be no more than 24” apart and at least 4” from the end of the panel. Before fastening, double-check to make certain that Trusscore Panel is interlocked along its entire length. Keep the joints uniform to ensure that all joints remain parallel. Also make certain that Trusscore can slide freely, nail properly by starting at the center of the panel and working outwards. Use a one-part, neutral cure silicone sealant to seal all corners, to seal around all fixtures and to repair small holes. The sealant color should be off-white to match the liner panel. CEILING INSTALLATION WALL INSTALLATION 1. Begin by installing the necessary trim on the perimeter of the ceiling. Fasten trim at 24” maximum to wood strips or the ceiling members along the perimeter of the ceiling area. 1. Install Trusscore on walls in a similar manner to the ceiling installation. 2. 2. Cut the width and length of the first panel for the first course. Install into the necessary trim at one corner of the ceiling. Be sure to leave room in the trim for 1/8” expansion at the side and for ¼”expansion at the end. Fasten every 24” maximum, positioning fasteners in the centre of the slots. Do not fasten tightly. Do not fasten within 4” of the end of the panels. When installing Trusscore Panels on walls and ceilings, install the wall panels first, before installing the Inside Cove Trim for the ceiling. 3. Begin by installing the Base Trim along the bottom of the wall. If using a “J” Trim be sure to drill ¼” dia. drain holes in the bottom of the J-Trim at 16” on center for drainage. 4. You have a few options when coming to an inside corner: 1) At corners, install J-Trim vertically to finish the ends of the butt joints. 2) Install the inside cove trim when the panel comes to the corner, then proceed with the rest of the wall installation starting at the inside cove moulding and work away from it. 3. Install an H-Trim on the end of the first course leaving room for expansion ¼”. Fasten the H-Trim on the other side to wood supports at 24” on center. 4. As the installation proceeds install J-Trim around all openings. Cut the panels to suit the J-Trim. Be sure to leave room for expansion of the paneling and the J-Trim (As per Basic Installation 1.) trusscore_install_guide_inside_s1 1 1. To remove common dirt and grime and maintain your Trusscore panels beautiful appearance, wash using a long handled sponge or soft bristle brush and a mild cleaning solution. If the dirt is hard to remove, wipe clean with a solution of: 5. If the ceiling is not finished or an inside cove trim is not used install a “J” Trim to the top of the Trusscore Panel. 2. Protect eyes and skin from direct contact with cleaning agents. ** WARNING: Follow the precautionary labeling instructions on all cleaning agent containers. 3. For removal of stubborn stains and other marks, contact your nearest Domtek Building Solution representative for recommendations. THE MANUFACTURER IS NOT RESPONSIBLE FOR PROBLEMS RELATED TO EXPANSION DUE TO TEMPERATURE FLUCTUATIONS. IF WIDE TEMPERATURE FLUCTUATIONS EXIST IN THE AREA OF THE TRUSSCORE INSTALLATION, ALLOW FOR EXPANSION AND CONTRACTION GAPS IN MOLDINGS AND PERIMETER. BEFORE INSTALLATION, TRUSSCORE PANELS AND TRIMS SHOULD BE ACCLIMATIZED TO MINIMIZE EXPANSION AND CONTRACTION ISSUES. SPECIFICATIONS • TRUSSCORE PVC Interlocking Liner Panel comes in standard 10, 12- and 16-foot lengths. Trusscore’s unique tongue-and-groove interlocking system makes both vertical and horizontal installation quick and easy. Fastener Detail Trims and Flashing “J” Trim Outside Corner Inside Cove Base Trim H Divider RATINGS • Class A fire rating as per ASTM E84 (Flame spread = 25) • Meets CFIA and FDA requirements for walls and ceilings 2/27/2014 12:06:01 PM


